Choosing Roller Width for Narrow Corridors vs Open Rooms
Choosing Roller Width for Narrow Corridors vs Open Rooms becomes much easier when we match the roller cover and frame to the wall geometry, coating type, access conditions, and required finish. I recommend a five-stage process: measure the usable wall width, select the roller diameter and nap, confirm frame compatibility, test the setup on a small area, and then standardize the tool for the project. For narrow corridors, a 4-inch to 7-inch roller usually provides better control and fewer wall strikes; for open rooms, a 9-inch to 18-inch roller improves productivity and reduces lap marks. G.SB supports this decision with precision-manufactured roller frames, dimensional control to 0.01 mm on critical components, 100% inspection options, and a 24-hour response target for product and specification questions.
Start With the Working Width, Not the Room Name
A “narrow corridor” and an “open room” are useful descriptions, but they do not provide enough information for accurate tool selection. The real measurement is the clear working width around the painter.
Before selecting a roller, I check:
- Wall width and height
- Distance between the wall and the opposite wall
- Door frames, trim, radiators, cabinets, and handrails
- Ceiling height and extension-pole access
- Paint viscosity and coating build
- Desired finish quality
- Number of square metres to be coated
- Whether the project is residential, commercial, or industrial
A corridor may be 1.2 metres wide but contain multiple door recesses. In that situation, a 9-inch roller may technically fit but still create poor control. Conversely, a large room with built-in furniture may require a smaller roller around obstacles even when the main wall could accept an 18-inch tool.
A practical width-selection formula
Use the following clearance rule:
Recommended roller width = minimum clear wall width minus 100 to 150 mm
This allowance helps prevent contact with adjacent walls, trim, and fixtures. It also leaves space for a controlled stroke and reduces accidental paint transfer.
For example:
| Working condition | Recommended roller width | Typical application |
|---|---|---|
| Very narrow corridor or stairwell | 4–7 in / 100–180 mm | Tight walls, corners, door recesses |
| Standard bedroom or office | 9 in / 230 mm | General interior walls and ceilings |
| Large open room | 12–14 in / 300–355 mm | High-output wall coating |
| Warehouse or expansive commercial wall | 18 in / 450 mm | Large uninterrupted surfaces |
| Detail work around frames and cabinets | 2–4 in / 50–100 mm | Edges, reveals, and small sections |
I do not select the widest possible roller simply to increase coverage. Excessive width can reduce control, overload the cover, and increase splatter, especially with high-solids acrylic or waterborne architectural coatings.
Match Roller Width to Corridor Geometry
Why narrow corridors need control
In a corridor, the painter often works close to both walls. A wide roller can strike the opposite surface, door casing, baseboard, or handrail during the return stroke. It may also make it difficult to maintain a consistent wet edge.
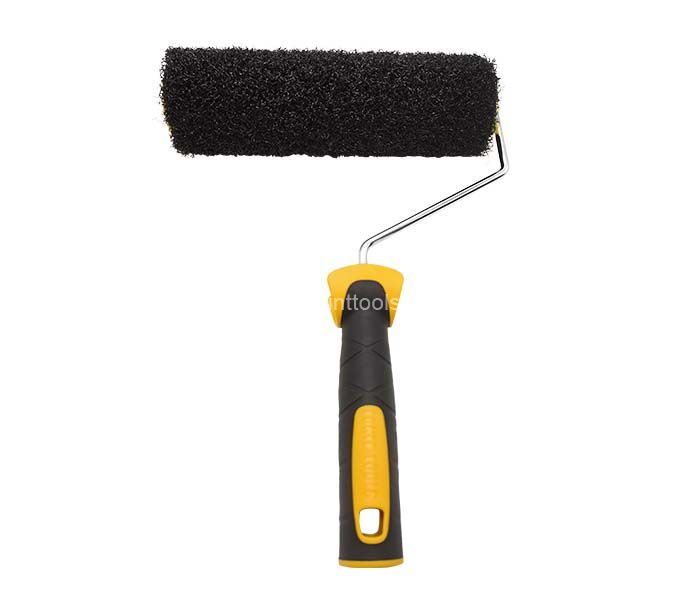
For most corridors, I begin with a 4-inch, 6-inch, or 7-inch roller. A 7-inch roller is productive on a relatively open corridor, while a 4-inch roller is more suitable for tight passages and segmented wall areas.
The frame should have:
- A compact cage design
- Smooth bearing rotation
- A corrosion-resistant wire
- A comfortable ergonomic handle
- A threaded end compatible with an extension pole
- A secure connection between the frame and roller cover
A high-quality frame should rotate without binding or excessive radial play. Even a small amount of wobble becomes visible when the roller is used on a long, straight corridor.
Choose the nap for the substrate
Roller width controls coverage area, but nap length controls paint pickup and surface texture.
| Surface condition | Suggested nap | Reason |
|---|---|---|
| Smooth plaster, drywall, or previously painted wall | 3/16–1/4 in | Minimizes stipple |
| Lightly textured interior wall | 3/8 in | Balances coverage and finish |
| Medium texture or masonry | 1/2 in | Reaches surface irregularities |
| Heavy texture or blockwork | 3/4 in or longer | Improves coating penetration |
For a narrow corridor with a smooth wall, a 4-inch or 7-inch frame paired with a 3/16-inch to 1/4-inch nap often provides the cleanest result. On textured masonry, reducing roller width alone will not solve poor coverage; the cover must also have enough nap to reach the profile.
Control the wet edge
Narrow spaces often encourage short, disconnected strokes. That approach can create flashing and lap marks. I recommend working in manageable vertical sections, loading the roller consistently, and maintaining an overlap of approximately 25% to 50% between adjacent passes.
The correct sequence is:
- Cut in the edges with a brush or small trim roller.
- Load the roller evenly without saturating the cage.
- Apply the coating in a controlled “W” or vertical pattern.
- Finish with light, parallel passes.
- Move to the next section while the previous edge remains workable.
A compact roller frame from a reliable paint roller frame manufacturer helps maintain consistent pressure in these restricted movements.
Increase Productivity in Open Rooms
When a wider roller is the better choice
Open rooms benefit from wider rollers because the painter can cover more square metres per pass. A 9-inch roller is the standard choice for many residential and commercial interiors. A 12-inch, 14-inch, or 18-inch roller may be more efficient on large uninterrupted walls and ceilings.
I typically consider a wider roller when:
- The clear wall run exceeds 2 metres
- There are few windows, doors, or built-in obstructions
- The coating has a suitable open time
- The painter can maintain a stable wet edge
- The ceiling height allows safe extension-pole use
- The roller can be loaded without excessive weight
A wider roller is not always faster. If it becomes too heavy after loading, the painter may apply uneven pressure, causing thin areas, edge marks, and premature fatigue.
Balance width, diameter, and weight
Most architectural rollers use a standard frame diameter near 1.5 inches, although specialty systems vary. A larger diameter may reduce rolling resistance and improve paint release, while a smaller diameter can offer greater control.
For open rooms, I evaluate:
- Roller width for coverage
- Core diameter for rolling efficiency
- Cover density for paint release
- Frame wire strength
- Handle grip and balance
- Extension-pole compatibility
- Total loaded weight
For ceilings, the weight of the wet roller is particularly important. A 12-inch roller may be more comfortable than an 18-inch roller when the coating is heavy or the work is performed overhead.
Use a two-size system for mixed layouts
Many projects contain both open walls and restricted sections. Rather than forcing one roller to do everything, I recommend a two-size system:
- Primary roller: 9–14 inches for open walls
- Secondary roller: 4–7 inches for corridors, recesses, and around fixtures
- Detail tool: 2–4 inches for trim, corners, and narrow strips
This approach reduces rework and produces a more uniform finish. G.SB can help distributors and contractors configure matching frame families so the handle ergonomics and replacement-cover fit remain consistent across sizes.
Select the Correct Frame Construction
The roller cover receives and distributes the coating, but the frame controls rotation, pressure, and alignment. This is why the choice of paint roller frame manufacturer matters as much as the cover brand.
Important frame specifications
When I evaluate a frame, I look for:
- Wire diameter: sufficient stiffness without unnecessary weight
- Cage configuration: usually four-wire or five-wire support for stability
- Bearing or end-cap performance: smooth rotation with low drag
- Handle material: impact resistance and solvent compatibility
- Thread specification: secure connection to a pole
- Surface treatment: zinc plating, nickel plating, or another corrosion-resistant finish
- Dimensional consistency: important for cover fit and rotation balance
G.SB roller frames can be specified with dimensional tolerances down to 0.01 mm for selected components, depending on the product design and inspection plan. For export orders, I recommend confirming the actual tolerance requirements on the technical drawing rather than assuming every dimension uses the same precision level.
Verify quality with measurable controls
A professional paint roller frame manufacturer should be able to explain how the product is controlled, not only describe it as “high quality.” Useful verification points include:
- Incoming raw-material inspection
- First-article approval
- In-process dimensional checks
- 100% visual inspection for critical appearance defects
- Rotation and assembly checks
- Coating thickness or plating verification
- Carton and barcode inspection
- Batch traceability
For metal surface treatments, buyers may request salt-spray evaluation based on ASTM B117 or ISO 9227, depending on the application and contract. For painted or coated components, adhesion can be assessed using ASTM D3359, while quality-management systems may be managed under ISO 9001. These standards should be treated as documented test requirements, not automatic proof that every product has passed them.
A dependable paint roller frame manufacturer will provide inspection records, sample approval procedures, and corrective-action support when required.
Use a Step-by-Step Selection Workflow
Stage one: Measure the space
Record the narrowest clear distance, not the average room dimension. Measure around:
- Door openings
- Wall returns
- Radiators
- Electrical cabinets
- Stair rails
- Fixed shelving
- Ceiling obstructions
If the narrowest practical section is 240 mm, a 230 mm roller may leave insufficient clearance. Choose a smaller size or use a detail roller for that section.
Stage two: Identify the substrate and coating
Determine whether the surface is:
- Smooth drywall
- Lightly textured plaster
- Concrete
- Masonry
- Previously coated metal
- Wood or composite board
Then review the coating’s technical data sheet for recommended nap, thinning, recoat time, and application temperature. A thick elastomeric coating may require a deeper nap and a stronger frame than a low-viscosity interior emulsion.
Stage three: Select the cover and frame together
The roller cover’s core must fit the frame cage correctly. Excessive clearance can cause wobble, while an overly tight fit can increase drag and make replacement difficult.
I check:
- Core inside diameter
- Cover outside diameter
- Frame cage length
- End-cap position
- Cover retention
- Compatibility with the intended paint chemistry
This is one area where working with paint roller handle manufacturers can simplify procurement. A matched frame and cover system reduces compatibility problems during high-volume painting.
Stage four: Test before full production
Apply the selected tool to a test area of at least 1 square metre. Examine the surface under the actual lighting conditions.
Check for:
- Stipple or orange peel
- Lap marks
- Uneven film thickness
- Excessive splatter
- Paint starvation
- Edge lines
- Frame wobble
- Operator fatigue
For critical projects, measure wet-film thickness with a wet-film comb and compare the result with the coating manufacturer’s specification.
Stage five: Standardize the work method
Once the setup is approved, document:
- Roller width
- Nap length
- Frame model
- Paint dilution
- Loading method
- Stroke direction
- Recoat interval
- Cleaning or replacement procedure
Standardization is particularly valuable for contractors managing several painters or multiple sites. It makes the finish more repeatable and simplifies replacement ordering.
Learn From Practical Project Examples
Narrow hotel corridor
A hotel renovation team initially used 9-inch rollers in corridors approximately 1.1 metres wide. The roller technically fit, but the frame frequently contacted door casings. The painters also had difficulty maintaining a wet edge around room entrances.
The team changed to 6-inch frames with 1/4-inch nap covers and used 9-inch rollers only on wider wall sections. After the change:
- Door-frame contact was eliminated
- Edge touch-ups were reduced
- Painter control improved around wall returns
- The corridor finish became more uniform
The improvement came from matching tool geometry to the workspace rather than simply using a smaller roller everywhere.
Open office refurbishment
For an open office with long, uninterrupted walls, a contractor used 18-inch rollers. Coverage was fast, but two painters reported fatigue and inconsistent pressure near the end of each wall.
The contractor tested 14-inch rollers with extension poles and retained 4-inch tools for corners and service penetrations. The revised system offered a better balance between productivity and control. The team also reduced lap marks by assigning one painter to load and another to maintain the finishing passes on large walls.
Residential room with mixed obstacles
A homeowner used a 12-inch roller in a living room containing bookcases, windows, and multiple recesses. The broad roller covered the main wall effectively but produced frequent paint contact on trim.
The better solution was not a single “perfect” size. A 9-inch frame handled the main surfaces, a 4-inch frame handled the recesses, and a brush was reserved for final cutting-in. This mixed-tool approach reduced cleanup and produced sharper boundaries.
Manage Common Problems During Application
The roller hits the opposite wall
Cause: The roller is too wide for the actual clearance or the painter is using an uncontrolled stroke.
Solution:
- Move to a 4-inch or 6-inch roller
- Use shorter vertical sections
- Keep the frame perpendicular to the wall
- Avoid overextending the arm
- Protect adjacent surfaces with masking film
The finish shows lap marks
Cause: The coating is drying before adjacent sections are blended, or the roller is overloaded and then run dry.
Solution:
- Work in smaller sections
- Maintain a wet edge
- Reduce direct airflow from fans or HVAC
- Use the coating’s specified open time
- Finish with light, consistent passes
The roller leaves lines at the edges
Cause: Uneven cover loading, worn cover fibers, or a bent frame cage.
Solution:
- Distribute paint evenly across the cover
- Replace contaminated or compressed covers
- Check cage alignment on a flat surface
- Select a frame from a paint roller frame manufacturer with controlled assembly procedures
The frame rotates unevenly
Cause: End-cap friction, paint buildup, poor cage concentricity, or a damaged bearing.
Solution:
- Clean the frame according to the coating type
- Check the cover core for deformation
- Replace bent frames
- Confirm cage runout during incoming inspection
- Request a rotation test from the supplier for larger orders
The tool feels too heavy
Cause: Excessive roller width, high coating pickup, or an unsuitable handle and pole combination.
Solution:
- Reduce width from 18 inches to 14 or 12 inches
- Use a lighter cover with the required nap
- Drain excess paint before lifting
- Select an ergonomic handle with a balanced grip
- Rotate tasks between operators on large ceilings
Prepare a Buyer’s Inspection Checklist
When sourcing from paint roller handle manufacturers or a paint roller frame manufacturer, I recommend requesting the following information before approving an order:
- Product drawing with key dimensions
- Wire material and diameter
- Cage length and core compatibility
- Handle resin specification
- Surface-treatment description
- Salt-spray or corrosion-test method, if required
- Sampling plan and acceptance criteria
- 100% inspection scope
- Packaging and carton-drop requirements
- Sample lead time and production lead time
- Replacement-cover compatibility
- Technical response time
For custom G.SB programs, buyers can define tolerances to 0.01 mm on selected features, request pre-production samples, and establish a 24-hour response target for technical questions. The exact inspection plan should be documented in the purchase specification.
Useful tools for the job
The following resources make roller-width selection more reliable:
- Steel tape measure or laser distance meter
- Wet-film thickness comb
- Surface-profile gauge for textured walls
- Product technical data sheet
- Frame and cover compatibility chart
- Extension-pole length guide
- Inspection checklist
- Sample approval form
- Smartphone camera for recording test-area results
A simple project worksheet can include wall width, substrate, coating type, nap, frame size, test result, and final approval. This record helps prevent inconsistent tool selection on repeat projects.
Make the Final Decision With G.SB
For narrow corridors, choose control first: a 4-inch to 7-inch roller, compact cage, suitable nap, and stable handle. For open rooms, prioritize productivity without sacrificing balance: a 9-inch to 18-inch roller selected according to wall length, coating weight, ceiling height, and operator strength.
The most reliable process is to measure the tightest area, match the nap to the substrate, verify frame and cover compatibility, test the finish, and document the approved setup. By working with experienced paint roller handle manufacturers and a technically capable paint roller frame manufacturer, contractors and distributors can reduce rework and improve product consistency.
G.SB combines application-focused roller-frame design with measurable production controls, including precision checks to 0.01 mm on specified components, 100% inspection options, standards-based testing plans, and a 24-hour response target. The result is a more practical path to selecting the right roller width for every corridor, room, ceiling, and commercial surface.
Key Points to Remember
- Use the narrowest working clearance to determine roller width.
- Select 4–7-inch rollers for most narrow corridors.
- Use 9–18-inch rollers for open rooms when the wall is uninterrupted.
- Match nap length to the substrate texture and coating specification.
- Use a two-size or three-size system for spaces with mixed layouts.
- Inspect frame rotation, cage alignment, wire strength, and surface treatment.
- Request documented controls such as ISO 9001 management, ASTM B117, ISO 9227, or ASTM D3359 testing when relevant.
- Test a minimum 1-square-metre area before full application.
- Work with a qualified paint roller frame manufacturer for consistent dimensions and replacement compatibility.
- Use G.SB technical support, precision inspection, and documented specifications to standardize the final tool selection.
 Previous: None