Exactly How to Avoid Paint Roller Strokes?
As a Paint Roller Factory, share with you.
Just How to Repaint Skimmed Walls?
The Most Effective Ways to Paint Roller
How to Repaint Uneven Sloping Walls of a Room?
Painting a wall surface making use of rollers is much quicker than utilizing paintbrushes, but rollers posture their very own collection of difficulties. Each stroke of the roller transfers less repaint to the wall surface than the last, which can leave noticeable roller strokes on the wall surfaces when you have actually ended up. Bumps and ridges of thicker paint from the edge of the roller can mar the surface, as well as wet paint applied over completely dry paint leaves sticking around roller marks. Invest in good-quality products and make use of the exact same strategy experts do to prevent all these risks and achieve a smooth, flawless coating.
Put the paint right into a 5-gallon container. Dip a paintbrush into the paint, and repaint the edges of the walls where they meet the ceiling, trim and other walls. It's challenging to accessibility these edge areas with the roller, so cover minority inches nearest the corners with a paintbrush instead.
Fit a bucket screen into the bucket. Move the roller sleeve over the roller, as well as dip the nap of one side of the roller into the paint. Roll it versus the screen, then dip the following side right into the paint. Continue such as this up until you have saturated the snooze with paint, which should take five to seven complete rotations.
Paint a long, smooth stroke up the wall, beginning concerning 1 foot from the flooring and also about 6 inches from the corner. Angle the stroke slightly so it isn't perfectly upright, and also quit a couple of inches prior to you reach the ceiling. The strip of paint on the wall surface need to be thick as well as hefty. This is called laying on the paint.
Roll the paint on the wall right into the vacant location in between it as well as the corner. Usage much shorter, quicker strokes. This is called spreading out the paint. Replenish the roller with paint. This need to only take 2 turnings currently because the much deeper nap is still full from earlier. Lay on the paint 6 inches from the painted location, and also spread the paint to fill up the room in between them. Repeat this up until you have covered an area of the wall regarding 4 feet broad.

Stainless Steel Trowel
Smooth the painted area by running the roller over it gently in long, upright strokes. Cover the entire painted area by doing this, getting rid of any ridges as well as roller marks. This is recalled rolling.
Repeat the procedure of laying, spreading and also back rolling the paint in 4-foot areas till you have actually covered the entire wall surface. Work swiftly, so the edge of the paint is still wet when you begin repainting the area beside it. Maintaining a damp edge like this is crucial to finishing with a smooth paint work. Our company also Stainless Steel Trowel for sale, welcome to consult us.
Painting the interior or exterior of your home is one of the best ways to give it a facelift. Once you’ve prepared the painting surfaces, and you’ve chosen your paint it’s important that your roller painting techniques don’t leave marks. Knowing how to avoid roller marks will ensure your painting project looks like a professional’s done it.
How to Avoid Roller Marks when Painting Walls
Using a paint roller is an effective way to apply paint but knowing how to avoid roller marks is all about using the right painting techniques.
How to avoid roller marks - Example of a freshly painted feature wall
Step 1: When you roll paint onto a wall, it should be done in a sweeping stroke.
Step 2: Start a few centimetres from the bottom of the wall and a couple of centimetres from the corner.
Step 3: Using a slight angle and light pressure, roll up and down back towards the corner to spread the paint.
Step 4: Reload the roller and continue rolling.
Step 5: At this stage you may see roller marks, but don’t worry. Once you’ve painted the entire wall, you’ll back roll over the area to smooth and blend the paint.
Step 6: When back rolling, don’t reload the paint roller and use a very light pressure.
How to Avoid Roller Marks when Painting Ceilings?
How to avoid roller marks - Example of roller marks in paint?
When painting ceilings with a roller, use Haymes Paint flat sheen ceiling paint. Using paint with a high sheen on your ceiling will show imperfections, including roller marks. To avoid making marks on the ceiling with your roller, reduce the amount of paint you use.
If you notice roller marks appearing, re-roll the areas to smooth them out using very light pressure. Another method to avoid roller marks is to add another coat of paint in the opposite direction for the second coat of paint.
How to Avoid Roller Marks when Painting Furniture
Before you paint furniture with a roller, it’s important to take the time to prepare the piece of furniture. If you want a smooth finish, make sure you smooth out any flaws. If you would like a distressed finish, you can skip sanding it. When applying paint to the furniture, rolling in one direction will ensure the paint is evenly distributed. The paint roller should feel like it’s gliding across the furniture surface with minimal pressure applied.

Simple ways to Avoid Paint Roller Strokes
A fresh coat of paint is a great way to start a home improvement project. However, there are some things that you can do to prevent roller marks on your walls.
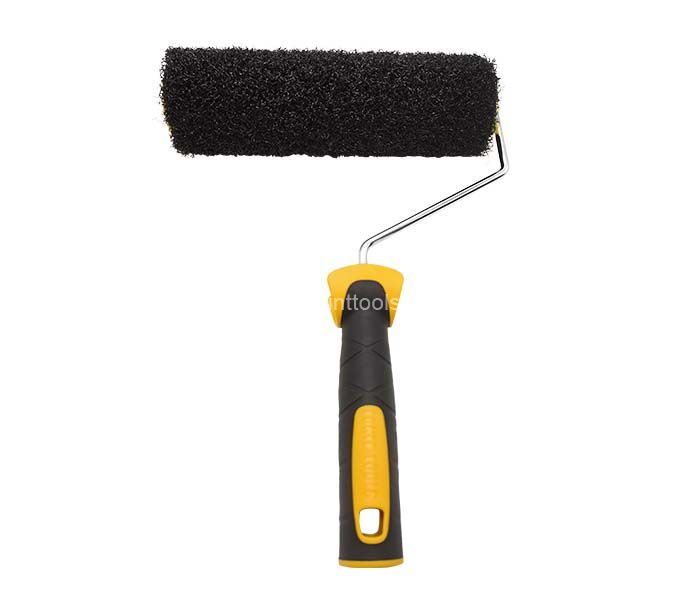
Cheap roller covers can lead to streaking and paint marks. When you’re picking out your supplies, go for a 0.25 in (0.64 cm) synthetic, short-napped roller cover for your walls and ceiling. This roller cover doesn’t have any obvious seams, so it will apply your paint smoothly on every surface. So that, longer-nap roller covers are better for textured walls.
We are going to avoid splatters and spots in your paint from dust and lint. Use a vacuum or a piece of painter’s tape to clean your roller off before you use it. Even if our roller is the new one,but it still might have a little bit of dust or dirt on it, so give it a quick wipedown before you start. When if you’re using an old roller, make sure it doesn’t have any dried paint on it that could cause lumps or bumps in your paint job.
Remembe, too much paint can splatter and cause harsh lines. Pour your paint into a paint tray and dip your roller into the paint. Roll the roller back onto the grooves of the paint tray to squeeze out any excess before you put it on the wall. On the flip side, too little paint can leave your paint job streaky and thin. Try to strike the balance in between too much and too little.
Coat massive areas of the wall effortlessly barring a ton of streaks. Move your curler up and down at a diagonal to go throughout your complete wall. Be certain to comply with up with new paint earlier than your ultimate coat dries to stop streaking.Professional painters can paint up and down in straight lines, however it’s a little bit more difficult to do. If you’re a beginner, attempt a W or N sample to start.
Pressing super hard can push the paint into the wall. Instead, press the roller against the wall with moderate pressure; if the paint starts to streak or create lines, you’re probably pushing too hard.This is a little bit objective, and it might take some practice before you find the right pressure point for your paint job.
Every time you roll paint on the wall, overlap it on the wet paint. This will help ensure that your edges don’t look so defined. It doesn’t have to be a huge overlap—about 1 in (2.5 cm) will do just fine.This is the easiest and best way to make sure you don’t get any streaks in your dried paint.
Avoid harsh paint traces on the pinnacle and backside of your wall. Try to drag your curler as shut to the ceiling and flooring as you perchance can besides spreading paint everywhere. It will assist combination the traces in between your two paint jobs and make your partitions appear seamless. And you can paint round the ground and ceiling first to make your paint job easier, or you can shop it till the end.
Please don’t be tempted to pause in the middle and let the paint dry. Once you’ve started on a wall, it’s important to go over the entire thing to avoid roller marks. Stopping and starting in the middle of a paint job can lead to uneven drying which creates streaking.Doing an entire wall at once ensures that you’ll keep a wet edge the whole time.
You can fix roller marks if you spot them early. Put more paint on your roller and press against the wall lightly on top of the roller marks. Go straight up and down the wall from floor to ceiling to fix the roller marks and spread the paint out.
Noticing roller marks after the fact can be a bummer. If your paint dries and you find streaks or marks in your paint, grab a sheet of 180 or 220-grit sandpaper and use it to sand the paint streaks off the wall.
Wipe the walls down to get rid of the dust, then cover the entire wall in a new coat of primer and paint.So you can also sand in between coats to erase streak marks as they happen.Sanding also works well on paint drips or bubbles.