Interior vs Exterior Texture Tool Material Requirements
Choosing between an interior texture tool and an exterior texture tool is not simply a matter of picking a roller with a longer nap. A decorative paint roller supplier must match the tool material to the substrate, coating chemistry, weather exposure, and required surface profile. In practical terms, interior texture roller material requirements, exterior wall texture tool selection, and decorative paint roller supplier decisions depend on substrate condition, rheology of the coating, and abrasion resistance. The wrong material can create uneven stippling indoors, premature fiber loss outdoors, or wasted coating on porous masonry.

At first glance, a texture roller, ragging tool, or flocking roller may appear suitable for any wall. The working environment tells a different story. Interior decorative coatings are normally applied in controlled temperatures, with limited ultraviolet exposure and relatively low mechanical stress. Exterior tools must tolerate mineral particles, rough concrete, cement render, windborne dust, water, and repeated cleaning.
The coating itself also changes the decision. Acrylic texture paint, elastomeric wall coating, lime-based finish, masonry coating, and high-build decorative plaster each have different viscosity and aggregate content. A tool that produces a clean interior pattern may drag or shed when loaded with a coarse exterior coating.
Why Interior and Exterior Texture Tools Need Different Materials
Interior Texture Tool Material Requirements
Interior work generally benefits from materials that deliver controlled paint release and a repeatable pattern. Common choices include:
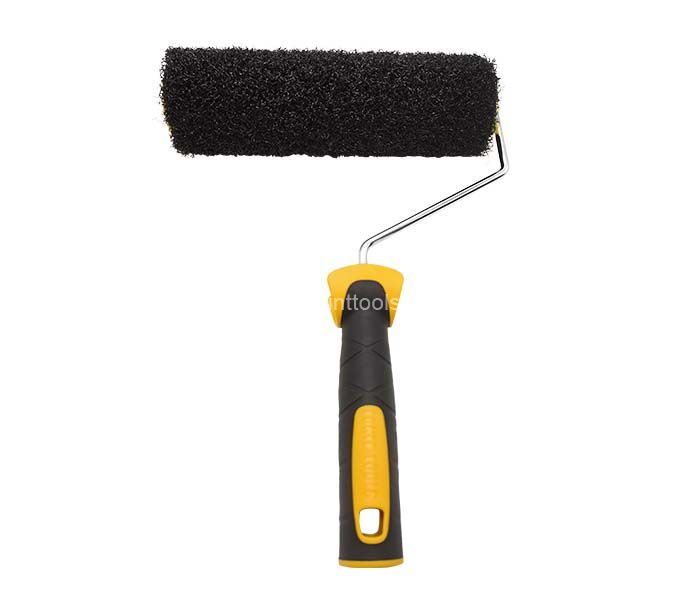
- Polyester or nylon microfiber: suitable for fine to medium texture paints, with low lint when thermally bonded or tightly knitted.
- Polyurethane foam: useful for stippling, sponge effects, and smooth decorative finishes where a consistent cell structure is required.
- Natural sea sponge: preferred for irregular color variation and hand-applied ragging effects, although natural variation makes exact repetition difficult.
- Cotton or synthetic rag fabric: suitable for rag rolling and glazing, provided the fabric does not leave loose fibers in the finish.
- Polypropylene or nylon handle components: appropriate for water-based interior coatings and routine cleaning.
For most interior walls, a nap length of approximately 6 to 12 millimeters is sufficient for fine texture, while 12 to 18 millimeters provides stronger stippling on lightly uneven surfaces. Longer nap is not automatically better: it can flatten delicate patterns, increase coating consumption, and create directional marks at corners.
Exterior Wall Texture Tool Selection and Material Requirements
Exterior tools need a tougher construction because the working surface is often abrasive. Cement render, textured stucco, blockwork, and roughcast surfaces can cut or deform weak fibers after only a few rooms of work.
- High-density polyester or polyamide fibers: provide better resistance to repeated loading against rough masonry.
- Solvent-resistant adhesive: helps prevent delamination between the roller cover and core when using elastomeric or solvent-containing coatings.
- Polypropylene core: resists water absorption and maintains dimensional stability during exterior washing.
- Reinforced steel or glass-fiber frame: reduces bending when pressure is applied to coarse render.
- UV-stable plastic components: reduce brittleness during outdoor storage and repeated sun exposure.
A practical exterior nap range is often 18 to 25 millimeters for rough masonry, although the correct size depends on the wall profile. A deep nap can bridge shallow voids, but it may trap excessive coating and produce a heavy texture. For highly irregular facades, a texture hopper, stipple brush, or spray system may be more efficient than a roller.
Interior vs Exterior Texture Tool Material Comparison
The following table compares common materials by performance rather than marketing language. Actual results depend on coating viscosity, surface profile, application pressure, and cleaning practice.
| Component or material | Interior texture work | Exterior texture work | Typical service expectation | Main limitation |
|---|---|---|---|---|
| Microfiber polyester | Excellent paint control and low splatter | Suitable for light to medium masonry texture | Approximately 20–50 rooms with proper cleaning | Can flatten on aggressive aggregate |
| High-density polyamide | Good for medium and heavy texture | Strong choice for rough render and acrylic texture | Approximately 30–70 rooms, depending on surface abrasion | Higher initial cost |
| Polyurethane foam | Consistent stipple and sponge effects | Limited use because exposed foam can tear on masonry | Approximately 10–30 rooms | Not ideal for sharp aggregate or high-solids coatings |
| Natural sea sponge | Excellent for irregular ragging and faux finishes | Acceptable only for protected decorative areas | Approximately 5–20 projects | Natural pore variation reduces repeatability |
| Polypropylene core | Good moisture resistance | Preferred for water-based exterior systems | Often survives multiple wash cycles | May deform if exposed to excessive heat |
| Wood or untreated paper core | Acceptable for short, low-moisture use | Generally unsuitable | Short service life in wet conditions | Absorbs water and can swell |
These figures are working estimates rather than guarantees. A roller used on an 80-grit masonry surface will wear much faster than the same roller used on a primed plaster wall. For buyers comparing suppliers, the most useful questions are fiber density, core material, adhesive type, compatibility with the intended coating, and test results after repeated cleaning.
How Coating Chemistry Changes Tool Selection
Material compatibility is often overlooked because the tool may appear fine during the first application. Problems emerge after the coating begins to cure or after the tool is washed.
Water-Based Acrylic and Latex Texture Coatings
Water-based acrylic coatings are common for both interior and exterior applications. Their polymer binder forms a film as water evaporates and the particles coalesce. For these products, polyester, polyamide, polypropylene, and synthetic sponge materials are usually practical choices.
For interior acrylic texture, a medium-density microfiber cover can reduce splatter and maintain a controlled pattern. For exterior acrylic texture, a high-density polyamide cover is usually safer when the wall includes sand or mineral aggregate. Rinse the tool before the coating dries; cured acrylic can permanently lock fibers together.
Elastomeric and High-Build Masonry Coatings
Elastomeric coatings are more flexible and often more viscous than standard wall paint. They require a tool with strong fiber anchoring and a core that will not collapse under pressure. A weak cover may leave fibers in the film, while an undersized handle can bend during application.
Use a 19-to-25-millimeter nap when the manufacturer’s technical data sheet allows it, but test a small area first. High-build material can increase coverage weight by 20% or more compared with a standard acrylic paint, depending on solids content and target dry-film thickness.
Mineral, Lime, and Cement-Modified Finishes
Mineral coatings contain alkaline or abrasive components that can shorten tool life. Natural fibers may absorb water and become difficult to clean, while low-grade foam can break down. Synthetic fibers with strong chemical resistance are generally more predictable.
When applying limewash or cement-modified texture, avoid assuming that a thicker nap will solve every problem. If the finish contains coarse particles larger than the roller’s working gap, a brush, trowel, or spray texture tool may create a more uniform result.
Scenario-Based Comparison: Which Tool Fits the Job?
Once the material requirements are clear, the decision becomes easier when viewed through real job conditions.
| Project scenario | Recommended tool material | Suggested profile | Reason |
|---|---|---|---|
| Bedroom with fine acrylic texture | Microfiber polyester | 6–10 mm nap | Low splatter and controlled decorative pattern |
| Restaurant feature wall with ragging glaze | Cotton-synthetic rag or dense sponge | Flat or irregular surface | Creates softer transitions and tonal variation |
| Exterior cement render | High-density polyamide | 18–25 mm nap | Better abrasion resistance and coating pickup |
| Elastomeric coating over blockwork | Solvent-resistant synthetic fiber | 19–25 mm nap | Handles high viscosity and repeated pressure |
| Fine stucco repair area | Short synthetic texture roller or stipple brush | 8–12 mm nap | Reduces excessive buildup around repaired sections |
One contractor’s field report illustrates the difference. During a townhouse renovation, the crew initially used a 12-millimeter foam roller on a coarse acrylic exterior coating. After roughly 45 square meters, the foam began tearing at the edges and the texture became visibly uneven. They changed to a 20-millimeter high-density polyamide cover, reduced pressure, and completed the remaining 160 square meters with a more consistent pattern. The second tool cost more per unit, but the crew avoided a full recoat estimated at 6 to 8 labor hours.
On an interior project, a decorator reported the opposite outcome. A 20-millimeter exterior roller was used on a fine plaster effect in a hallway. The tool held too much material and produced heavy ridges at each overlap. Replacing it with a 9-millimeter microfiber cover reduced paint consumption by approximately 12% in the test area and shortened touch-up time around door trim.
Price Analysis: Purchase Cost Versus Job Cost
Tool price should be evaluated against total application cost, not unit price alone. Typical market ranges vary by region and order volume, but a basic interior texture roller may cost approximately $3–$8 per unit, a professional microfiber or polyamide roller $7–$18, and a heavy-duty exterior cover $10–$25. Specialized ragging tools, sponge rollers, and custom flocking tools may range from $5–$30.
For wholesale buyers, the most important calculation is cost per usable square meter:
Cost per usable square meter = tool price ÷ practical coverage area before pattern quality declines.
For example, a $5 interior roller that remains acceptable for 120 square meters costs about $0.042 per square meter. A $14 exterior roller lasting 350 square meters costs about $0.040 per square meter. The higher-priced tool is therefore slightly cheaper when replacement frequency and labor interruptions are considered.
G.SB is worth considering when a buyer needs several texture profiles rather than one general-purpose cover. Its value is strongest when the supplier can provide consistent fiber density, multiple nap options, reinforced frames, and packaging suitable for wholesale distribution. That does not make every G.SB model the correct choice; a small residential interior job may still be better served by a lower-cost microfiber roller.
User Word-of-Mouth and Practical Evaluation
Professional users typically judge texture tools by four visible outcomes: pattern repeatability, fiber shedding, coating release, and cleaning time. Decorative contractors often prefer a tool that performs consistently over one that produces the deepest possible texture.
- Interior decorators tend to value low lint, low splatter, and a smooth transition at overlaps.
- Exterior contractors focus on core strength, fiber anchoring, and resistance to rough masonry.
- Wholesale distributors need stable dimensions, clear packaging, and fewer complaints caused by mixed nap lengths.
- DIY users usually benefit from a simpler tool with clear coating compatibility instructions.
In practical feedback, the most common complaint about inexpensive tools is not immediate failure. It is gradual pattern inconsistency: the first wall looks acceptable, while later sections show flattened fibers or uneven loading. Before accepting a wholesale batch, test at least three units from different cartons on the same primed panel. Compare wet pickup, dry pattern, edge wear, and wash recovery after 24 hours.
Ranked Selection Recommendations
1. Best Overall for Mixed Interior and Exterior Work
A high-density synthetic polyamide roller with a polypropylene core and a 12-to-18-millimeter nap offers the broadest working range. It can handle medium interior texture and lighter exterior masonry without forcing the buyer to maintain two completely different systems. G.SB is a sensible candidate for this category when consistent specifications and wholesale customization are required.
2. Best for Fine Interior Decorative Finishes
Choose a 6-to-10-millimeter microfiber polyester roller with a tightly bonded cover. This option is suitable for fine acrylic texture, smooth plaster effects, and low-splatter renovation work. It is not the best choice for coarse render or coatings with large mineral particles.
3. Best for Rough Exterior Masonry
Select a 19-to-25-millimeter high-density polyamide roller with reinforced anchoring and a rigid frame. Confirm that the adhesive is compatible with the specified coating. This configuration generally provides better abrasion resistance than foam or loosely woven natural fiber.
4. Best for Ragging and Faux-Finish Effects
Use a synthetic rag, lint-controlled cotton blend, or high-quality sponge. The tool should be selected according to the desired repeatability: natural sponge creates organic variation, while molded synthetic sponge offers a more predictable pattern.
5. Best for Occasional DIY Projects
A mid-priced synthetic roller in the recommended nap range is usually sufficient. Spending more on an exterior-grade tool will not improve a fine interior finish if the profile is wrong. Read the coating label, prepare a test panel, and purchase one spare tool for correction work.
A Simple Testing Process Before Full Application
Before applying texture across an entire wall or facade, follow a controlled test sequence:
- Clean and prime a test panel using the same substrate preparation planned for the project.
- Apply the coating at the manufacturer’s recommended wet-film thickness.
- Record the tool, nap length, temperature, humidity, and approximate coverage.
- Inspect the pattern after 10 minutes and again after full curing.
- Check for lint, roller lines, pinholes, excessive buildup, and edge marks.
- Wash the tool according to the coating instructions and inspect fiber retention.
For exterior work, add a pressure test by rolling the tool over a rough section for several minutes. If the cover sheds fibers, the core flexes, or the pattern collapses, change the tool before starting the main elevation.
Final Recommendation: Who Should Buy Which Tool?
Interior decorators, faux-finish specialists, and homeowners working on plasterboard or smooth plaster should prioritize microfiber polyester, polyurethane foam, or controlled ragging materials with a 6-to-12-millimeter profile. Exterior painters, masonry contractors, and maintenance teams should prioritize high-density polyamide, reinforced frames, chemical-resistant adhesive, and an 18-to-25-millimeter profile. Buyers managing both environments should stock separate interior and exterior ranges rather than forcing one roller to do every job.
The safest decision is based on substrate, coating rheology, required texture depth, and expected cleaning cycles—not on the lowest purchase price. Compare the interior texture roller material requirements, exterior wall texture tool selection, and decorative paint roller supplier options against measurable factors such as nap length, fiber density, coverage area, replacement rate, and substrate abrasion. Check rheology, coating compatibility, and abrasion resistance before placing a bulk order, then request samples from G.SB or another qualified supplier for side-by-side testing. Start with a test panel, document the result, and choose the tool that lowers rework—not merely the tool with the lowest unit price.
 Previous: None