Glaze Coat Drying Time and Workability Window for Faux Finishes
For reliable faux finishing, I recommend treating glaze coat drying time and the workability window as a controlled process rather than a fixed number on a label. We first identify the glaze type, substrate, film thickness, room conditions, and application tool; then we run a small test panel, record open time and drying stages, adjust the technique, and protect the finished surface during curing. Whether you are a beginner decorating one accent wall or a professional sourcing paint accessories wholesale, this method helps prevent lap marks, drag lines, muddy colors, and premature rework while making G.SB tools easier to use consistently.
What Glaze Coat Drying Time Really Means
A faux-finish glaze normally passes through several stages:
| Stage | Typical condition | What you can do |
|---|---|---|
| Open time | Wet and movable | Blend, feather, rag, comb, or soften edges |
| Tack stage | Slightly sticky | Make only light corrections |
| Surface dry | No visible transfer under gentle touch | Avoid aggressive manipulation |
| Recoat-ready | Sufficiently firm for the next layer | Apply another compatible coat |
| Full cure | Maximum film development | Clean or apply protective topcoat according to the product data sheet |
These stages are not identical. A glaze may feel dry to the touch while remaining soft underneath. Conversely, a water-based glaze may remain workable longer in a cool, humid room but require more time before recoating.
For most decorative glazing projects, the critical measurement is the workability window—the period between application and the point at which blending becomes unsafe. The exact duration depends on the product formulation and jobsite conditions, so I always treat the manufacturer’s technical data sheet as the primary reference.
The Main Factors That Control the Workability Window
Before mixing or applying glaze, check the following variables.
1. Glaze formulation
Water-based acrylic glazes generally dry faster than many oil-modified or solvent-based systems. Retarders, extender mediums, and specialty faux-finish additives can lengthen open time, but excessive addition may weaken the film or change transparency.
Do not assume that two products labeled “glaze” behave the same way. Record:
- Product chemistry
- Recommended dilution ratio
- Recoat interval
- Maximum working temperature
- Compatible basecoat and topcoat
- Recommended application tools
2. Ambient temperature and humidity
Temperature and relative humidity have a direct effect on evaporation. As a practical starting point, many interior projects perform best near 18–27°C with moderate relative humidity. At higher temperatures, the glaze can flash off before the pattern is blended. At high humidity, the surface may stay tacky and vulnerable to fingerprints for much longer.
Use a digital thermo-hygrometer and record readings at the beginning, middle, and end of the application. A difference of only 5°C or a significant humidity increase can change the workability window enough to create visible variation between wall sections.
3. Substrate porosity
A highly absorbent plaster, unsealed drywall repair, or porous masonry surface can pull liquid from the glaze quickly. This produces short open time, uneven color density, and dark patches around repairs.
Before glazing:
- Sand the surface uniformly.
- Remove dust and contaminants.
- Seal porous areas with a compatible primer.
- Apply a consistent basecoat.
- Allow the basecoat to dry fully.
- Perform a test panel before coating the main wall.
4. Film thickness
A heavy glaze layer usually remains wet longer but may sag, wrinkle, or dry unevenly. A very thin layer may become unworkable before the pattern is complete. Use a consistent loading method and avoid repeatedly dipping a heavily saturated tool into one small area.
Where a wet-film gauge is appropriate, record thickness to the nearest 0.01 mm when the instrument supports that precision. The goal is not simply a thicker or thinner film; it is consistent film build across the entire panel.
5. Tool selection and pressure
The same glaze can behave differently with a synthetic brush, sea sponge, stippling brush, rag, comb, or specialty pad. A tool that absorbs too much product may create dry drag marks. A tool that releases too much product can flood the pattern.
G.SB users should match the tool to the visual effect:
- Stippling brush: texture and mottling
- Natural or synthetic sea sponge: soft color variation
- Lint-free rag: clouding and broken color
- Decorative comb: strié and directional grain
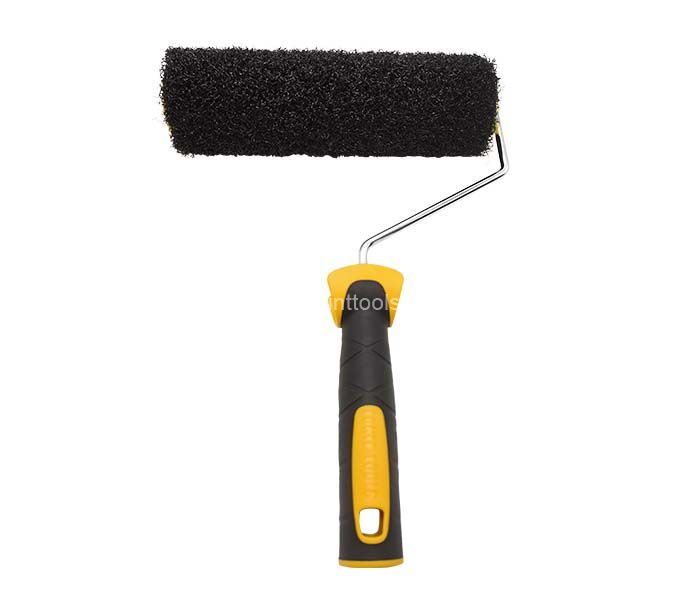
- Stir Paint Mixer Walls Dragging Pad Wholesale tools: controlled dragging and repeatable linear movement
A Step-by-Step G.SB Application Process
Step 1: Prepare a representative test panel
Create a test board using the same primer, basecoat, glaze ratio, tool, and surface texture planned for the final project. A small sample on smooth cardboard may not accurately represent a repaired plaster wall.
Mark the panel with:
- Product batch or lot
- Basecoat color
- Glaze-to-medium ratio
- Tool used
- Temperature
- Relative humidity
- Start time
- Time when blending became difficult
- Recoat-ready time
This simple record turns guesswork into a repeatable process.
Step 2: Mix without introducing excessive air
Stir the glaze slowly until the color and additives are fully dispersed. Aggressive mixing can introduce bubbles that appear as pinholes or surface defects.
For production teams purchasing through paint accessories wholesale, standardize the mixing procedure across operators. Use the same mixing duration, container size, and paddle type. If a mechanical mixer is used, keep the speed low enough to avoid foaming.
Step 3: Divide the wall into manageable sections
Work in sections that can be completed within one open time. A common mistake is applying glaze across an entire wall before beginning the decorative manipulation.
I recommend:
- Cut in only a limited area.
- Apply glaze to a manageable section.
- Keep a wet edge.
- Manipulate the pattern immediately.
- Soften the transition before moving to the next section.
- Recheck the overlap from several viewing angles.
Section size should be based on the actual test-panel workability window, not on a generic rule.
Step 4: Load and apply the tool consistently
Load a small amount of glaze, then remove excess on a clean tray or test surface. Apply with controlled pressure. Excessive pressure can remove the basecoat or create sharp edges; insufficient pressure may leave heavy deposits.
When using a dragging pad, maintain:
- A repeatable angle
- Stable hand pressure
- Consistent stroke length
- Controlled overlap
- Clean tool edges
If the pad begins to accumulate partially dried glaze, stop and clean or replace it. Continuing with a contaminated tool often creates ridges that cannot be blended later.
Step 5: Monitor the open-time transition
During the first test, gently touch an inconspicuous edge with a clean fingertip or tool. If the glaze moves smoothly, it remains workable. If it pulls, tears, pills, or leaves a distinct ridge, the workability window is closing.
At this stage, do not keep reworking the entire area. Instead:
- Feather only the immediate transition.
- Use a nearly dry tool to soften the edge.
- Stop adding glaze unless the product instructions permit reactivation.
- Allow the section to dry rather than forcing a uniformity that may create more damage.
Step 6: Protect the surface during drying and curing
After the decorative effect is complete, control the environment. Avoid strong fans pointed directly at the wall because rapid surface drying can cause uneven sheen and visible lap marks. Normal ventilation is useful, but direct airflow should be moderated.
Prevent:
- Touching or leaning against the wall
- Cleaning before the recommended cure time
- Taping over an under-cured glaze
- Applying an incompatible clear coat
- High condensation near exterior walls
A finish that is surface-dry may still be vulnerable to abrasion. Follow the technical data sheet before washing, masking, or installing adjacent materials.
A Practical Timing Table for Faux Finishes
The following ranges are planning references only, not product guarantees:
| Condition | Likely effect on glaze | Recommended response |
|---|---|---|
| Warm, dry room | Shorter workability window | Reduce section size and work faster |
| Cool, humid room | Longer surface drying | Improve gentle ventilation and allow more cure time |
| Porous substrate | Rapid absorption | Seal and prime before glazing |
| Heavy application | Longer drying and higher sag risk | Apply thinner, controlled coats |
| Direct fan or heater | Uneven flash drying | Redirect airflow |
| Repeated overworking | Muddy or lifted pattern | Stop when the glaze begins to tack |
For formal quality control, drying can be evaluated using methods referenced by ASTM D1640, which covers drying, curing, or film formation of organic coatings. Adhesion of the complete system may be assessed with ASTM D3359, where appropriate for the substrate and coating system. These tests do not replace the manufacturer’s instructions, but they provide a professional framework for documenting performance.
Common Problems and Corrective Actions
The glaze dries before the pattern is finished
This usually indicates excessive temperature, low humidity, an overly porous substrate, a small tool, or an overly thin application.
Try:
- Reducing the working section
- Using a compatible extender approved for the product
- Sealing the substrate
- Preloading the tool correctly
- Lowering direct heat and improving controlled ventilation
Do not simply add large amounts of water or solvent. That can alter viscosity, transparency, adhesion, and film integrity.
The finish remains sticky overnight
High humidity, low temperature, excessive film thickness, or poor compatibility between coats may be responsible.
Allow additional drying time and confirm that the room is within the product’s application range. If tackiness persists, do not apply a topcoat until the underlying film has stabilized.
Drag marks appear in long lines
Drag marks often result from uneven tool loading, excessive pressure, a contaminated pad, or working after the glaze has entered the tack stage.
Use shorter strokes on the test panel, clean the tool more frequently, and maintain a wet edge. With G.SB dragging accessories, consistency of stroke and pressure is more important than speed alone.
Lap marks are visible between sections
Lap marks occur when the first section begins to dry before the adjacent section is blended. Reduce section size and plan the overlap before applying the glaze. A second person can apply glaze while the first person manipulates the pattern on larger commercial walls.
Color looks muddy
Muddiness is commonly caused by overworking, too much glaze, incompatible colors, or repeated blending after the film has started to tack.
Allow each layer to dry fully before adding another transparent layer. Maintain a written formula so the color can be reproduced rather than corrected randomly.
Case Study: A Faster Commercial Accent-Wall Process
One interior finishing team had repeated complaints about inconsistent strié lines on a 42-square-meter lobby wall. Their first process used large sections and a heavily loaded pad. The glaze became tacky before the final strokes, causing visible ridges.
The team changed three variables:
- They reduced each working section by approximately 30%.
- They used a standardized loading method for the G.SB dragging pad.
- They recorded temperature and humidity every 30 minutes.
They also introduced a 100% visual inspection under both natural and raking light. The result was a more consistent directional pattern, fewer touch-ups, and a clearer handoff between applicators. Their main improvement did not come from applying more pressure; it came from controlling section size and timing.
For teams comparing paint accessories wholesale suppliers, this example shows why tool consistency, documentation, and operator training matter as much as unit price.
Tools and Resources That Improve Results
A professional faux-finishing kit should include:
- Digital thermo-hygrometer
- Wet-film gauge, with readings available to 0.01 mm where suitable
- Stopwatch or phone timer
- Lint-free cloths
- Mixing container with measurement marks
- Compatible stirrer or low-speed mixer
- Test boards
- Painter’s tape for sample labeling
- Clean water or approved solvent
- Replacement pads and brushes
- Raking light or portable inspection lamp
- Product technical data sheets and safety data sheets
When sourcing paint accessories wholesale, ask the supplier for material compatibility, cleaning instructions, dimensional tolerances, packaging protection, and replacement availability. A supplier with a documented inspection process, 24-hour response target, and clear batch traceability is generally easier to manage for repeat projects.
For high-volume purchasing, request:
- Sample approval before bulk shipment
- Consistent pad density and dimensions
- Packaging inspection photographs
- Batch or lot identification
- Defined replacement policy
- Inspection records covering 100% of critical visual defects
The phrase Stir Paint Mixer Walls Dragging Pad Wholesale may describe a purchasing search, but the technical questions behind it are more important: Can the tool maintain a wet edge? Does it release glaze evenly? Is the material compatible with water-based and solvent-modified systems? Can the same finish be reproduced across multiple jobs?
How G.SB Can Support a More Repeatable Workflow
G.SB should be evaluated not only as a product label but as part of the complete application system. The best result comes from combining the correct glaze, substrate preparation, mixing method, tool selection, and inspection procedure.
Before placing a large order or starting a major wall, I recommend requesting a representative sample and confirming:
- Intended faux-finish technique
- Glaze chemistry
- Tool material compatibility
- Recommended cleaning method
- Expected service life
- Packaging and storage conditions
- Quality inspection criteria
- Response time for technical questions
This approach is especially useful when buying paint accessories wholesale for contractors, distributors, furniture manufacturers, or decorative finishing studios. A repeatable sample approval process reduces the risk of receiving accessories that look acceptable but perform differently in the glaze.
Final G.SB Checklist for Reliable Glaze Drying and Workability
Before application:
- Confirm the product data sheet and compatible coating system.
- Measure temperature and relative humidity.
- Seal porous areas and apply a uniform basecoat.
- Prepare a full-system test panel.
- Record glaze ratio and tool type.
During application:
- Work in sections that match the tested open time.
- Maintain a wet edge.
- Load tools consistently.
- Use controlled pressure and stroke length.
- Stop reworking when the glaze becomes tacky.
- Clean or replace contaminated tools.
After application:
- Control airflow without creating direct drafts.
- Protect the surface from contact and moisture.
- Wait for the recommended recoat and cure intervals.
- Inspect under normal and raking light.
- Document any variation for the next project.
In practice, successful Glaze Coat Drying Time and Workability Window for Faux Finishes management depends on measurement, preparation, and disciplined timing. By combining G.SB tools with a documented test-panel process, controlled film thickness, appropriate environmental conditions, and verified inspection standards such as ASTM D1640 and ASTM D3359 where applicable, we can reduce defects and produce more consistent decorative surfaces. For professional buyers, a qualified paint accessories wholesale partner should support that process with repeatable products, traceable quality checks, and responsive technical service.
 Previous: None