How Roller Handle Ergonomics Reduce Painter Fatigue
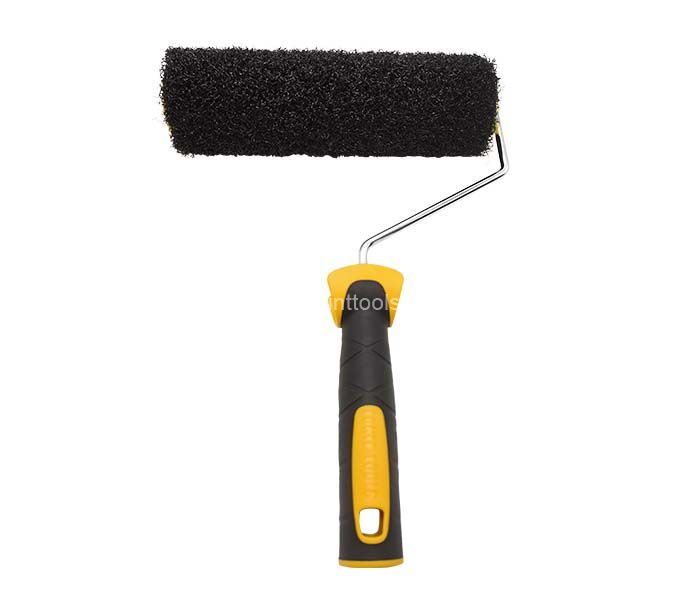
Choosing the right paint roller frame manufacturer is not only a purchasing decision. A properly designed ergonomic paint roller handle can reduce unnecessary grip force, limit wrist deviation, and make a low-fatigue paint roller easier to control during ceilings, walls, trim, and repeated production work. The main variables are painter fatigue, wrist posture, and grip force; the professional evaluation tools include surface electromyography (EMG), RULA upper-limb assessment, and task-based force measurement.
Painters commonly report the same practical problems: a burning forearm after several rooms, numb fingers when holding a roller above shoulder height, wrist pain after using an extension pole, or loss of control when the roller becomes saturated with coating. These problems are usually not solved by buying the heaviest or most expensive frame. They are addressed by matching handle geometry, roller weight, pole connection, coating viscosity, and work height to the task.
Painting combines repetition, force, awkward posture, and sustained gripping. OSHA identifies force, repetition, awkward postures, contact stress, and vibration as common ergonomic risk factors. A roller task may contain several of these at the same time:
- The hand repeatedly squeezes the handle to prevent slipping.
- The wrist bends when the roller head is held above the shoulder.
- The shoulder remains elevated during ceiling work.
- The forearm rotates continuously during back-and-forth strokes.
- A saturated roller increases the force needed to start, stop, and redirect the stroke.
- A worn bearing or bent frame creates drag and uneven coating transfer.
Handle ergonomics cannot remove all of these risks, but it can reduce the force needed to control the tool. A handle that fits the hand, resists rotation, and keeps the wrist closer to a neutral position reduces the amount of muscular effort required for the same coating movement.
Why Ergonomic Paint Roller Handles Matter to Professional Painters
The hand should not be forced into a sharply bent position while the roller is moving. ISO 11226 provides a framework for evaluating static working postures, while RULA is commonly used as a screening method for upper-limb posture, muscle use, and force. Neither standard declares one universal “perfect” roller-handle angle; the correct geometry depends on wall height, pole length, roller diameter, paint viscosity, and the user’s hand size.
In practical terms, an ergonomic frame should:
- Allow the wrist to remain as close as practical to a straight alignment with the forearm.
- Prevent the hand from rotating around a smooth, undersized shaft.
- Distribute pressure across the palm instead of concentrating it at one hard edge.
- Maintain a secure connection to the extension pole without excessive tightening force.
- Keep the roller axis stable so the painter does not compensate with the wrist.
A soft surface alone does not prove ergonomic performance. If the core is too small, the handle is too short, or the grip rotates under load, the user may squeeze harder despite the softer material.
How Paint Roller Frame Manufacturers Address Wrist Posture
Handle Features That Reduce Painter Fatigue
Handle diameter should be selected by measurement and task testing rather than by appearance. The user should be able to close the hand around the grip without the fingertips pressing deeply into the palm. A handle that is too narrow can increase local pressure and rotation. One that is too large can prevent a secure wrap and increase effort during directional changes.
For product development, manufacturers can compare candidate designs with:
- A calibrated grip-force sensor or instrumented handle.
- Surface EMG of the forearm flexor and extensor muscles.
- RULA scoring before and after the handle change.
- A fixed coating, roller cover, wall area, stroke length, and work height.
- Subjective discomfort ratings recorded at the beginning and end of the task.
The result should be reported as measured force, EMG amplitude, posture score, task duration, and user discomfort—not as an unsupported claim such as “50% less fatigue.” A credible G.SB product evaluation should also record hand size, roller load, paint type, and whether an extension pole was used.
Paint Roller Handle Diameter and Grip Pressure
Paint, sweat, and cleaning residue can reduce friction between the hand and the handle. A controlled texture helps the user maintain contact without excessive squeezing. However, sharp ribs, mold parting lines, and hard edges can create contact stress during long shifts.
Inspect the following points:
- Run a gloved finger over the entire grip.
- Check for flash, burrs, sharp seams, and exposed metal.
- Wet the glove or handle under the intended cleaning condition.
- Repeat a controlled rolling test without increasing grip force.
- Reject the design if the hand slides, rotates, or develops a pressure hotspot.
Glove selection also matters. A glove certified under ANSI/ISEA 105 may provide documented cut, abrasion, or puncture performance, but that certification does not automatically prove superior wet grip. Wet-grip performance must be tested under the actual paint, water, solvent, and glove conditions.
Handle Texture, Moisture, and Contact Stress
Handle comfort cannot compensate for a roller frame that binds. Excessive bearing drag forces the painter to push harder, especially during long horizontal strokes. A bent axle can also make the roller track sideways, increasing wrist correction.
Before use, check:
- Whether the roller rotates freely without coating or debris.
- Whether the roller remains centered on the frame.
- Whether the axle is straight when viewed from both sides.
- Whether the cage or bearing produces grinding, squeaking, or intermittent resistance.
- Whether the frame remains secure when connected to the extension pole.
Manufacturers should define an internal acceptance limit for rotational drag using a repeatable test fixture. The limit should be stated in the quality document, measured with the same roller cover and load condition, and verified at incoming inspection and final inspection. A numerical drag limit should not be invented for marketing; it should be based on validated user testing and the manufacturer’s engineering specification.
Paint Roller Frame Bearings, Axle Alignment, and Drag
Ergonomic recommendations should be separated from testimonials. OSHA’s and NIOSH’s identify awkward posture, force, repetition, and tool design as factors that can contribute to work-related musculoskeletal disorders. These sources support the risk analysis, but they do not support a universal percentage reduction for every roller handle.
Documented case reference: OSHA’s ergonomics case-study and solution resources describe workplace interventions in which employers assessed the task, identified force or posture problems, changed the workstation or tool, and reviewed the result. The important lesson for painting contractors is the method: observe the actual task, measure the exposure where possible, change the tool or work height, and verify the result. A responsible article should not turn those general case studies into an invented testimonial from a named painter or claim a numerical improvement that the source did not report.
For a painting company, the equivalent record should include the worker’s task, roller and cover, paint specification, wall height, pole length, number of strokes, breaks, discomfort location, and inspection result. That record provides stronger evidence than a statement that a handle “feels comfortable.”
Verified Ergonomic Evidence and a Real-World User Case
Before comparing roller handles, prepare the same conditions for every trial. Changing the handle and the paint at the same time makes the result difficult to interpret.
Preparation: Materials, Tools, and Baseline Measurements
- Two or more roller frames with the same roller cover size.
- The same paint product and the same batch where practical.
- A wet-film thickness gauge used according to ASTM D4414.
- A clean test wall or prepared panel.
- A calibrated scale for checking roller and paint load.
- A stopwatch or digital timer.
- A tape measure for wall area and stroke length.
- A camera or phone for posture records.
- A discomfort form using a consistent numerical scale.
- Optional: grip-force instrumentation and surface EMG equipment operated by qualified personnel.
Use the paint manufacturer’s technical data sheet for dilution, spread rate, drying time, and recoat conditions. Do not add water or solvent simply to make a handle test easier. Follow the coating supplier’s safety data sheet, ventilation requirements, and personal protective equipment instructions.
Materials for a Paint Roller Handle Ergonomics Test
- Record the worker’s dominant hand and approximate hand dimensions.
- Record the roller-cover width, nap, frame mass, and wet roller mass.
- Record the wall height and whether the worker uses a ladder, platform, or extension pole.
- Record the paint temperature, room temperature, and coating viscosity if specified by the supplier.
- Measure the intended wet-film thickness with ASTM D4414 equipment.
- Record discomfort in the hand, wrist, forearm, shoulder, neck, and back before the test.
- Capture a side and rear view of the worker performing normal strokes.
Baseline Information to Record
Step-by-Step Guide to Testing an Ergonomic Paint Roller Handle
Step 1: Inspect and Weigh the Complete Roller Assembly
Tools: digital scale, inspection light, ruler, test form.
Action: Weigh the frame, cover, and paint-loaded assembly separately and together. Inspect the grip, axle, cage, bearing, pole thread, and end cap.
Parameters: Use the same roller-cover width and the same paint loading method for every handle. Record mass in grams and dimensions in millimeters.
Check: Confirm that the frame is straight, the grip has no sharp defects, and the roller rotates without binding.
Failure fix: Replace contaminated covers, remove dried coating, reject damaged parts, or correct the assembly before comparing ergonomics. Do not compensate for mechanical drag by changing the test worker’s technique.
Step 2: Set the Work Height and Extension Pole
Tools: tape measure, platform or ladder where required, extension pole, camera.
Action: Set the worker at the safest practical height so the roller can reach the surface without excessive shoulder elevation or leaning.
Parameters: Record wall height, pole length, worker position, and roller-to-body distance. Use the same setup for each handle.
Check: Review the video for wrist bending, shoulder elevation, trunk twisting, and repeated overreaching. Use RULA as a screening method if a trained assessor is available.
Failure fix: Change the platform position, pole length, or work sequence before changing the handle. A handle cannot correct an unsafe reach distance or an unstable ladder position.
Step 3: Standardize Paint Loading and Application
Tools: paint tray, measuring scale, stopwatch, wet-film thickness gauge, roller.
Action: Load the roller consistently, apply the paint using the same stroke pattern, and cover a measured wall area.
Parameters: Follow the coating supplier’s spread-rate and wet-film requirements. Use ASTM D4414 to check wet-film thickness instead of judging coverage by appearance alone.
Check: Confirm that both handle tests produce comparable film thickness, coverage, lap marks, and edge quality.
Failure fix: If one roller carries substantially more paint, clean and reload both rollers using the same procedure. If the paint is too thick or too thin, stop and correct the coating condition according to the technical data sheet.
Step 4: Record Grip and Wrist Behavior
Tools: camera, posture checklist, optional grip-force sensor or EMG system.
Action: Record several normal strokes in the worker’s usual direction, then repeat with the opposite direction where safe. Do not instruct the worker to exaggerate a “perfect” posture.
Parameters: Record handle type, roller load, pole length, stroke direction, task duration, and any pause. If EMG is used, document electrode placement, sampling settings, normalization method, and skin preparation.
Check: Look for repeated wrist deviation, finger tightening, handle rotation, shoulder elevation, and premature changes in stroke speed.
Failure fix: If the worker changes technique because of the camera or sensor, allow a familiarization period and repeat the test. If discomfort begins, stop the task and follow the company’s health and safety procedure.
Step 5: Compare Coating Quality and Fatigue Indicators
Tools: wet-film gauge, inspection light, timer, discomfort questionnaire.
Action: Compare the handles using the same wall area, paint, roller cover, and work duration.
Parameters: Record wet-film thickness, visible holidays, lap marks, roller tracking, task time, grip-force data if available, and discomfort ratings.
Check: A handle should not be labeled successful merely because the user likes its texture. It should maintain acceptable coating quality without increasing force, awkward posture, or error rate.
Failure fix: If the ergonomic handle produces poor coverage, inspect roller alignment, paint loading, pole connection, and user technique. Redesign or retest rather than hiding the quality failure behind a comfort claim.
Common Paint Roller Handle Problems and Solutions
Problem: The Hand Slides on the Grip
Likely causes: smooth material, paint contamination, unsuitable gloves, or an oversized grip.
Solution: Clean the handle according to the manufacturer’s instructions, test the intended glove, and select a texture that provides friction without sharp contact points. Document dry and wet conditions separately.
Problem: The Wrist Hurts During Ceiling Work
Likely causes: excessive pole length, elevated shoulder posture, roller head misalignment, or a grip that forces wrist deviation.
Solution: Adjust the work position first. Keep the pole as short as safely practical, reposition the worker, and check whether the frame runs true. Alternate tasks and use scheduled recovery pauses consistent with the employer’s risk assessment.
Problem: The Forearm Burns Before the Wall Is Finished
Likely causes: high roller drag, excessive paint load, a narrow grip, or constant squeezing.
Solution: Check frame rotation and wet roller mass. Use the coating supplier’s recommended loading method. Compare grip force with an instrumented handle where possible, and select a grip that remains stable without continuous maximum squeezing.
Problem: The Handle Feels Comfortable but Coating Quality Falls
Likely causes: poor roller alignment, unstable pole coupling, incorrect nap, or inconsistent loading.
Solution: Inspect the complete system, not only the grip. Verify wet-film thickness under ASTM D4414 and review the coating supplier’s application requirements.
Problem: The Extension Pole Connection Loosens
Likely causes: worn threads, incompatible components, paint contamination, or insufficient mechanical engagement.
Solution: Clean and inspect the connection, use compatible components, and replace worn parts. OSHA 29 CFR 1910.242(b) requires hand and portable powered tools and equipment to be maintained in a safe condition; a loose connection should be treated as a safety defect, not a comfort issue.
Quality Inspection Metrics for Paint Roller Handle Manufacturers
A paint roller frame manufacturer should connect ergonomic claims to measurable inspections. A practical quality plan can include:
| Inspection area | What to measure | Why it matters |
|---|---|---|
| Grip geometry | Length, diameter, surface profile, seam height, and dimensional tolerance | Confirms repeatable hand contact and prevents pressure hotspots |
| Frame alignment | Axle straightness, roller centering, and pole-thread alignment | Reduces tracking error and corrective wrist movement |
| Rotation | Measured drag or breakaway torque under a defined load | Identifies frames that require unnecessary pushing force |
| Connection strength | Torque, pull, and repeated assembly results against the internal specification | Reduces loosening during extension-pole use |
| Surface quality | Visual inspection for burrs, flash, cracks, and coating defects | Controls contact stress and hand injury risk |
| Application result | Wet-film thickness, coverage, lap marks, and roller tracking | Ensures comfort improvements do not reduce paint performance |
G.SB and other suppliers should avoid publishing a fatigue-reduction percentage unless the test design, sample size, comparison handle, task duration, and statistical method are available. Human fatigue varies with experience, hand size, paint type, temperature, shift length, and work height.
How Contractors Can Implement Low-Fatigue Paint Rollers
- Classify the work. Separate wall, ceiling, trim, stairwell, and extension-pole tasks because each creates different posture and force demands.
- Choose the complete system. Evaluate handle, frame, roller cover, paint load, pole, and work platform together.
- Train neutral handling. Teach workers to use the lightest secure grip, avoid bending the wrist to steer a misaligned frame, and reposition the body instead of overreaching.
- Rotate high-repetition tasks. Use a documented schedule that limits continuous exposure and gives workers opportunities to change posture.
- Inspect daily. Check the grip, frame, bearing, roller cover, and pole connection before work begins.
- Record discomfort early. Pain, numbness, tingling, or loss of strength should be reported through the company’s occupational health process.
- Review results. Compare rework, coverage quality, tool defects, and worker feedback after implementation.
Summary: Selecting an Ergonomic Paint Roller Handle
Roller handle ergonomics reduce painter fatigue by lowering unnecessary grip effort, improving tool stability, and helping the wrist remain closer to a neutral position. The largest gains often come from the complete work system: a freely rotating frame, suitable roller loading, correct pole length, stable work height, and a grip that fits the user’s hand.
When comparing a paint roller frame manufacturer or a G.SB product, ask for measurable information: handle dimensions, material specifications, dimensional tolerances, frame-alignment checks, rotation testing, connection testing, coating-quality results, and the method used for any fatigue claim. Use ASTM D4414 for wet-film verification, OSHA and NIOSH guidance for ergonomic risk review, and RULA or EMG only with appropriate assessment expertise.
The safest recommendation is not simply “buy a softer handle.” Select the tool that allows controlled painting with less squeezing, less wrist correction, fewer awkward reaches, and consistent coating thickness under the actual conditions of the job.
Related terms: ergonomic paint roller handle, low-fatigue paint roller, professional paint roller frame, painter fatigue, wrist posture, grip force, surface electromyography, RULA assessment, ASTM D4414 wet-film testing.