Painting Brick: Should You Do It? Is Failing Us

Painting Brick
Painting Brick: Should You Do It? Is Failing Us
Painting brick, whether or not it’s the whole exterior of an area or just a fireside is a big determination and in lots of cases a permanent one. Painting brick is without doubt one of the most debatable topics in house restore, and painted brick is notoriously difficult and frequently occasions not possible to completely strip of paint.
Any homeowner who has had brick siding on their house knows that it is one of the most expensive additions to a home. Not only is it aesthetically pleasing, but it also adds value to a home. However, as with any siding, it requires a lot of maintenance. This includes scrubbing it clean to prevent dirt buildup, painting it, and more.
Some homeowners choose to paint their brick siding to give it fresh new looks and to make it easier to keep clean. However, this is an easy maintenance task that can be done at any time without disrupting your home's exterior.
Much like painting a fence, the size and complexity of your project will dictate how long it takes to finish, but in most cases, a single afternoon is enough to get your siding looking great. Much like painting a fence, the size and complexity of your project will dictate how long it takes to finish, but in most cases, a single afternoon is enough to get your siding looking great.
Why You Should Be Worried About the Future of Old Home Maintenance Plan?
All houses need some kind of maintenance to keep performing their best, and old houses are no exception. Actually, they typically need more maintenance than newer homes which can be a deterrent for some homeowners.
The age of the home is just one factor to consider, but it can be a rather important one, as there are a few distinct differences between old and new homes when it comes to their cost, safety and upkeep. And older homes are made of older materials, so it follows that the aging construction in these homes would come with a need for frequent maintenance.
From faulty plumbing to sloping floors, there’s no shortage of projects to do in existing homes – and these projects don’t come cheap. Construction standards have changed over time, which means older homes may not be built to code to withstand natural disasters, prioritize electrical safety and protect from the dangers of plumbing failures. The lack of inherent safety in these homes makes the home inspection that much more important.
But I feel we must look at the placement a bit in a different way. Today’s homes have windows that can’t be maintained, floor that can’t be refinished, siding that may not be repaired. When an architectural part wears out it's got rid of and replaced with a brand new one.
The same is going for floor. When the finish on a picket ground is beginning to put on through, the ground will also be sanded and refinished, lengthening it is lifespan to more than 100 years. Compare that with vinyl plank floors which come with a thin wear layer that after worn down the color and pattern have worn off and the ground must be changed. If you’re fortunate sufficient to seek out that same pattern at the store shelves 20 years later you can patch it, but sooner or later, as styles trade, the flooring has become obsolete and wishes wholesale substitute.
Determining the lifespan of things in a newer house is hard, but on an outdated house it’s if truth be told relatively easy. Other than roof coverings and fashionable mechanical such things as home equipment and the HVAC machine…etc. You'll be able to typically expect all of the unique items to closing almost indefinitely. Wood flooring and windows, doors, steel weatherstripping, picket siding, bricks, stucco and other masonry, plaster, trim, none of these things have expiration dates instead of when they are broken by chance or forget.
We encourage you to dig in and change your mindset from looking for no maintenance products (products that can’t be maintained) to a mindset of maintenance. This maintenance mindset saves money, keeps things out of the landfill and is a boon to your home economics.

Create a Maintenance Plan for your old homes
Keep in thoughts this can be that repairs plan no longer a recovery plan. If you've got a porch that has through to the core then there is no point keeping up it until it's restored and in excellent situation. This repairs plan can be best at keeping up things which might be lately in just right working order to keep them in that situation longer they another way would ultimate without the upkeep.
The shoulder seasons will be the busy instances for you in preparation for the summer time solar or the iciness storms. If you spend someday within the spring and one day within the fall you must be capable of knock these items out. Then you get summer and winter off except for minor indoor repairs pieces that shouldn’t take quite a lot of mins, which will help you save money.
Old brick buildings across the country have a tendency to get painted. over the years by owners looking to “improve” their look. Whether it is just a chimney or the whole building that’s been painted, a lot of us want to go back to that original brick look.
Natural Brick or Painted Brick?
So that, how do you strip paint from century old brick? Well, the first thought a lot of folks have is sandblasting old brick. There are countless videos and well-meaning bloggers from USA who will tell you that sandblasting is the answer, but what they won’t show you is what happens after sandblasted brick is exposed to the elements for a few months.
Like other types of masonry, brick is a high-quality cladding that never seems to go out of style. It’s more expensive than steel, vinyl, wood, or composite siding and it’s always in demand. Some of today’s finest homes boast brick cladding, but it’s not hard to find homes with painted brick if you look around. For many, the preference for bare or painted brick is a matter of personal style.
Once painted, brick siding becomes an upkeep factor. Paint is not an everlasting repair—it will have to be repainted when it starts to turn put on. This manner giving up a couple of weeks all through the summer season each and every three to five years to repaint the house. If you’re not ready to tackle the task yourself, expect to pay round $2,500 -$5000 for a professional paint activity.
Brick is porous, but paint is not. Exterior paint bureaucracy a seal over the brick’s surface that may prevent any moisture within the bricks from evaporating and drying out. Trapped moisture, which can come from a leaky window or pipe, is a prime supply of mildew and expansion. What’s extra, moisture within the bricks could cause the paint to unencumber and peel off.
In general, natural brick is more desirable to homeowners than painted brick, but attempting to remove the paint and restore the brick to its original grandeur is labor-intensive and cost-prohibitive. Clearing away the paint requires blasting with sand or silicone beads, which must be done with the greatest caution to avoid damaging the underlying bricks, which is going to have the paint safely removed.
So that, your friends maybe gasp at the idea of painting over your home’s brick exterior, but few will care if you paint a brick fireplace or interior accent wall. It’s more acceptable to paint interior brick, and maintenance isn’t a factor indoors either, since the brick isn’t subject to rain and moisture retention.
Over the years by homeowners looking to “improve” their look. Whether it is only a chimney or the whole building that’s been painted, a lot of us wish to go back to that unique brick glance. So how do you strip paint from century old brick? Well, the first idea a large number of other people have is sandblasting outdated brick.
There are numerous movies and smartly meaning bloggers who will tell you that sandblasting is the answer, however what they gained show you, what occurs after sandblasted brick is uncovered to the weather for a couple of months.
In their most simple shape brick are simply clumps of clay combined with various degrees of shale and sand. Until the mid1800s, most bricks had been formed by means of hand and set out in a brick backyard or in tunnels to dry for a pair-weeks until they were in a position for the kiln.
The kiln was frequently built the usage of just these “green” bricks because the partitions as a way to act as their own kiln. The bricks were cooked at a decrease initial temperature slowly to remove any remaining water and then after they had been dry sufficient, the fires were stoked to convey the temps up to round 1800°F sooner than allowing them to slowly settle down.
Once the bricks had cooled enough, the kiln used to be disassembled and the bricks were looked after. If most effective raw bricks had been used to construct the kiln, the bricks from the outermost partitions had been kept to be burned again within the subsequent kiln. Some bricks that have been closest to the fireplace won a glaze from the sand that fell into the fires and changed into vaporized and deposited on the bricks.
These much less attractive bricks had been used in the interior courses of the partitions. Bricks that turned into critically over-burned and cracked or warped were called clinkers and were used less for structural functions and more for ornamental makes use of like gardens.
This early process of creating bricks ended in much softer and not more constant bricks than what we've got today. Today, the bricks are fired lightly and under managed high temperatures where every brick will get the same amount of warmth resulting in much harder bricks.
Just like how a loaf of bread develops a crust as it is baked in the oven, bricks also develop a protective skin on them from the firing process. That skin keeps them protected from the elements and just like bread, without a crust, they won’t last long without it.
Sandblasting old brick removes paint, yes, but it also removes the outer skin, leaving the brick exposed to the elements and susceptible to an early death. Here are some of the biggest problems sandblasting old brick causes.
Spalling occurs when the brick slowly self-destructs, turning into a powder and falling apart. Spalling can also occur from repointing with a mortar that is too hard which causes the face of the brick to break off exposing the softer interior.
Sandblasting causes this masse as “all the sandblasted brick” is now exposed and weakened. I’ve seen whole walls turned to powder within months of sandblasting depending on the climate.
Old brick and lime mortar are very breathable building materials that are constantly taking in and expelling water through both sides of the wall. If you seal up one side of the wall, then you prevent that natural breathability from happening. Moisture builds up within the brick on the underside of the sealer and minerals are deposited just below the surface of the sealer.
Eventually this build up can cause the exterior 25% or more of the brick to be forced off the wall and fall to the ground. Not only does it damage the structural integrity of the brick, but the appearance of sandblasted brick is destroyed too. Any decorative tuckpointing or tooled mortar joints are blasted away along with the face of the bricks, leaving a uniformly rough scarified surface that doesn’t have the same attractive appearance as the original.
Our goal with this post is to help you think through all the things before you grab that paint brush or roller and go to town transforming your brick. It’s not the same as painting the walls of your house a color and then changing your mind a couple years later.
Should You Paint Brick?
Painting brick is a lot like getting a tattoo. You better feel entirely confident that you want painted brick, and you want it forever because there is usually no going back once you have painted brick. The porousness of brick means that it pulls paints and other coatings deep inside the brick making it extremely difficult to remove.
Rather than the paint sitting on top of the material like metal the paint seeps deep into the clay brick and no amount of scraping or even chemicals can effectively remove all the remnants of the paint. If you’re thinking you’ll just sandblast the paint off when you want to go back to bare brick think again. Sandblasting is possibly the quickest way to completely destroy a brick building. Learn how detrimental sandblasting is to brick here.
The type of bricks used in constructing your house were often chosen with a purpose. Their color and texture were selected to provide the appearance desired by the builder or architect. Before you paint brick think about what that style is and if you really want to cover it forever.
If you’re renovating a 1980s tract home then you may have me on your side about painting some of the brickwork, but if you’re talking about a historic 1860s townhome you and I will certainly have a strongly worded disagreement.
Brick is porous and absorbs some moisture when it is wet. The amount of moisture absorbed varies depending on the quality of the brick and whether the protective fire skin on the outside of the brick is intact. Moisture can come from the air (humidity), from the sky (precipitation), or from the ground (wet soil). Precipitation is a major issue if there are cracks in the brick, open joints, poor roofing or roof drainage, lifted or insufficient flashing, or other venues where water can get into a wall.
But moisture in the ground is also a problem. Wet soil around a foundation allows moisture to wick up through the pores of the brick in a process known as rising damp. The dampness rises up through brick courses until it reaches a point of equilibrium with the dry outside air. The moisture eventually evaporates through the brick’s surface.
As we discussed in the post about strong mortar, moisture is meant to evaporate through soft mortar joints, not through hard masonry. The mortar is sacrificial and can be easily replaced, while it is more costly and difficult to replace damaged bricks or stone.
However, when you paint brick, you paint both the bricks and the mortar. Most types of paint are not vapor permeable, which means they trap moisture within the brick wall. Trapped moisture doesn’t sound too terrible, but in our cold winters, trapped moisture can quickly deteriorate a wall.
During the winter, moisture within a wall can go through several freezing and thawing cycles per day. Ice has greater volume than liquid water, so the ice microscopically breaks apart the brick and mortar. If you repeat this freeze-thaw cycle hundreds of times over the course of a year, the masonry wall will begin to deteriorate.
Also look for mortar deterioration behind the paint. If your mortar joints look eroded and weren’t when your first painted it, you are probably trapping moisture in the wall. If your brick building is painted and you notice blistering paint or other signs of moisture, what do you do now? It is best to repair the source of moisture infiltration to stop moisture from being trapped within the wall.
You can remove the paint, but you should work with a preservation consultant or preservation architect to determine the best method for removing the paint so it does not damage your brick. When done incorrectly, paint removal can cause more damage to a brick wall than leaving the paint intact.
If you really want to paint your brick building, look for a vapor-permeable paint. You want a paint that is a two-way street: it allows some moisture in and out of the brick so that the brick wall can ‘breathe’, so to speak. You don’t want a paint that will seal up the building. You may not have any source of moisture infiltration now, but think to the future; in five years you could end up with a leaky gutter or poor flashing that pours water into your wall every time it rains.
These softer masonry materials were design to breathe and if they can’t breathe you are setting yourself up for a world of hurt. When you use a sealer or paint brick of this age you often trap moisture inside which can lead to efflorescence and eventually spalling which is when the face of the brick is pushed right off the body and the brick quickly disintegrates into powder.
Some people have restored many brick buildings where large chunks of the brick are spalling and the structure is falling apart from applying incompatible paints and coatings to the brick. Everything from masonry sealers to layers of latex or oil paints trapped moisture and the bricks slowly ate themselves up from the inside.
When it is OK to Paint Brick?
We will give you my guidance on the topic, and since this is not only a paint tools blog or company newsletter, and we are not a benevolent dictator. So that, we will leave it to you to heed or ignore my advice. We think there are times when painting brick is just fine to do.
First of all, people paint their brick buildings for aesthetic reasons. Who doesn’t want their house to look unique? After all, paint comes in a thousand colors so everyone can individualize their house. Along the same lines, sometimes people paint their building because they think it’s easier to paint a heavily soiled brick building than it is to clean it.
The same thing happens when buildings are tagged with graffiti, especially buildings that are heavily or frequently tagged. You can’t blame an owner for wanting to take the easiest route, but in the long run it is much more difficult to remove paint than it is to remove soiling or isolated graffiti. Similarly, the contractor may have used a brick that doesn’t match the adjacent brick in color or texture.
Alterations are another big reason for painted brick. An owner may paint their brick building if they construct an addition using a different color of brick or they may paint a portion of a building if a wing was demolished exposing a non-matching brick wall.
Materials also influence whether owners paint their brick or leave it exposed. Very soft, porous brick or historic brick that was underfired in a kiln may need to be painted to protect the brick from further deterioration.
But if the protective fire skin on the outer surface of the brick has been abraded by sandblasting or scarified during stucco removal, the softer inside of the brick is exposed to greater deterioration. Because of this, you often see that painted brick that has a rough texture under the paint.
People also paint their brick buildings when their repairs do not quite match the adjacent brick. Their contractor may have used smaller brick, or they may not have done the repair using brick at all.
Covering Patches
If you’ve had changes to the exterior like a door or window was moved and new bricks were infilled that don’t quite match then I completely understand the urge to repaint. Painting bricks that don’t match is an excellent way to blend things together better and one that I won’t argue with you on.
Forever is a Long Time
If you are comfortable painting your brick and having painted brick until death, do you part then go for it. If there is a small part of you that is uncertain, I would say wait and think on it more before you make such a permanent decision.
Don’t just think about your preferences either. Keep in mind that you may not be the only person to own this house over the next 20, 30, 50 years or more. You are making a decision for all the owners that will come after you and you need to be comfortable with that. Too often we don’t think about those that come after us in society today, but I think this is something that we need more of personally. Think about it long and hard.
What about Maintenance?
Unpainted brick is a virtually maintenance free product. Every 60 years or so you may need to repoint lime mortar here and there, but other than a cleaning every now and then to keep it looking good it requires no additional work.
Painted brick is a whole other story. That paint job will only last you 10-15 years before it needs repainting and that means a lot of prep. Sanding, scraping, and cleaning takes hours of labor and costs a lot of money to do.
For a decent exterior paint job (one that will last at least a decade) you’re looking at around $6,000 to $30,000 depending on the size of your house. Are you willing to pay that costs every 10 years? If you may not want to rethink your painting plans.
How to Paint Brick Step-by-Step: Interior & Exterior
The exterior and interior brick surfaces need to be updated from time to time. You shouldn't be afraid to use paint on bricks. It can be used to complement interior and exterior color schemes, or to hide old, weathered and beaten brick. All you need is the tools and expertise to get the job done.
Step 1: Prepare the Bricks for Painting
Both internal and external bricks should be prepared before painting. For example, if you're painting a brick fireplace, remove everything around the work area, such as fireplace screens and fireplace tools, and use paint tape to cover any areas you don't want to paint on.
Place the drop cloth on the floor and use paint tape to hold it in place. Clean interior tiles with water, mild detergent and a brush. Allow the wall to dry completely before painting.
Outside, remove all window screens, light fixtures, plumbing sockets, appliance covers, blinds, and address numbers/signages, or cover them with paint tape before starting. Cover cars, patio furniture, shrubs, and anything you don't want to splatter paint with a rag.
It's a good idea to cover the ground so you don't paint on sidewalks and grass. Also, consider your neighbor's property when painting.
Remove dirt, debris and mold from garden hoses with water, or pressure wash with water and a mild detergent. Using a pressure washer is the most effective cleaning method because it blows dirt and debris out of tiny cracks and pores in the brick. NOTE: Use a lower setting when pressure washing to avoid corrosion or damage to the brick.
For stubborn mold, use bleach and a water solution when washing walls. Let everything dry completely before continuing.
Look for any substantial cracks in the surface. Small cracks can be painted, but any larger cracks will need to be repaired before painting. Fill cracks with paintable acrylic latex caulk suitable for outdoor use. Let the caulk set and dry before painting.
Use hydrochloric acid to remove weathered salt deposits that may have formed on the brick surface. Follow the manufacturer's instructions on how to prepare the acid and aqueous solutions.
Wet the walls with water from a garden hose before applying the hydrochloric acid to the walls and scrubbing them with a stiff brush. Let the acid work in the brick for about 10 to 20 minutes, then rinse the surface with water.
Step 2: Choose the right paint
For interior tiles, first prime the surface with a primer/sealer. After drying, skip the primer. When painting exterior surfaces, it is recommended that you use latex paint, which is more durable than oil-based paint on exterior surfaces.
After choosing a paint color, you need to know how much paint to buy. When estimating, a good rule of thumb is to multiply the length of each surface by its height, then increase it by 30% to get a good measurement. Typically, a gallon of paint will cover 400 square feet.
Step 3: Primer and Paint
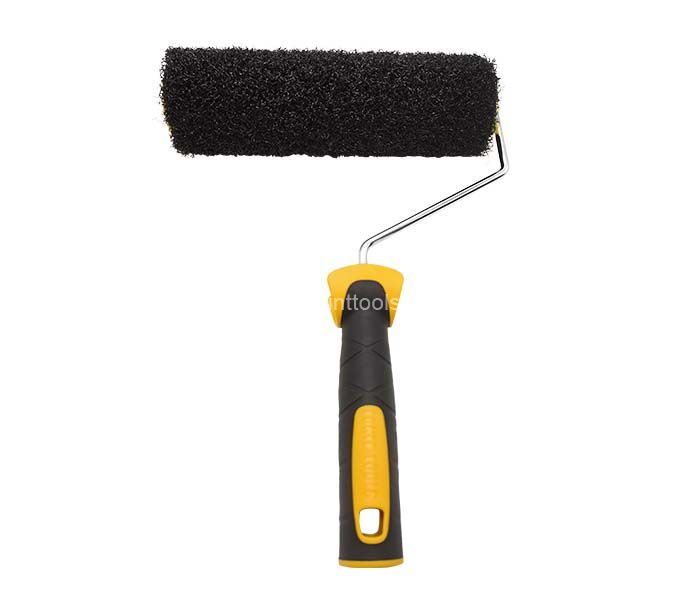
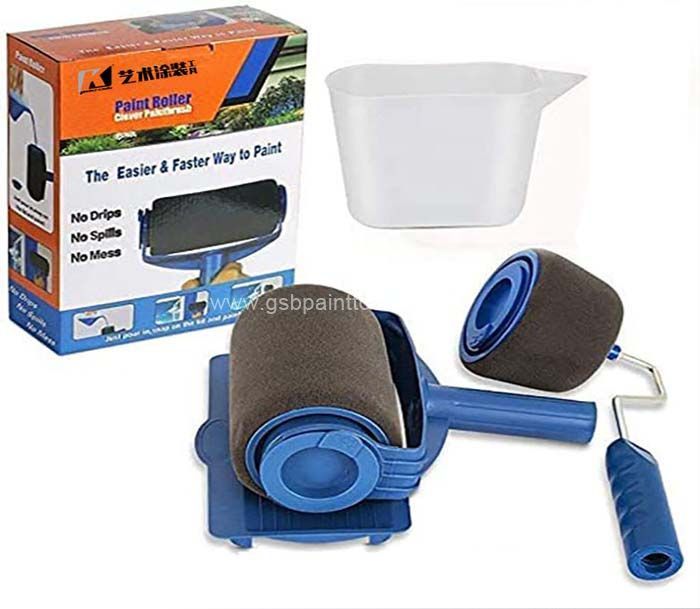
Paint rollers are excellent interior and exterior primer and paint tools, especially when working on brick walls or fireplaces that are difficult to fully cover. While almost any roller cover will work on smooth walls, textured surfaces like brick require a roller cover that is at least 1 inch thick.
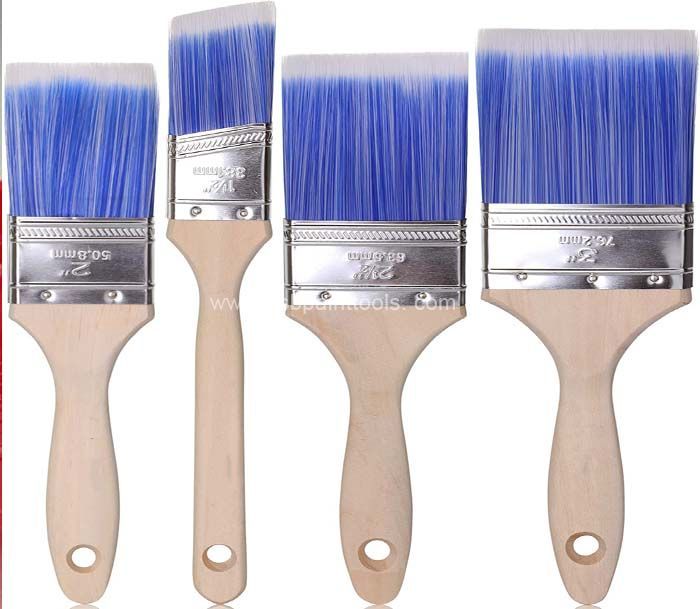
For brushstrokes, use a professional-grade brush with a wooden handle and synthetic bristles. These provide the best results when using latex paint.
Pour primer into paint tray and apply to roller. Follow the top-down rule - work from top to bottom for the most even coverage. Use the brush to cut and cut into hard-to-reach areas for the roller. Allow the primer to dry completely before starting to paint.
When it's time to paint, pour the paint into the paint pan and apply it to the roller. Again, follow the top-down rule. Use a brush where you can't use a roller. When done, roll the roller over the painted surface for even coverage. Use two layers for best results.
Step 4: Clean Up
Thoroughly rinse the drum cover and scrub in water until it is clean. Squeeze them to remove excess moisture and store them in a plastic bag. Take the drop cloth and pull off any painter's tape at a 45-degree angle to avoid removing any paint. Finally, your brick surface is fresh.
Painting your brick home is a great way to get a fresh, clean look and add some instant curb appeal. This is a step-by-step process. Below are the painting tools needed to successfully complete this project.
Paint Tools
Drop Cloths & Sheeting
When painting, it’s important to use both quality paint and tools like paint brushes, paint rollers, paint edgers and sponges for paint. Whether you’re painting cabinets and doors, walls or furniture, we’ve got the best paint brushes for every job.
When it comes to painting rooms, your best bet is a paint kit. These kits contain everything you need to do the job well including brushes, a plastic tray and tray liners. A good paint brush set will include a variety of brush sizes (including angled brushes) so you can paint both large surfaces as well as smaller details like trim. Looking to achieve a textured look? Check out our selection of texturing paint rollers.
Painters tape is a must-have for clean and sharp lines along ceilings, trim or wherever you prefer paint not to spill over. At G.SB's, we offer painters tape in various widths and for specific uses and surfaces.
Refine your search to select the right tape for your project needs. For instance, if you’re working in a hot and sunny location, use UV-resistant tape to prevent the tape from baking onto the surface. You can also find products for specific surfaces, like concrete and masonry, as well as white painters tape for labeling - once your paint has dried and it’s time to remove the tape, pull gently and steadily to avoid lifting paint from the newly finished surface.
Looking for a wall paint sprayer to tackle the big task of painting your home? We understand that for some do-it-yourself paint jobs, a paint brush just won’t cut it. If you’re working on a big job — like painting all of your walls, your kitchen cabinets or the exterior of your home — you might want to look into paint sprayers at G.SB’s.
A spray gun will cut the time of your project significantly while providing a clean, professional finish. To get a fine finish on cabinets and trim, a sprayer is going to be your best option. Painting your car? A high-volume, low-pressure (HVLP) sprayer gun, which uses a high volume of air at low pressure, is ideal. Most paint sprayers come with easily adjustable spray-pattern options — like horizontal, vertical, wide and narrow — to suit the type of job you’re working on.
Materials
Caulk