Extension Pole Compatibility Guide for Different Roller Handles
Choosing the correct extension pole for a paint roller handle requires more than matching the visible thread. In this Extension Pole Compatibility Guide for Different Roller Handles, we explain how to identify the connection type, measure the interface, verify load capacity, and test the assembled tool before use. Whether you are a first-time decorator, a professional contractor, or a purchasing manager comparing paint roller handle manufacturers, the safest approach is to check the roller frame socket, pole tip, thread profile, locking mechanism, and working load in sequence. G.SB supports this process with precision-controlled components, dimensional inspection to 0.01 mm on critical parts, and documented quality procedures suitable for international trade buyers.
Why Extension Pole Compatibility Matters
A roller extension pole transfers force from the user’s hands to the roller frame. If the connection is loose, the roller may wobble, detach, or leave uneven coverage. An incorrect interface can also damage the handle socket or strip the pole thread.
Compatibility affects:
- Safety: A secure connection reduces the risk of falling tools and accidental impact.
- Finish quality: A rigid connection supports consistent pressure and uniform paint distribution.
- Product life: Correct thread engagement prevents premature wear.
- Productivity: A suitable pole reduces ladder movement and operator fatigue.
- Purchasing accuracy: Importers can avoid costly returns caused by incompatible roller frames.
As a professional paint roller frame manufacturer, G.SB evaluates the complete connection system rather than treating the pole and roller handle as unrelated products. This systems-based approach is particularly valuable when supplying private-label painting tools, contractor kits, and hardware-store assortments.
Identify the Roller Handle Connection Type
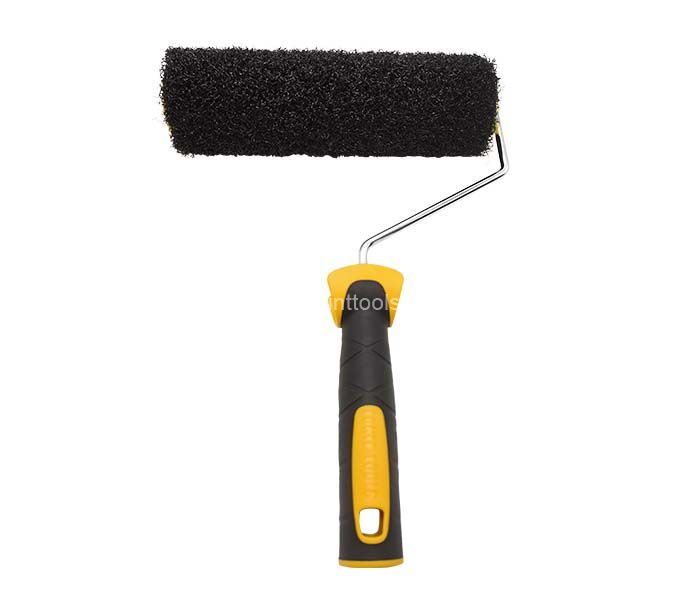
Before purchasing an extension pole, inspect the roller frame or handle socket. Do not rely only on brand names or photographs because similar-looking handles may use different coupling systems.
Common connection systems
| Connection type | Typical design | Compatibility indication | Main consideration |
|---|---|---|---|
| Female threaded socket | Threaded opening in the roller handle | Accepts a male-threaded pole tip | Confirm thread diameter and pitch |
| Universal ACME-style thread | Coarse, widely used pole connection | Often compatible with standard extension poles | Check actual fit because “universal” is not always identical |
| Quick-connect system | Button, collar, or locking pin | Requires a matching proprietary pole tip | Fast assembly but limited interchangeability |
| Taper-fit socket | Conical opening with friction fit | Pole tip slides into the handle | Verify taper angle and locking security |
| Multi-purpose threaded adapter | Removable insert or adapter | May accept several tool types | Confirm adapter length and load rating |
Most professional roller frames use a threaded connection, but the thread may vary in diameter, pitch, depth, or profile. A pole that begins to screw in but stops after one or two turns is not necessarily compatible.
Check the handle construction
Look for the following features:
- Internal metal threads or molded plastic threads
- A locking collar
- A spring-loaded button
- A hexagonal or D-shaped socket
- A removable adapter
- Visible damage, cross-threading, or deformation
A professional roller handle with a reinforced threaded socket is normally better suited to repeated extension-pole use than a lightweight disposable frame. G.SB roller frames can be specified with different socket materials and reinforcement levels for retail, professional, and industrial applications.
Measure the Interface Before Ordering
Once the connection type is identified, measure the critical dimensions. A digital caliper is the most useful tool for this stage.
Recommended measurement sequence
- Measure the internal socket diameter of the roller handle.
- Measure the outside diameter of the pole’s male tip.
- Check thread pitch by counting the distance between thread peaks.
- Measure usable thread depth inside the handle.
- Record the number of full engaged turns during a trial fit.
- Check the shoulder diameter to ensure the pole seats correctly.
- Inspect axial play after the components are connected.
For export procurement, we recommend recording measurements in millimeters and documenting tolerances. Critical mating dimensions should be verified to 0.01 mm where the design requires close control. However, dimensional precision alone does not guarantee compatibility; thread form, engagement length, material strength, and shoulder geometry are equally important.
A suitable threaded connection should engage smoothly without excessive force. It should not wobble under moderate hand pressure, and the roller frame should sit squarely against the pole shoulder.
Match the Pole Tip to the Roller Frame
After measuring the handle, compare it with the pole specification sheet. A reliable paint roller frame manufacturer or extension-pole supplier should provide connection drawings instead of using vague descriptions such as “fits most handles.”
Review these technical specifications
- Pole-tip thread diameter
- Thread pitch and profile
- Effective engagement length
- Adapter material
- Pole shaft diameter
- Maximum recommended working load
- Locking or anti-rotation feature
- Corrosion-resistant finish
- Compatibility with wet or solvent-based coatings
For general interior painting, a standard threaded pole may be sufficient. For ceilings, exterior façades, textured coatings, or high-build materials, choose a rigid pole with a reinforced tip and reduced flex.
G.SB can help buyers configure roller frames with compatible threaded sockets, adapter inserts, and anti-loosening features. For large-volume orders, we recommend approving a physical sample before mass production.
Follow a Practical Compatibility Test
A short fitting test can prevent a large purchasing error. We use the following five-stage process when assessing roller handle and extension pole combinations.
Stage 1: Visual inspection
Check that both components are clean and free from burrs, paint buildup, dents, and damaged threads. Even a small burr can cause cross-threading.
Stage 2: Hand engagement
Insert the pole tip into the roller handle and rotate it by hand. The parts should start smoothly without forcing or rocking.
Stage 3: Full-thread engagement
Tighten the connection until the handle shoulder contacts the pole seat. Avoid relying on a single or partial thread. A short engagement length may fail when the roller is loaded with paint.
Stage 4: Load and rotation test
Hold the pole horizontally and apply moderate downward and lateral pressure. Rotate the handle through a full working range. The connection should remain stable without clicking, slipping, or loosening.
Stage 5: Working simulation
Attach a loaded roller cover and test the tool on a scrap wall or test panel. Observe:
- Roller alignment
- Handle vibration
- Pole flex
- Thread loosening
- Paint coverage consistency
- Operator comfort
For production validation, G.SB recommends recording at least 10 repeated assembly and removal cycles for standard products and increasing the cycle count for professional-grade programs.
Select the Correct Pole Length and Rigidity
Compatibility is not only about the tip. The pole must also match the application.
| Application | Typical useful length | Recommended pole characteristics |
|---|---|---|
| Interior walls | 0.6–1.2 m | Lightweight, moderate rigidity |
| Standard ceilings | 1.2–2.4 m | Rigid shaft, secure threaded tip |
| Stairwells and high walls | 1.8–3.6 m | Telescopic sections with reliable locking |
| Exterior façades | 2.4–6.0 m | Reinforced shaft and low flex |
| Industrial or high-build coatings | Application-dependent | High-load connection and chemical-resistant materials |
A long pole increases leverage on the roller handle. Therefore, a connection that feels secure at 1 meter may loosen when used at 4 meters. This is why a reputable paint roller frame manufacturer should validate roller frames under realistic leverage conditions, not only through static hand fitting.
Telescopic poles should also be checked for section locking. Twist-lock systems need sufficient clamping force, while button-lock systems require accurate hole alignment and spring retention. Never exceed the supplier’s recommended extension length.
Consider Materials, Coatings, and Cleaning Chemicals
The roller frame, pole adapter, and threaded insert may be manufactured from steel, stainless steel, aluminum alloy, reinforced nylon, or other engineering plastics.
Material selection guidance
- Carbon steel: Strong and economical, but requires effective corrosion protection.
- Stainless steel: Suitable for humid environments and frequent cleaning.
- Aluminum alloy: Lightweight and useful for long poles, although thread areas may require reinforcement.
- Glass-filled nylon: Lightweight and corrosion-resistant, but must be matched to the expected torque and temperature.
- Zinc-plated or powder-coated components: Appropriate when coating adhesion and corrosion resistance are properly controlled.
For coated metal parts, buyers may request salt-spray evaluation in accordance with ASTM B117. For the quality management system, G.SB follows documented procedures aligned with ISO 9001 principles, including incoming inspection, in-process checks, final inspection, and traceability.
These standards do not replace a product-specific compatibility test. They provide a controlled quality framework, while the actual roller-and-pole interface must still be verified through dimensional and functional testing.
Avoid Common Compatibility Problems
Several issues appear repeatedly in field use and international purchasing.
The pole screws in but remains loose
Possible causes include:
- Different thread pitch
- Worn plastic socket
- Insufficient engagement depth
- Oversized pole tip
- Missing shoulder contact
The solution is to stop using the assembly, measure both parts, and confirm the thread profile. Do not compensate for a loose fit with tape, glue, or excessive tightening.
The connection jams during assembly
This usually indicates cross-threading, burrs, contamination, or a mismatched thread. Remove the pole, clean both interfaces, and inspect the first thread carefully. If the parts still do not engage smoothly by hand, they should not be forced together.
The roller frame rotates during use
An ordinary threaded connection may loosen under repeated rotational movement. Select a roller handle with an anti-rotation shoulder, locking collar, hex feature, or improved thread engagement. A paint roller frame manufacturer can also modify the socket design for high-torque applications.
The pole bends excessively
Excessive flex may result from a shaft that is too long, too thin, or overloaded by a heavy roller and thick coating. Use a shorter extension, a larger-diameter shaft, or a reinforced professional pole.
Quick-connect parts do not lock
Inspect the button, collar, and receiving hole. Paint residue can prevent full engagement. If the locking mechanism still has movement after cleaning, replace the damaged component rather than relying on friction.
Use a Simple Buyer’s Inspection Toolkit
Whether you are a contractor or a sourcing manager, a compact inspection kit improves decision-making.
Useful tools include:
- Digital caliper with 0.01 mm resolution
- Thread pitch gauge
- Steel ruler
- Torque screwdriver or low-range torque wrench
- Sample roller covers
- Clean test panel
- Inspection checklist
- Camera for recording fit and defects
- Material and coating certificates from the supplier
For factory orders, request a first-article inspection report. It should include dimensional results, visual inspection, assembly testing, and packaging verification. G.SB provides technical communication and quotation support, with a target response time of 24 hours for standard product inquiries.
Practical Case Results from Field Testing
In one contractor application, a ceiling-painting team experienced repeated roller loosening after replacing a standard short pole with a 3-meter telescopic pole. The original frame had only shallow thread engagement. After switching to a reinforced frame socket with a longer engagement zone and improved shoulder seating, the team completed repeated ceiling passes without visible wobble or mid-task retightening.
In another private-label program, an importer received roller frames from two paint roller handle manufacturers that appeared interchangeable. Dimensional inspection showed a small difference in thread pitch. The buyer approved physical samples from G.SB, completed 10 assembly cycles per sample, and rejected the incompatible combination before mass production. This prevented a large batch of returned tools and reduced the risk of negative distributor feedback.
These examples demonstrate why a qualified paint roller frame manufacturer should provide measurable interface data, samples, and functional verification rather than relying on the phrase “universal fit.”
How G.SB Supports Reliable Compatibility
G.SB works with distributors, contractors, and private-label buyers who need consistent roller frame and extension pole performance.
Our recommended supply process is:
- Share the existing roller handle or pole drawing.
- Confirm thread, socket, shoulder, and locking dimensions.
- Select the appropriate frame material and reinforcement.
- Produce a sample or pre-production unit.
- Complete dimensional and functional inspection.
- Approve packaging, labeling, and carton specifications.
- Proceed with controlled mass production.
As an experienced paint roller frame manufacturer, G.SB can support custom socket geometry, handle length, frame wire configuration, surface finish, branding, and packaging requirements. Quality records can include inspection data, batch identification, and agreed acceptance criteria.
Final Compatibility Checklist
Before using or ordering an extension pole and roller handle, confirm the following:
- [ ] The connection type has been identified.
- [ ] Thread diameter and pitch have been measured.
- [ ] The pole tip reaches the required engagement depth.
- [ ] The handle seats squarely against the shoulder.
- [ ] There is no excessive rotational or axial play.
- [ ] The pole length matches the application.
- [ ] The shaft rigidity matches the roller load.
- [ ] Locking mechanisms operate fully.
- [ ] Materials and coatings suit the working environment.
- [ ] A loaded-roller test has been completed.
- [ ] Supplier inspection documents are available.
- [ ] Samples have been approved before bulk production.
The most reliable solution is to treat compatibility as a measurable engineering requirement. Identify the connection, verify the dimensions, test the assembled tool, and select a supplier that documents quality. With G.SB’s precision inspection, structured validation, and support from an experienced paint roller frame manufacturer, users can reduce tool failures, improve coating consistency, and confidently match different roller handles with the correct extension pole.
 Previous: None