2022 Top Tips: How to use Paint Sprayer for Beginners

House Painting: Brushing vs House Paint Sprayer
Maintaining the paint in your domestic is an essential section of preserving the look and universal exceptional of your home. Damage to your paint can show up without problems from falling objects, shifting your furniture, or simply typical accidents, or beautiful simple wall paintings (I like paint sprayer for walls), especially if you have kids.
Dust Your Walls--one of the easiest ways to maintain the quality of the walls in your home is to handle the dust and dirt that might accumulate. To reach troublesome areas, you might have to move the furniture and pictures out of the way. Also, this should be a task you’ll do every six to eight weeks, depending on how bad they get through that time.
It might not seem like dusting your walls is all that important, but the walls will accumulate dust just like any other surface in your house, and will only accumulate faster in the areas that are not cleaned as often. Easy way to dust your walls is by using a microfiber cloth or something like a Swiffer wand so you can reach the trouble areas. If you regularly dust your walls during your usual cleaning routine, you’ll likely be able to keep your walls looking nice for a longer period of time.
Before cleaning your wall, you want to make sure that the paint won’t come off during the cleaning process, which would require you to repaint the wall to cover the damage. A way you can test this is by taking the soap you had created and washing an area that you wouldn’t immediately notice, like in the corner. If the paint comes off when you wash this area, it’ll cause more damage than anything.
However, if the paint doesn’t come off when you wash the area, then you may proceed with the rest of the wall. It’s important to keep an eye on it in case something changes and the paint starts coming off. High traffic areas, like the walls near the front door, the wall where you keep your shoes, the hallways, etc., will be the most important to maintain because they endure the most abuse out of all the walls in your home. Also, keep in mind the areas where your furniture is moved a lot.
Does your couch rub against the wall and take the paint off? Are the kids kicking their shoes off when they arrive home, which will end up scuffing the wall? Identify these high traffic areas and ensure that the paint in these is maintained and cleaned on a near regular basis. Doing so gives you a nice and clean interior.

Areas to Spray or Brush
There are two major areas on a home that can be either sprayed or hand brushed. One of those areas is the siding. Other areas such as gutters, downspouts, porch ceilings, and shutters can also be sprayed. The one surface that is almost never debated is brick. Exterior brick homes are always sprayed. Just as a side note, gray homes with white trim a new trend that looks amazing!
Typically, the trim and doors are hand-brushed. However, brushing siding is a costly task. Hand brushing typically will take upwards of 2 coats of paint for full coverage and so you should expect a long project timeline. Major advantage of hand brushing is the ability to push the paint into cracks where caulking is not used.
Lap siding is commonly recommended for a hand brushed job. Hand brushing helps preserve the siding by pushing paint into every lap and it will seal the edge of each board where tends to swell and expand due to water damages. Spraying the siding will be cheaper and the project will be completed faster. It takes longer to set up to spray and there will be a lot more paint used for the project too.
When you use HLVP paint gun or best professional airless paint sprayer to be spraying usually only requires one coat and you will get a smooth finish free of brush strokes and roller marks. Spraying can also override some surface imperfections like cracks, bumps, and gaps that brushes or rollers have a problem with.
Spraying is a plenty higher software if you are altering the color of your home. Spraying covers higher and the software is greater uniform. Spraying has no brush strokes and affords an extra-long lasting satin end that appears a whole lot nicer.
Hand brushing a new shade might also no longer provide you the complete, even insurance you are searching for. A spray gun will provide you full coverage and a greater even coating for your new paint color. Spraying is extra versatile and can be used on many exclusive surfaces with an even end and no brush strokes.
When deciding whether to spray or brush, there are a few factors to take into account. If your project is small, it may be easier to have your house hand brushed. For a small house, if you pick spraying, you may end up spending more money on the preparation and clean up rather than painting.
If you have a tight timeline, spraying may be the better option because it is faster than traditional brushing and requires a lot less time. Consider the type of finish you want when your house is finished being painted. Brushes will, in most cases, leave some form of brush lines. Spraying will leave a smooth finish.
Paint-spraying will be much less costly, with extra coaching involved. Hand brushing will be greater highly-priced due to the fact it is greater labor-intensive. Keep in thought that it is necessary to pick out a satisfactory paint product no be counted which choice you pick. A fine product will final longer in the lengthy run and have a cleaner searching end whether or not you spray or brush.

Choose a Paint Sprayer for Your Project
There are three frequent sorts of paint sprayers: airless sprayers, High Volume Low Pressure (HVLP) sprayers and pneumatic sprayers.
Airless paint sprayers are used through professional learners and experts for massive surfaces such as indoors partitions and residence siding. This kind of sprayer makes use of pressurized pressure to supply a massive quantity of paint quickly. An airless sprayer can supply paint at a charge of a 1/2 gallon to two gallons a minute. Choose an airless sprayer if the usage of a paint sprayer does no longer require an awful lot precision work to whole a huge job.
The HVLP paint sprayer is appropriate for certain purposes that require accuracy and an easy finish. These sorts of paint sprayers use air glide and paint extent controls for speedy and even paint delivery. The output of paint coming from HVLP paint sprayers can cowl giant surfaces quickly. It is additionally positive for touch-up work. Choose a standing or a lightweight, stationary mannequin of an HVLP sprayer to keep away from arm fatigue.
Pneumatic paint sprayers use compressed air and can follow an increased extent of paint than airless and HVLP sprayers. They are used for precision utility of paint in precise business and industrial work such as motor automobile physique parts.
Practice with the paint sprayer before the project to get comfortable with how it works, especially if you’re a novice at using one.
Fill the sprayer’s reservoir with paint and spray a large scrap of cardboard propped up on a wall. Scraps of drywall also work fine to practice on. Take your time learning how to use a paint sprayer and have several pieces of scrap material on hand. Try various vertical and horizontal spraying movements to get a consistent pattern of paint onto the surface of the scrap material. You want to achieve a uniform look to the surface when using a paint sprayer.
Holding the spray gun close to a surface applies more paint and creates a narrower spray pattern. Practice holding the spray gun closer to the surface for that result. Holding the gun farther away from the surface creates a thinner coat of paint and a wider spray pattern. Work on how to use a paint sprayer to create that result as well.
An if you hold the sprayer too far away, the paint can dry before it reaches the surface. If that happens you might need to respray the surface and take even more time to complete the project, and your paint supply will deplete faster.
Paint Sprayer Beginner's Guide step by step
Using a spray gun can supply you a clean as silk floor finish. It's best for doing fake metallic or even simply portray a straight coloration really fast. It can be a bit intimidating as a beginner. When I used to be first beginning out, I could not locate any on line sources that addressed all factors of spraying.
So, this tutorial will stroll you through: the components of a gun, mixing paint for the gun, how to exact maintain your gun whilst spraying, bother shooting, cleansing your gun, and safety. Don't get overwhelmed; there may be a lot of information. But, with a bit of luck through the end, spraying will experience a lot much less scary.
Step One: The Gun
This particular type of gun is called a gravity feed or cup gun. It means the paint cup is above the gun and gravity allows the paint to go into the gun. There are a few different types of guns, but this type is my favorite.
The illustration of the gun is not a gravity feed gun, nor does it have an air knob. It's important to familiarize yourself with all parts of the gun. The most important are the air cap, fluid tip, fluid needle, fluid knob, air pressure knob, and some guns have a fan knob.
Step Two: About air
The gun we are the usage of desires to be connected to an air hose which is connected to an air compressor. Air pressure, additionally regarded as PSI (pounds per rectangular inch of pressure), can fluctuate relying on the gun and fabric being used. Make positive to study the paint can and gun guidelines to see what the encouraged PSI is.
Usually, water primarily based paints want much less air than lacquer or enamel paints. The common vary used is 35-85 PSI. You can set the PSI on your compressor or with an air regulator that can be connected to your gun or air hose.
Step Three: Fluid and Material
All paints need to be thinned down to be able to make its way through the paint sprayer. Thin the paint with whatever material the paint can says to use to clean up (e.g latex/acrylic thin with water, laquer w/ laquer thinner, automotive acetone based with acetone…etc.)
The good way to test consistency: Dip a stir stick in the paint then hold it up. If you see 3 drips of painting come off the stick, you're usually good to go. Too diluted and the paint will run, not diluted enough and it will spray out speckles of paint.
Step Four: Fan and Pattern
Sometimes the fan is referred to as a spreader, but most people call it a fan. The fan determines the width of the spray. Set the gun to a wide fan for larger pieces to be sprayed and smaller fan for smaller pieces. If you use a wide fan for a small piece, you'll have a lot of over spray which wastes paint and money.
Likewise, if you use a small fan for a large piece, it will take a lot longer because you'll have to do more passes with the gun and there's a greater chance of spraying unevenly. When you change the fan, you need to change the amount of fluid that comes out and PSI too.
Step Five: Setting Up
Now that you know what the consistency of the paint should be, you are ready to pour it into the paint sprayer gun.
Note: always use a paint strainer to pour the paint into the paint sprayer gun.
Even if your paint looks clean and smooth, it probably has a booger or two that the strainer will catch. If you don't strain, the boogers (boogers being clumps of dried paint, dirt, whatever else falls into the paint) will clog your gun.
Remember: a clogged gun is no fun! You can buy cone shaped paint strainers at just about any major hardware store. If you can't find any strainers, fold up some cheese cloth and use that instead.
Place your paint sprayer gun in the gun holder, so you can pour your paint in and fill the cup 1/2-3/4 full. Don't fill it to the top because it will definitely splash out; the gun will be heavier and your arm will get tired faster. Place the lid on and make sure it's tight, you don't want paint dripping out from under the lid and ruin your work.
Turn your compressor on. Attach a coupler to the plug you added to the gun. I recommend a quick connect to the end of your air hose. This will make a HUGE difference. It allows you to easily and quickly connect/disconnect your gun from your air hose.
You can also attach one to the other end of the air hose to make connecting to the compressor easy too. Set in the compressor to the proper PSI. Make sure there are no air leaks from the hose or the gun. If there is, see the Troubleshooting page.
Step Six: Safety
No matter what type of paint you are using, it's important to protect your health while doing so. Always read the paint can and/or Material Safety Data Sheet (MDS) and follow their safety instructions. You are spraying paint particles into the air and they can easily get in your lungs, on your skin, or even in your eyes. Don't be a tough guy, where safety gear! Your future self will thank you.
To be the safest, wear: organic vapor cartridges, protective clothing to cover arms & legs, nitrile gloves, safety glasses and wear a respirator. Also, it is important to work in a well-ventilated area no matter what material you are using.
Step Seven: Testing Before Spraying and Time to Spray
You continually favor to do a check spray on a piece of paper/cardboard/wood so you can regulate your air, fluid, or fan knobs. Also, this offers you the probability to make certain your paint used to be blended suitable earlier than you soar proper into your project. Additionally, you can take a look at the spray sample to make certain it is coming out even.
When you are happy with the quality of spray during your testing, it's time to SPRAY for real! You want to hold the gun about 5-10" away from the surface you're spraying (that's about a fist or spread out hand's distance). Please hold the gun perfectly perpendicular to the surface. If it's tilted, you'll get uneven coverage.
With the fan oriented vertically, you'll start at the top and work your way down in rows. Point the tip of the gun at the edge of the surface. You'll have a bit of over spray, but this will give the edge the same amount of coverage as the rest.
Working left to right, you'll pull the trigger and move your hand and arm left to right (like a typewriter, NOT like an oscillating fan). Don't keep your arm in one place and just move/tilt your hand ; this will cause uneven coverage. You want to keep your arm and hand perpendicular to the surface at all times.
At the cease of the row, slightly launch the trigger, however solely adequate to cease the material, no longer the air. Move down to the subsequent row and repeat proper to left. Always factor the tip of the gun at the backside of the remaining row. It’s will take a lot of exercise to get even rows. If it is too dry between rows, purpose your gun nearer to the preceding row to stop any gaps.
Step Eight: Top tips
Before use paint sprayer starting to spray your piece, always pull the trigger away from the piece's surface first. This will prevent any dried-up boogers on the nozzle from getting on your piece.
When you reach the end of a row or column, lightly release the trigger just enough to stop the fluid from coming out when you move your hand down to the next row or over to the next column. This helps keep the edges from getting unevenly heavy with material.
Keep your finger down on the trigger just enough so the air is always coming out; even when you aren't releasing paint. This will maintain your air pressure at the same consistency. When you release the trigger completely, shutting off the air, this could cause air pressure fluctuation and allows time for the paint to dry on the tip.
Always spray with the lowest air and fluid pressures possible while maintaining finish quality. When if your first layer is sprayed in rows (side to side), and then spray the second layer in columns (down to up) and vises versa. This will help get complete coverage.
Step Nine: Clean up
Cleaning your gun is a bit of a pain, but definitely necessary! Remove the needle, air cap, fluid cap, and paint cup. The fluid cap is usually difficult to remove and requires a wrench. An adjustable wrench works fine on some guns, but they do make spray gun wrenches that have standard hexagonal shapes to make it easier and prevent slipping.
You'll want to clean all of the gun parts individually. You will figure out what works best for you. Make sure all paint is removed from inside the gun, the air holes, needle, cup, etc. Before reassemble, squirt a small amount of lubricating oil on all the threads to maintain the integrity of the threads. Reassemble paint sprayer gun.
To make certain the gun is one hundred percent easy inside, reattach it the air hose, fill the cup with a little bit of the fabric you used for cleaning, and spray air thru the gun. This will assist push out any clumps you may also have overlooked whilst cleaning.
Step Ten: After Learning the Basics...
After you learn the basics of spraying, then you can dive deeper into the more complex parts of spraying. There is so much more information out there about types of guns, fluid tip sizes, air hose length/sizes, ventilation systems, building a spray booth, regulators, pressure loss, CFM, temperature, humidity levels, etc.
Airless sprayers pump paint from a container through a hose directly to a spray gun, creating paint spray without using any compressed air.They accommodate a variety of paint products from thick latex paints to thin stains and are considered to be the fastest type of paint sprayers. They can also spray most coatings depending on the tip size and pump horsepower.
Airless pumps are ideal for multiple large projects a year or people paid to paint. Jobs like the full exterior of a large house or the interior of a new build are ideally suited for the speed and size of airless pumps. The sprayers require little setup and cleaning time and produce a professional-looking result even on surfaces that are hard to paint using a traditional brush.
Holding the gun closer applies more paint to the surface and creates a narrow spray pattern while holding the gun farther away results in a thinner coat and a wider spray pattern. But be careful not to hold the sprayer too far away or the paint can dry before reaching the wall, which creates more overspray and loss of material.
Test the sprayer on a large piece of cardboard or other scrap material, adjusting the sprayer and your technique as needed to achieve a uniform spray pattern.
To prevent paint buildup, start your stroke before you pull the trigger and then continue the stroke after releasing the trigger. Careful observe how the paint lands on your project when you first start spraying, then speed up or slow down to get consistent, even coverage.
Spray straight at the surface. Avoid swinging your arm back and forth. Move your arm, not your wrist, keeping the gun straight and at right angles to prevent arcing, which causes an uneven coating. Regularly wipe the tip of your paint sprayer to prevent paint from dying and disrupting the spray pattern.
Clean the unit thoroughly following manufacturer’s instructions once your project is completed. Not store paint in your paint sprayer for an extended period of time. For projects with unusual challenges, or if you simply want a different paint finish than that produced by a standard paint sprayer, you may need to use a specialty sprayer.
Choose from handheld paint sprayers or paint sprayers that use stands, carts or are cordless. Each type allows you to rest your arms during long painting jobs or provides more flexibility as you paint.
Texture paint sprayers are designed to apply interior wall and ceiling textures such as orange peel, popcorn, splatter and knockdown.
Line striping machines align the paint sprayer on rollers with a handle so that you can easily roll the device along the ground to paint stripes.
No remember what kind of paint sprayer you use, training is key. Make positive to set up drop cloths and desirable tape off the region you are going to spray, put on coveralls and historical garments you do not thinking getting paint on and take the crucial protection precautions by using carrying a full-face respirator or mask.

Paint Sprayer Basics to Know Before You Buy
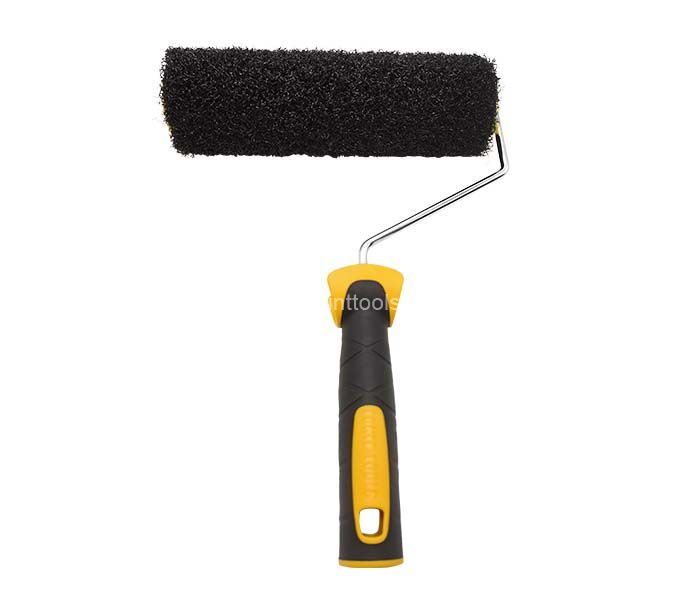
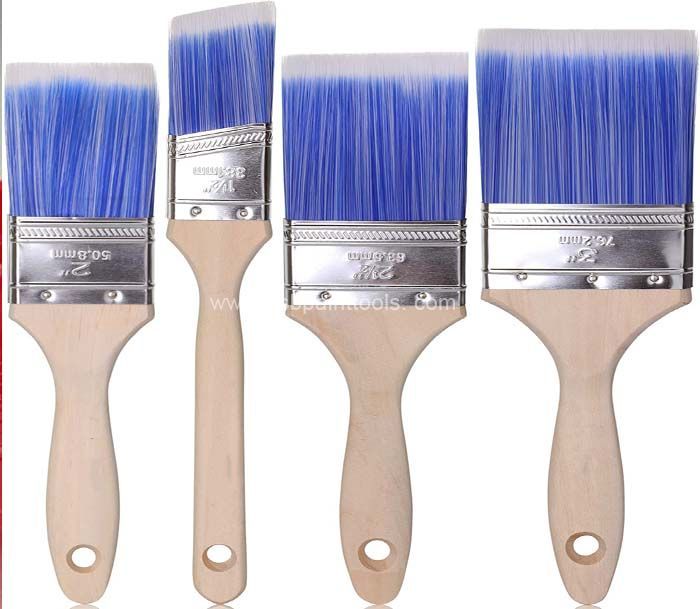
If you have ever painted a house, you know how much fun it is to wield a paint roller or brush for hours on end. Paint rollers have their strong points: They lay down a thick coat of paint fairly quickly and the roller covers are easy to change out. Paintbrushes are great for small, detailed work and they can be cleaned and reused nearly endlessly.
But rollers are a chore to reload with paint, and brushes are very slow. The natural solution seems to be to use a paint sprayer. Pulling the trigger and laying down a wide mist of paint, while better than rollers and brushes in many ways, does have its drawbacks.

(Best HVLP Sprayer)
Best HVLP Sprayer: K brand Trolley type electric HVLP spray gun
The benefits of HVLP sprayers are that they can atomize paint faster, more accurately, and at a lower pressure than traditional paint guns, creating a softer, more even spray—so you can cover larger areas faster without as many touchups. Plus, the lower pressure also minimizes air pollution.
1600W of power with 800ml high-capacity container. Strong control, Precise control of paint flow, length and shape, creating the smooth and superior finish. It will be your best electric paint sprayer for tables, chairs, fences, interior walls and crafts. It is also the best choice of DIY users and paint worker.
This machine uses the principle of low pressure and high flow spraying, which presents a good performance on the coating and increases the mechanical bite of the coating and the wall. Against the traditional roller coating, better solve the problem of coating bubbles, coating scars, etc...
Coating utilization rate of 80% or more, as opposed to traditional pneumatic spraying have more saving raw materials. The coating rebound is less, which greatly improves the working conditions and is more conducive to the health of the construction personnel.
Easy to use, less working noise. Fast loading, quick dismantling and fast washing. Lightweight and stable tie rod support plus base rollers, portable and easy to carry to the construction site. What We Like: Great for detailed-oriented projects; Reduces overspray and waste; Spray tip resists corrosion and wear; Easy to use.
1600W HVLP paint sprayer is a popular option, since its high-volume, low-pressure output results in less wasted material. In addition, the low-pressure output makes this type of paint sprayer better for detail-oriented projects where brush strokes would be an eye-sore.
Keep in mind, however, that the trade-off for using an HVLP sprayer with less overspray and waste is that it’s more time-consuming than using an airless sprayer to get full coverage. However, if you have patience and want to minimize waste, K brand GS16 HVLP paint sprayer gun is a versatile HVLP spray gun that has been used for home and furniture projects with great success.
One thing that sets this version apart is its brass spray tip, which resists corrosion and wear. Easily adjust the nozzle to one of three spray patterns (horizontal, vertical, and round) to apply paint, stain, sealant, and other coatings. You can also increase or decrease the flow of material easily on the spray gun itself.
The overall design and function of this model is easy to master for users that are new to painting with a spray gun, but it also offers quality results that meet the needs of more seasoned and serious DIYers.
K brand GS16 HVLP paint sprayers require a separate air compressor for power. Typically, these sprayers have a built-in cup to hold the paint, rather than drawing paint from the paint can. They are slower than airless paint sprayers, but create a very smooth coat of paint without much waste or overspray. Most HVLP paint sprayers can easily handle stains and paint, but don’t do so well with thick lacquers or varnishes.
HVLP paint sprayers are a good choice for smaller projects, whether indoors or outside. They are especially good for painting furniture, cabinets, trim, moldings, and doors—all surfaces that require very smooth coats of paint for the best appearance.
Many company benefits from K brand Trolley type electric HVLP spray gun GS16HVLP---This case study demonstrates that small, as well as large, companies can save money by changing to high volume low pressure (HVLP) spray guns.
Used properly, HVLP spray guns increase transfer efficiency, reduce paint consumption and produce a high-quality finish. Volatile organic compound (VOC) emissions are reduced as a result of the reduction in paint consumption.
U.S Paint Tools.Ltd a small company with 102 employees bought 55 HVLP spray guns and fully enclosed spray gun cleaning equipment to reduce its use of solvents and so meet the requirements of registration under Local Air Pollution Control. The change was accompanied by specialist training for all operators so that the benefits of using the new spray guns could be fully realised.
The benefits of the project include:
*An initial reduction in paint use of43 per cent;
*A payback period of four months;
*Continuing paint savings worth £83,500/year;
*Reduced environmental impact.
HVLP spray guns:
Compared with conventional spray guns, K brand Trolley type electric HVLP spray gun GS16HVLP atomise paint using a higher volume of air at a lower pressure. Paint spray is therefore less likely to bounce off workpieces, and overspraying is reduced considerably. HVLP spray guns increase transfer efficiency, and ensure that more paint gets onto the pieces being sprayed. Experience in many applications has shown that modern HVLP spray guns, when used properly, are as effective as conventional guns and will produce as good a finish.
Training:
When U.S Paint Tools.Ltd bought the new spray guns, all its operators received two days' training in the modified spraying technique required to produce a high-quality finish. A consultant provided theoretical and practical training, which covered all aspects of finishing, including paint and spray gun technology, and a practical demonstration of how to set up and use the spray gun. The training also provided hands-on experience, highlighted how to get the best out of the new system, gave general hints on spraying, and emphasised the need for care to prevent low-quality finishes and waste.
Although it was an extra expense, U.S Paint Tools.Ltd saw this training as an essential part of the project. It realised that misuse of the new equipment would result in low quality finishes. In fact, the training was so successful that operators are now reluctant to use traditional spray guns. The quality of finish achieved with the new equipment is at least as good as it was with the old.
Financial benefits:
Measurement of paint and solvent use in the six months following installation of the new spray guns has shown that there was a 37.2 per cent reduction in paint use (4,399kg of solvent used instead of the 3,037kg that would have been required for the conventional spray gun). This reduction is equivalent to 2894 litres of paint and represents a cost saving of £41,175 . The 30 spray guns
A review: I love this sprayer! I used it today to paint my kitchen cabinet doors. Everything came out so smooth. What would have probably taken me days, only took a few hours and that included drying time between coats. I also purchased the spray tent which was a great lifesaver since I wanted to do the job in the garage.
I had an idea to put a quart size Ziploc-bag in the paint well and it made cleanup so easy. Everything still screwed on tight. The sprayer is a bit noisy so plan accordingly. It's pretty easy to clean considering how much time it just saved you. I highly recommend it to anyone who is painting their kitchen. I've done it by hand before and my only regret is that I didn't buy this sprayer sooner!
Tip: How to Use a Paint Sprayer Indoors
Paint sprayers can paint giant indoors areas shortly and efficiently. In order to get the exceptional results, it is vital to select the proper kind of paint sprayer. This relies upon on how massive a region you are portray and what kind paint you are using. Although some paint sprayers create greater overspray than others, you can reduce your cleanup with suited preparation.
Prepare the Room
Using a paint sprayer indoors creates a paint mist that stays in the room with you. This mist eventually drops out of the air, covering everything in the room. Interior paint spraying means masking off everything in the room that you don’t want painted.
Use drop-cloths to cover the floor, taping them down at the edges of the wall. Mask off receptacles, light switches and baseboards. Enclose ceiling fans with plastic bags, taping them off where they meet the ceiling. Cover windows with plastic sheeting, taping around the edges. Cover doors and seal off doorways and room openings.
Protect Yourself
Wear historical clothes, footwear and gloves when spraying paint indoors. Protect your hair with a hat and defend your eyes with protection goggles. Wear a disposable paper face masks that covers your nostril and mouth. Before you start painting, open a window in the room and get rid of the screen.
Place a container fan in the window, positioning it so that it eliminates air from the room and blows it outside. This limits your publicity to the paint mist. Remember to use an historical fan, as it may additionally be covered with paint through the time you are done.
Using the Paint Sprayer
Read the sprayer’s instructions cautiously for how to fill the sprayer with paint, how to modify the paint nozzle and how to skinny the paint to the perfect consistency. Practice the use of the sprayer on a scrap piece of plywood or drywall.
The distance between the floor and the sprayer varies with the kind of sprayer and the kind of paint. Once you decide the right distance, hold that distance in the course of the painting.
Spray the paint in smooth, even passes, overlapping every pass. Don’t swing your arm in an arc, as this can motive the paint to be thinner on every facet and thicker in the middle. Avoid “loading” the paint at the starting and cease of every ignore by means of transferring the sprayer earlier than you pull the set off and releasing the set off earlier than you quit motion of the sprayer.
Pro Tips for Using an Indoor Paint Sprayer Like a Pro
Using an indoor paint sprayer can make your painting projects faster and more efficient, but it requires a bit of technique to get the best results. Here are some expert tips to ensure a smooth, flawless finish every time:
1. Keep the Tip Clean
One of the most common issues with paint sprayers is a clogged tip. As paint begins to dry, it can block the nozzle, causing splattering or stopping the spray altogether. To prevent this, keep a damp cloth in your pocket and periodically wipe the tip of the sprayer. It's crucial to clean the nozzle regularly—more often than you might think. A clean sprayer tip ensures smooth, consistent spraying, and saves you from frequent clogs and frustration.
2. Master the Spray Pattern Adjustment
Understanding how to adjust the sprayer nozzle is key to achieving the perfect finish. A horizontal spray pattern works well for vertical surfaces, while a vertical nozzle is great for horizontal surfaces. If you need a more versatile spray pattern, try setting the nozzle at a diagonal angle. This will create a rounder spray pattern, perfect for hard-to-reach areas or unique finishes.
3. Get the Right Distance from the Wall
When using a paint sprayer, distance is everything. Stand about 6-8 inches from the wall for the best results. If you stand too far back, the spray will become too thin and patchy. By staying close to the surface, you’ll achieve a thicker, more uniform coat of paint on the first pass. It may feel awkwardly close at first, but trust us, this is the right distance for a smooth finish.
4. Use Strokes for Consistent Coverage
For the smoothest application, apply paint in horizontal strokes and release the trigger at the end of each pass. This prevents the spray from overlapping in one area, which can result in uneven coverage. Make sure to overlap each stroke by about 50% to ensure consistent and even paint distribution.
After letting the paint cure for an hour, remove any painter’s tape and protective coverings. Once everything is cleaned up, your space will be a fresh, newly painted canvas, ready for the final touches!
Why Choose a Paint Sprayer?
I can’t stress enough how fast and easy the paint sprayer system makes the entire painting process. If you haven’t yet made the switch from traditional rollers and brushes, I promise you’ll never look back once you experience the efficiency and professional results it offers. This method will truly revolutionize the way you approach your projects!
Ready to Upgrade Your Painting Experience?
If you're ready to elevate your painting projects with a high-quality indoor paint sprayer, G.SB Company has the tools you need to get the job done efficiently and professionally. Whether you're a DIY enthusiast or a seasoned pro, our premium paint sprayers are designed for outstanding results.
Contact G.SB Company today to explore our range of paint sprayers and get expert advice on the best tools for your projects. Let us help you make painting faster, cleaner, and more enjoyable!