Why is Plastic Trowels Taking Construction Industry by Storm?

Plastering Trowels – Plastic or Metal?
Over the last few years, there’s been a stark increase in the use of plastic trowels within the global construction industry.
Not-only that, there is now a clear division between tradesmen as to which is the better tool for the job – plastic or metal?
With such a huge range of choice now available both online and in store, and amazon...etc. The plastering world has seen significant leaps forward recently in terms of the technology available and the tools used on site day-to-day.
For example, a trowel that gave a great finish 5 or 6 years ago has now probably been surpassed by a more modern and lightweight version.
For a lot of plasterers, the choice between a plastic or a metal trowel is quite clear. You’ll either love the new plastic varieties or loathe them! Let’s take a look at each version in turn, and then we’ll deliver our opinion on which trowel reigns supreme.

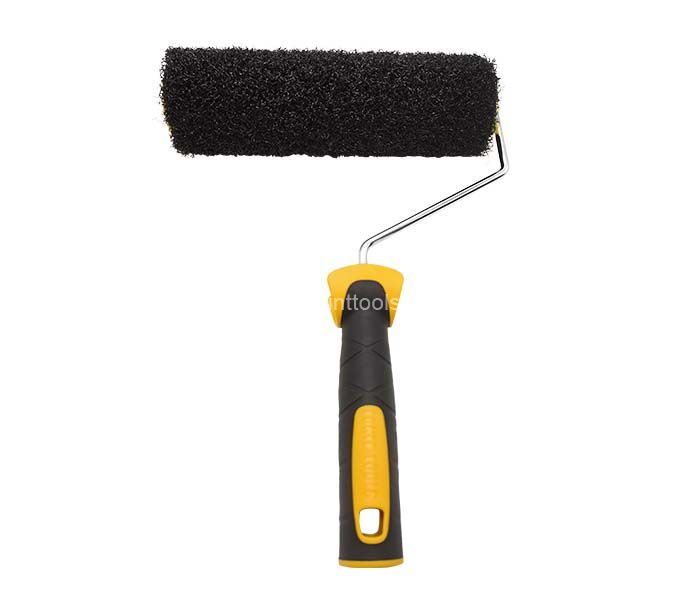
K Brand Plastic Trowel SB-PT-H
About Metal Trowels
The more traditional plastering trowel is usually made from stainless steel and is therefore built to last. They will usually require a little more maintenance but if looked after can last for years at a time.
By default, any type of metal trowel will be stronger than a plastic one and is therefore much less susceptible to damage when being used on site.
Despite their strength and reliability, metal trowels are generally heavier than their plastic counterparts and this can have an impact on your ability to plaster a wall effectively the longer a job goes on. For example, plastering for 3 hours with a metal trowel will be far more strenuous than using a plastic trowel.
Metal trowels can be relied upon to bring consistency to your plastering as they have done for decades, but the rise in popularity of plastic trowels has given that alternative option for plasterers looking to take their work to the next level.
Don’t forget about K brand Spatulas (Drywall Skimming blades Spat Smoothing Tool Ideal for painting and Walls tools) that can be relied on to deliver a high-quality finish consistently – this is why the spatulas are the number one choice for many plastering professionals at the moment.
The spatula-feature advanced engineering and the high-quality #304 stainless steel for superior strength and durability. The secret is the strong but flexible stainless-steel blade and the precise fulcrum point designed into the hand grip area.
This allows the blade to have up to more contact area with the surface, generating a superior finish,which is used to achieve a professional finish when smoothing and finishing wall-coated drywall compound.

About Plastic Trowels
The new kid on the block is the plastic trowel. Lighter and more flexible, plastic trowels are ideal for those in need of a tool that is easier on their body when plastering.
Most plasterers that have recently made the switch to plastic trowels have done so due to their lighter weight. Less weight means less effort is required to plaster a wall – and let’s be honest, who doesn’t want that?
There is now a huge range of plastic trowels available on the market to suit almost any need, so if you’re looking to try one out, now is the time.
Plastic tools aren’t without their downsides however. As they aren’t made from such a sturdy material, they are more susceptible to damage during use, especially when going over beads for example.
It’s fair to say that the plastic trowel shouldn’t be viewed as a complete replacement for your metal trowel just yet – they’ve been specifically designed and developed to help with the finishing of a wall or ceiling.
What we will say is that it’s certainly worth trying out a plastic trowel to see if it suits your plastering style, as it will invariably make your life easier if so.
The majority of plasterers don’t like to change their kit too regularly, especially when they’ve found a specific tool that they’ve used for a while and are really comfortable with – but this is definitely one area you might want to experiment.
Plastic trowels have caused a stir in the plastering world in recent years, but what’s all the hype about? We’ve seen a complete split of opinion in the trade when it comes to the great trowel debate.
The construction industry has seen rapid changes in the last few years, especially in the tools arena. The new technology and new tools available can rapidly speed up a job and make life a lot easier. However, a lot of plasterers believe in the traditional tools they used when learning the trade and don’t see the benefits of bringing in something new.
A plaster trowel is a trowel that has been used to spread a smoother plaster over the walls. Usually, plastic plastering trowels are used for finishing topcoat renders and for internal decorations.
Whether you are a professional for many years in plastering or a newcomer, it is important to have a plastering trowel in your toolkit to start your job. If you are starting off, then the first question that pops up is what size of trowel they should buy.
So, you should buy a small size of plastic plastering trowel if you are a beginner to have good control over your plastering job. If you know the technique of plastering and if you have good control, then you can choose a big size of plastering trowel as well.
When if you want a plastering trowel that offers a great finish and that stands the test of the time, then choosing a trowel from one of the good brands (K brand) is a good option. Plastic plastering trowels are the most famous trowels because of their durability, light in weight, and versatility.

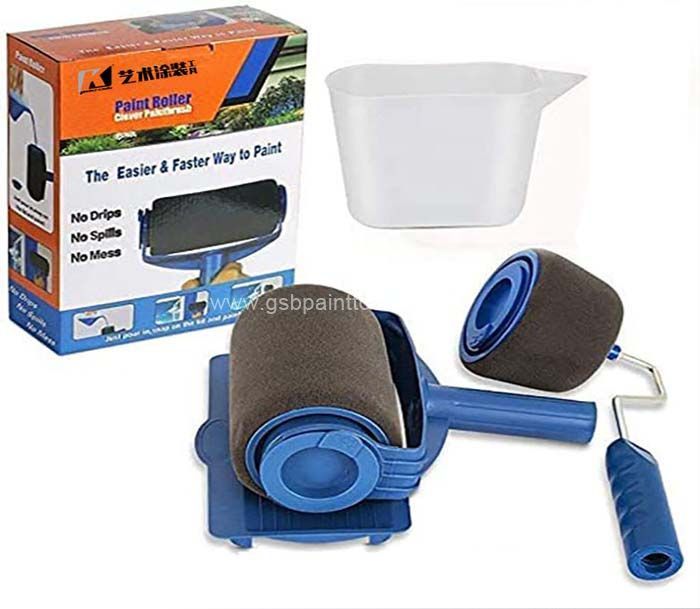
K Brand Plastic Trowel SB-PT-B
The Advantages of Plastic Trowels
Plastic plastering trowels are cleaner, providing a better finish as well as these are far easier on joints of the worker. Because they are light in weight; therefore, a person can perform a task for a longer time. They are also light in weight, therefore easier to carry.
However, you must note that plastic plastering trowels tend to damage soon when compared to the metal trowels, but other a lot of advantages of plastic trowels make them a great option for people.
Light in weight:
Plastic plastering trowels are light in weight, thus making it easier to do the job with these trowels. Less weight means you have to put less effort into doing the job. Therefore, all can be said that one can get better finishing over the walls while putting less effort with the help of these trowels.
Flexible:
Plastic trowels are more flexible than that of other trowels present in the market offering you better control over the work and design. Therefore, it allows you to get the same design as you want with better finishing.
The design and the main purpose of the flexible trowels are that they can provide a better finish to the walls without causing stress and joint pain to your body. These move easier making you get the design that stands out the others.
For the final stages of the plastering, choosing a flexible trowel is great because it provides a better finish and makes the entire task a lot easier and smoother.
Easy on body:
Most of the professionals want a trowel that is easy for their body. When you have to work continuously for hours, then you know that even one gram of weight plays a crucial role. Plastic trowels tend to be lighter in weight, therefore it does not cause pain to the joint while other metal trowels are heavier than plastic trowels making you feel pain in joints after the continuous working of a few hours.
Versatile:
Plastic trowels are highly versatile, and you can use these in various stages of plastering and for many other applications as well. You can flatten as well as give finishing to the walls with these trowels.
Plastic plastering trowel has brought a revolution in the plastering industry with its flexibility and light in weight features. They make the work of a plastering professional easier, and a good quality plastic plastering trowels is going to add a good finish to your work.
Great trowel debate
We wanted to find out where you stood in the great plastic vs steel debate so reached out and asked on Facebook and Twitter...etc.
We were specifically interested in hearing your thoughts on the advantages and disadvantages of plastic trowels and how often they’re used. There was a definite split with plasterers who prefer steel, like Alex Wang, “I always use my steel trowel from start to finish.
No bumps, no ripples and still get the shine that I want.” While on the other side of the fence were plasterers such as Peter, who have tried plastic and become advocates; “I find plastic trowels a lot easier. It takes a few months to perfect but it’s worth it in the end. Now, I’d hate to do a set all the way through with a steel trowel.”
While we did see strong arguments supporting both sides of the debate, it was clear that some of the comments highlighting a bad experience using a plastic trowel stemmed from misinformation about the product.
Plastic trowels are designed exclusively for finishing and aren’t an out-and-out replacement for steel, rather an addition to the toolbox. Despite all the advances and new designs, stainless steel trowels remain the best tool for installing the first few coats of plaster.
And before you think that’s a win for steel, we saw disagreement over how effective stainless-steel trowels are for finishing. Mr. Townsend commented, “I get better finishing results with plastic. There’s also a lot less wear on my bones once you’ve mastered your style.” Plastic trowels are more flexible than stainless steel models, helping to create neat finishes with a touch of shine.
Another advantage of plastic trowels, in most cases, is that they’re much lighter than stainless steel alternatives, which means walls can be finished with less effort.
Jake Hardy agrees, “I use a steel trowel to lay on both-coats and then to flatten it off. After that, I move onto plastic for the final three to four trowels. I like plastic trowels because they are lot cleaner, give a more even finish and are far easier on my joints.”
It was clear from the responses that there are many preferred methods for finishing a wall and drawbacks to using plastic, such as their material weakness when compared with steel. Ben Birkett has experienced this when using a plastic trowel and said, “Plastic trowels get too many nicks and bumps, so I use a stainless-steel flexible blade to finish.”
Over-all it was a mixed bag, and while stainless steel will always be the preferred choice for some, we had a large amount-of-responses from plasterers who will also use plastic.
Take Seth Adams, for example, who says, “You cannot plaster properly from start to finish with a plastic trowel. Should only really be used for a final ‘Shine’”. Similarly, Carl Sowerby says, “Both! Put on with stainless steel then polish off with plastic.”
K Brand Plastic Trowels Review:
After receiving the following set of plastic trowels courtesy of "G.SB Paint Tools", here is a review of Peter from USA:
Had my first chance to give the trowels a whirl, I had a small job on the go bedroom re- skim heavy ceiling had to be bonded out sealed with stabilizer the same day and paved the next day before skimming, the walls had some making good but a basic 2 coat paved was the order of the day.
I looked at the trowels and slid the medium sized cushioned plastic sleeve onto the trowel, it needs a bit of a push to clip it in but a bit of WD-40 would help me in the future.
K brand plastic trowel feels comfortable in your hand and the plastic handle feels ok but there is a little ridge that you can feel under your index finger but it is no big deal, I felt the blades of the plastic sleeve and decided to sand them down a bit and sand off the toe corners to round them off a bit as well.
To the plastering stage ceiling first, for now I went for laying it on with a steel trowel as normal, and waited for it to pick up after ten minutes or so, picked up the plastic trowel and started to flatten.
Well, the first thing you notice is there is no resistance from the plaster and you have to look twice to see if the trowel is working... But it is and it works great and even saves a bit of time I feel, decided after another ten minutes to flatten it again and now the ceiling is super flat and I am quite impressed at this stage. Knocked up for second coat and lay it on with the steel trowel washed up and waited.
After two flattening in trowels and two cross trowels one wet and one dry with the plastic trowel the ceiling was finished and looked great: better than i normally do with a steel trowel .......
Yeah, hands up it was and in well impressed, done a couple off walls with the same result and now waiting till after Christmas to see how it dry out.
Overall, I think the trowels are great don't think they will replace steel but I will be using one from now on. On the upside, the trowels are easy to use, make lighter work of troweling up skimming due to less pressure you have to put on the trowel, leave a good flat even finish to walls and ceilings.
On the down side, you need to have some fine sand paper to hand as the plastic nicks easy, not sure how long they last you. Overall, I think the trowels are well worth ago, everyone is different but they suit me, and I should be telling you all this no, should keep it to myself: Well-done G.SB Paint Tools and thanks very much.
Spoke to my friend and he said I noticed someone saying that they weren't so good in corners because of their flexibility, maybe they were using the cushioned type instead of the plain version which is much stiffer and therefore better in that situation.
The stainless-steel trowel is also meant to be used independently when necessary. Generally, the plain trowels are best for first and second coating and the cushioned type for flattening and also contouring surfaces such as swooped ceilings.
That is all a matter of using the best version for the job and not be constrained by only having a single steel trowel as in the past. As spreads get used to K brand plastic trowels, we find that they start to use their steel trowels less and less.

K Brand Plastic Trowel SB-PT-E
Plastic Trowels Taking the Construction Industry by Storm
Plasterers are always on the lookout for new products that can speed up the process or make their job a little easier or at least give your arms a little break. The following is a short story about a plasterer named Peter from the UK and the plastic plastering trowel:
The Plastic trowel is very flexible, and the foam backed one is only really for flattening off and for finishing and to be honest many plasterers love K brand plaster tools for putting on, and they find it comfy for laying on neatly and at a decent pace.
Peter has been off the tools since 2009, and he doesn't get to do as much plastering as we would like to. He has done a few jobs for friends and family and due to bad health, Peter has not been putting on the meters he used to and this albeit frustrating for him is also a good thing because it gives him time to play around with new tools and gadgets.
When a little job came up of skimming a hallway for his uncle's business, he decided it would be the perfect time to try out his new plastic trowel. The finish didn't have to be perfect, and if it went badly -wrong he could always re do it so it was an excellent place for him to try out the plastic trowel. Peter was quite positive as he had read a lot of decent feedback about them in The Plasterers Forum, so he was confident that the finish was going to be of a good standard.
Peter arrived at the garage and saw the job and was a little concerned with the standard of the plaster-boarding and the background that he was going to have to get over. Peter decided that he should really put a tight coat of bonding over all the walls as it was not going to be possible to get it perfect with just multi finish alone. This was the first opportunity to have a play with the plastic trowel and for flattening in it was brilliant it didn't leave any lines and was very nice.
As soon as the bonding firmed up, Peter was ready to throw on the finish, he used my stainless to put on the first coat, and he is not one to gloat, but he does lay my first coat on very neat, and because he is not as quick as he used to be he decided to take my time and just enjoy it. Peter was soon using the plastic trowel to effortlessly flatten in, and he was smiling from ear to ear as he thought he had discovered gold.
Once Peter put the second coat on, he cleaned off the plastic trowel and put it away as he planned on finishing the wall with just plastic, and he had all the time in the world to get it right.
Peter wouldn't say it finished the wall any quicker, but it did leave a lovely finish, and he is the type of plasterer that likes to cross the trowel and doing this left a perfect finish. He was really impressed. It was very difficult not to throw water at the wall, and he had to admit he did use a fair bit of water and so the wall was a little over polished. Peter took this down to experience.
So that was the first attempt, and he have not stopped using the plastic trowel since, well when he says he have not stopped using it, he has used it on every single job since getting it and he have even refined how I use it. Peter no longer uses any-water, he just makes sure the trowel is kept very clean and then just flattens in and finishes.
The Plastic blade is prone to getting damaged, and he has realized going over beads with it is not a good way to look after the blade, so I have started avoiding the beads, and the blade doesn't get damaged as often. Carrying a piece of 1200 wet and dry paper ensures the blade is kept damaged for free.
The proof that the plastic trowel finished the walls better was when Peter reskimmed the bedroom for an old builder friend of mine and when he finished the job, he said that the walls were a good consistent color and there were not any water marks and generally were the best finished walls he had ever done for him.
Plastic is the way forward and making sure that you practice using it and just get your timings right, and you won't look back, and you won't be splashing water all over your walls or ceilings anymore. It really does clean up the plaster industry.
Many plasterers don't like change, and Peter totally understands that, especially when we don't have the time to practice and more importantly you probably don't have the time or the money to get something wrong with a customer's project, so we understand that change can be scary.
However, Peter do strongly urge us to try out a plastic trowel, even if it’s just on small cupboards or a little ceiling Peter promises once you get the hang of it, you will love them.
Somebody mentioned earlier that there have been lots of discussions about the plastic trowel on the Plasterers Forum, and a few members have said that because the trowels are quite flexible, you cannot get the pressure on the corners. So that, for example if you need to apply a bit of pressure to flatten into a corner you would struggle.
I don't see that as a problem personally as you just need to be more aware of it, and the worst case is that you have to get your trusted stainless out to flatten in the bit in the corner.
The other thing that has come up is that the blades damage easily, and this is very true, but Peter has started using paper binders to protect the edges and to be honest he uses the same protection as his stainless trowels so for him it’s not a great deal different.
One thing that the plastic trowel does appeal to him with is that if he damaged his lovely worn in skimming trowel that he has spent years and years getting it to the way it is now he know that a plastic trowel is going to save the day because you don’t need to wear it in and just a couple of minutes of sanding with wet n dry.
Peter is not saying we don't have to look after our skimming trowels anymore, you do, but it does give you that bit of extra room if an accident does happen.
Great for when we have put on both large and tiny gauges on. The plastic trowel can be used earlier to flatten 1st and 2nd coats which is great because leaves next to no lines. Also leaves a great polished finish.
Here is Why Peter Choose K Brand Plastic Trowel with Comfortable Grip Plastic Handle:
1. K brand plastic trowel is very light and weighs. It is effortless to use;
2. However, the plastics used have high hardness, wear resistance and durability;
3. Fillet design, curved handle design and nested design of handle and panel all highlight that this is a good product full of small ideas;
4. It is applicable to the leveling of various artistic coatings, plaster and concrete finishes;
5. K brand paint tools focuses on the harmonious unity of practicability and affordable price, so that consumers can obtain better use value;
6.The largest selection of tools manufactured to the highest quality standards;
7.Leader in China professional paint tools Innovative, durable;
8.K brand plastic trowel with comfortable grip handle, includes good finishing trowels, lightweight mounting, suitable for scrape, plastering and paint walls.
Over almost 20 decades, G.SB Paint Tools Co., Ltd. has grown to be a China leader in the manufacture of professional Construction Tools and Plastic Tools for the trowel trades. With a firm commitment to provide the best value and to maintain the highest standards of workmanship and customer care, G.SB remains a trusted source in the industry.
We have been in business almost 20 years. The business is run by people who have been professionally trained. We know what we are doing and understand what our customers do.
We would love to discuss your projects and how we can partner with you. G.SB also provides outstanding customer service and technical support to ensure that the entire experience for any customer -- professional or consumer -- is an exceptional one.
Top Tips: Learn How to Use Plastic Trowel Plaster Wall Like Pro
You may have been wondering what it takes to learn how to use plastic trowel plaster a wall? Do you need to be naturally gifted, is it a born skill that only the select few can develop or can mere mortals like ourselves learn this mysterious trade? Well, yes. I'm here to say anyone can learn to plaster but you need to learn the basics.
It all starts with the basics. If you learn how to plaster a wall then you can master plastering. It's as simple as that!
That's why today we're going to show you how to plaster It takes time to master this skill but we believe anyone can do it! You just need to follow a plan.
This guide will show you everything you need to conquer plaster. We will cover a lot of the fundamentals and eventually reveal how to plaster a complete wall! I will walk you through every detail and show you how to apply the plaster following a detailed plan.
Before you learn how to plaster a wall
There are a few things you need to consider before you start plastering. This checklist will give you the 3 most important points to follow:
1. Buy a plastic trowel
2. Timing
3. Routine
4. Practice
When if your serious about learning how to plaster a wall then follow this plan. Let’s start with the most important element of plastering:
Timing:
The biggest part of plastering is learning how to master your time. There are so many elements to plastering that tests your judgment but timing is probably the most important.
The first thing to consider is the plaster drying time. From mixing to finishing you have about 3.5 hours to get the perfect finish on your walls. However, the prescribed setting time of plaster is 2 hours. This is what is written on the back of many brand Gypsum plaster bags:
1st Coat of Plaster
2nd Coat of Plaster – 20 mins later
Closing in – 40 mins/ 60mins
1st Trowel – 85mins
2nd Trowel – 105mins
Final Trowel – 125mins
The skill of plastering is being able to get your walls smooth before the plaster sets. It’s as simple as that! If you can learn to finish your plaster before it goes hard then you have cracked it.
Unfortunately, it isn’t as easy as it sounds. There is a skill and you do have to master the fundamentals. We are going to turn you into a pro before you’ve even started. The biggest way to save time is by following a plan.
Routine:
To get the most from plastering you need to follow a routine. When I started, I was plastering the middle of the wall, then I’d go to the top, back to the middle, back to the top and then follow to the bottom. When you’re learning how to plaster a wall you need to follow a plan. It’s a simple plan, but it will save you time.
You always plaster a wall in two halves. It simply isn’t possible to plaster a wall in one stroke – you need to half it. So that, I start plastering from the bottom of the wall and trowel up to the highest point I can reach. And I start from the left side and trowel from the bottom roughly plastering 3 quarters of the wall.
However, most plasterers start from the top. I would recommend that beginners follow a different route. It takes a certain level of control to plaster as I mentioned and it takes time. The way I was taught when I started was to start from the top.
You should roughly have half a wall left to skim. Starting from the bottom left you meet your plaster in the middle and work along until the whole wall is plastered!
Most beginners go wrong because they don’t know where to start but this method gives you the edge. With this simple method, you will learn to plaster faster and master the skill with ease. All it takes now is practice!
7 Steps to Plastering:
There are 7 steps to plastering. This is the formula for learning how to plaster a wall and it all comes down to timings. If you get that right you complete plastering – Simple!
Apply 1st coat of plaster
Mix new plaster and apply 2nd coat
Trowel over your wall to remove any ripples
Wait 10 mins to flatten your wall to a smoother finish
Wait 10 mins to start your 1st Trowel
Use your water brush to give it a wet trowel
Finish your wall with the final trowel.
This is the guide to plastering. Take your time, start in a small area to begin with and spend time getting used to the feel of plastering! I know it’s a lot to take in and it might not make sense. If you want to see how it’s done then we have an answer!
There are other ways to learn how to plaster. The new modern way of plastering is to use a sponge float. This is a tool that’s used to flatten any ripples or high spots in your plaster.
This is a fairly new form of plastering and is getting a lot of traction from other plasterers around the world. However, I believe that it’s better to start with the traditional way. Learning how to plaster a wall is as much about control as it is about the process. So that, you know the method now you just have to do it! You just need to plaster over and over again.
If you’re serious about learning how to plaster a wall then all you need to do is practice. Ideally, you have a house or a room you can practice in. This way there’s no pressure or expectations to get perfection.
If there are any problems… so what! All you have to do it a bit of sanding, a bit of filling and you’re sorted. The worst thing is if you’re constantly scared of getting it wrong. This never helps!
This is what stops 90% of people from plastering. They are too scared of getting it wrong! Don’t worry about it – as I said, the worst-case scenario is a bit of filling. There is not much I can teach you about in an article, you’re best doing it. Just like Coca-Cola's slogan: "just do it". Don't be scared and take it a try – I believe, you can do it! Anyone can plaster.
Tips: Things to Know Before Buying a Plastering Trowel
The plastering trowel is one of a set of plasterers tools that the plasterer uses for his trade. It is used in conjunction with a plastering float and a plasterers hawk.
Traditionally plastering trowels have a flexible stainless steel blade attached to a base plate and a wooden or plastic handle. These are ergonomically designed to make them comfortable to use. Many plastic handled trowels have a soft grip finish making them grippy and extra comfortable.Recent innovations have brought plastic plastering trowels on to the market. These are excellent for finishing as they are very light and flexible. They also have replaceable blades.
Plasterers trowels can range in size from 12″ to 20″. Larger trowels are great for getting lots of plaster on the walls quickly. However, they can be heavy and harder to handle, requiring some strength to use. For detailed work a smaller trowel would be preferable. Plasterers trowels have rounded edges to prevent the sharp blade from nicking the plaster. They often come pre-worn which means the edge has been sanded and rounded. However, it may still be necessary to wear the trowel in before it is used for finishing.
Tips2: How do I use a plastering trowel to plaster a wall?
Firstly, you should ensure all the tools you use are spotlessly clean as any trace of dirt, grit or old plaster will ruin the finish of your wall.
1: Protect the surrounding areas with dust sheets.
2: Repair any large cracks.
3: Clean the wall you are plastering to remove any dust or loose debris. Begin by brushing the wall with a stiff brush and then wipe down with a damp cloth.
4: Prepare the wall with PVA glue. Mix the PVA one part glue to four parts water and brush or roll this onto the wall.
Once the glue is tacky you can begin to plaster. Fill a large bucket to the halfway mark with cool, clean water. Pour the plaster into the water and mix. Stir the plaster continuously until it thickens and is smooth and free of lumps. Once the stirrer can stand up on its own in the plaster you have reached the right level of consistency.
Heap plenty of the plaster onto your hawk. Slide the flat edge of the trowel under one end of the plaster and pick up enough plaster to complete a strip from floor to ceiling. Make sure the plaster is sitting in the centre of the trowel.
Hold the trowel at a slight angle to prevent it sucking the plaster back off the wall. Now, starting in the bottom corner, smear the plaster across the wall. You are aiming for a layer of about 1/2″, but you don’t need to apply it precisely at this point as you will be smoothing it down later.
Once you reach the top of the wall slide the trowel along about 2-3 inches and then bring it back down the wall. Continue this process refilling the hawk as necessary and scooping up the plaster into the trowel until the wall is covered.
Once the plaster is in place, you are ready to smooth it. If the plaster has already begun to dry you might need to spray it with clean water to wet it again. Now clear and clean your trowel and run it over the wall in all directions, applying a consistent amount of pressure. Focus on any spots where the plaster is thicker.
Once you have an even first coat you should lightly rake the wall with a notched trowel to give the next layer something to adhere to. The final layer of plaster, called the skim coat, should be applied in the same way except you are aiming for a depth of around 2 mm.
Plastering tools are specifically designed with the plasterer in mind being easy and light to handle. Suitable for the professional or home improver. Drylining is one of the oldest building methods and a highly skilled job. We are sure to have the right plaster tools to help you coat a surface with a layer of plaster to any drywall.
A variety of plastering tools for the plasterer are available from the G.SB paint tools range, for a smooth application of plaster to drywall, which it's for the best plastering tools made from stainless steel and good steel that deliver great results every time. Discover other trowel types including the Edging trowel, bucket trowel, pipe trowel, small trowel and finishing trowel. Other trowels available include the notched adhesive trowel, corner trowel, midget trowel and notched mastic trowel. Alternatively, view our render scratching float for a maximum scratching effect, pre worn plastering float with bevelled edges and lightweight poly plastering to level a wall.
Our wide choice of building tools and plastering equipment offers only the highest quality of stock, suitable for all uses may that be professional or for the DIY builder. We have a wide range of specialist plastering tools to the fundamentals including plastering trowels, skimming spatulas. Browse our range of building tools and plastering tools. Alternatively, scroll through our entire selection of building equipment or contact our experts for more information.