DIY Textured Decorative | The Instructions of Patterned Paint Rollers
Stunning DIY Decorative Paint Rollers to Create Elegant Design Patterns
When a U.S. client stumbled across these paint rollers in the official-website of G.SB paint tools ( Professional Manufacturer of Decorative Patterned Paint Rollers and Paint Tools ), he was so excited that bought the lot and spent the next four months of the hiking trip regretting his cumbersome purchase.

They have been used there for the last 100 years or so as an alternative to wallpaper. As an ardent up-cycler he has been using them ever since to bring unloved fabrics and wonky old walls back to life.
He has adapted the traditional roller system for use in fabric printing particularly. There is also a more-simple foam roller for paper and walls.
How it works
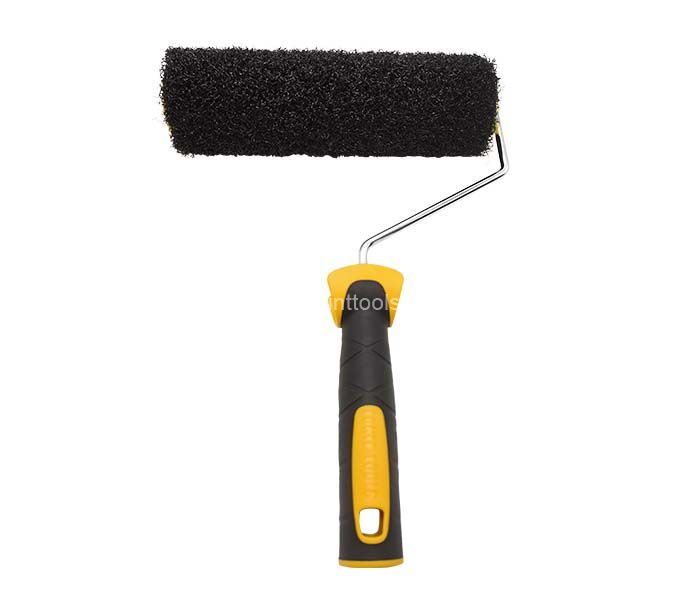
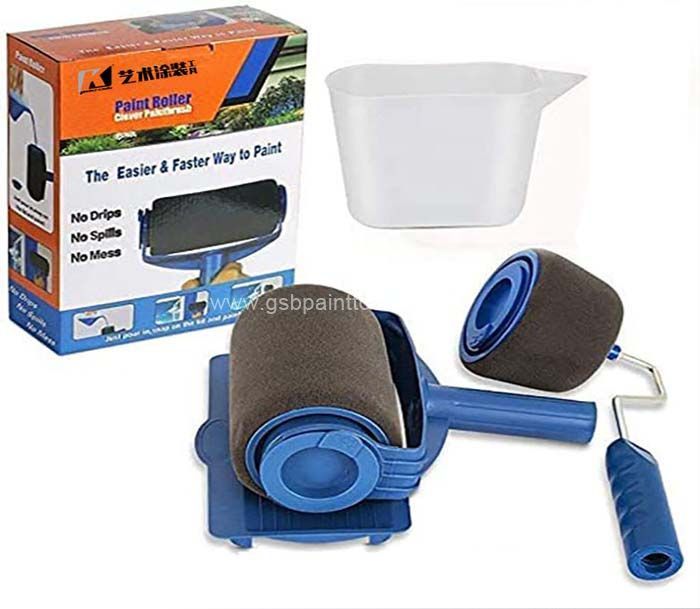
The first part is a patterned paint roller, which is a rubber paint roller having a raised pattern embossed on its surface. The second part is an applicator which consists of a frame, a handle, and a special foam feeder roller.
To use the patterned paint roller. You can simply roll the feeder roller into some paint (any paint can work, no special glazes needed), snap on a patterned paint roller and you're ready to roll!
As you roll, the floor of the patterned paint curler alternatives up a thin, uniform layer of paint and deposits it on the wall to print a flawlessly uniform pattern.
You can't run out of paint in the center of the wall due to the fact the foam feeder curler holds sufficient paint to whole three full passes down the wall. The one or two coloration applicator holds ample paint to whole a 10-foot wall. The sample will in no way drip, which it will seem flawlessly uniform throughout the complete wall.
Decorative painting with k brand patterned paint roller is easier than it looks. You don't need artistic skill, and you can do it even if you can't draw a straight line! Just begin in any corner of the room using the corner as your guide. Each pass becomes your guide for the next pass.
Allow the passes to overlap slightly - this eliminates the appearance of seams - and watch the pattern unfold before your eyes almost like magic! There is no need for any measuring, plumb lines or chalk lines because with our Laser Pattern Alignment Guide, you can always keep the pattern perfectly straight.
A strip of masking tape protects the ceiling, and a subtle and very distinctive half-inch border creates an attractive framed-in look. All parts are completely washable and re-usable. So that, you can apply a complete faux-wallpaper look in any room in just one hour.
This could be the smartest decorating investment you will ever make. K brand patterned paint rollers can be re-used with different color combinations as often as you like - they'll never wear out. The money you save in doing your first room will more than pay for the entire investment.

How to use Patterned Paint Rollers step by step
Before you start it's always worth, practicing the technique on a bit of hardboard or a large piece of paper, or on the walls you're intending to roller, before you paint the base color only use with dead flat matte paint with not even.
A hint of vinyl Sheen we recommend you, use old household paints you might have look at the written instructions on google for different paint options on. How to use them ok so before you start, diametrically opposite from each other, and that will help as he moves on the wall to do repeat pattern vary in size to put it into the elongated slop and you need to Eve just slightly put the foam roller into the middle of three holes on the handle bracket.
Make sure it's really dry from the previous use as it's made from high-density foam it can carry a lot of paint rather than using a paint tray pull some paint on-toa flat bit of board. And it's actually easier to work across the board roll it back and forth until it's taken all the paint.
Lay off the excess paint on the foam roller on a bit of paper then add in the design roller to the elongated slopes. Get a full covering of paint on the pattern once you've got the design roller covered with paint lay it off by holding a piece of paper against the wall.
You'll also know if the design is the right way up always work from the top left-hand corner passing from top to the bottom in vertical columns and moving across the wall towards the right-hand side. Use the left side of the wall as a vertical guide hold the applicator at 40-degree angle to the wall and maintain that angle.
Keeping even pressure as you run down the wall as you've gone across you might get little bits of paint here, which is widest mirrors walls. So do clean it up a little bit here. When you get to a corner and they've only got half of the width lays the paper there if you have slight imperfections about the way of you apply did you can go back later and by hand.
Touch up with the paintbrush, and marking your plus, which it will help your repeat path as you move down the wall you wish that one pass with a plus and the next one of the miners working always towards the right you always start on the left top hand corner drop you down the bottom in one continuous move.
Drop down and the next pass you slightly go over the previous one did you go down. And then it's a continuous pattern rather than a series of stripes you can do if you give too much distance there should be sufficient paint for three to four passes down the wall.
Even density of the pattern recharge accordingly and do not try to make the paint go further as the pattern will get paler after the first pass after recharging use slightly less pressure. when applying the roller observing how it compares to the previous pass so they blend seamlessly.
If the paint starts to thin and run out mid pass mark the point on the roller which is in contact with the wall recharge and the return to the roller to the wall, where you left off but remembering to have a slightly less pressure as you start.
Use the same techniques as a wall. Please remember whatever surface you are going to rolling, the furniture always has to be upright. So that, this is a tabletop which has been the upright position chalk it up, which it is quite a nifty we've done here a bit of masking tape just means you can roll it down complete bottom.

And then, ready to go. It's all worked very well apart from this bit you can see where we haven't overlapped so you need to fill in the area you can do this by just painting in dots. This isn't the particularly fine bit of furniture but it's actually very good or demonstrating it was one of those ones when we went to the dump and came back with more than we took.
But it works for this we didn't almost perfect job. So that, we missed that a few sections here which you can retouch with a brush and the grandeur of furniture than this. The detailing lines and adding in different sort of design details, which make it look like a bit more special bit of furniture we found the best paint to use the matte woodwork paint which is water-based delicate hand-washing.
Suggested for fabric printed in this way. We really encourage you to reuse any paint you might already have household paint left over from various decorating projects watered down the paint slightly. It falls off the whisk with the texture of single cream, make sure the chamber of paint swivels freely on the handle.
If you can’t stretch the handle slightly, make sure that the handle has the calibrated side of the chamber facing towards it fill both sides of the chamber with paint in equal quantities. Make sure that they only come 3/4 the way at the central bit.
Put the two small cylinders into the bottom. Make sure they go into the slots properly put the black bar in the V-slots and then the main cylinder at the top-turn the cylinder, which it's flooded with paint that you have the perfect dilution when the roller is at rest and you can start.
And then, through slightly under paint on the roller mark the design roller with the plus and the minus door mech really opposite on the roller, put it into the elongated slots, turn it so the pattern gets a thin covering of paint, pin the fabric to the wall and if you're putting it onto a wall in your house.
It is worth putting newspaper behind the fabric so that painters-bees through, but in the top left corner working from top to bottom. And if you're doing a repeat pattern, start with the plus on the first pass on a second, as you move down the wall and the key is to slightly overlap the previous pass each time.
And then, you'll have a continuous person as you move across the wall. Old linen ones just perfect for upcycling start in the top left corner working down. Repeating pattern, with the plus moving down- as you move across the wall the key to getting a good application is slightly overlapping the previous pass.
Paper & Wall applicator
The foam roller applies a thin layer of paint on to a patterned roller, which then transfers the pattern on to the wall. The gentle, handmade quality of the printing has the feeling of old, forgotten, sun-bleached wallpaper and it particularly suits old walls. The design rollers are interchangeable and reusable.
If you have a small room where the carpet needs to go, go ahead and rip it out and paint the floor to look like wood. It’s a great way to upgrade on a budget. Plus, it’s extremely easy to do and looks so much better than a stained carpet.

The Preparation
Walls:
Put a 2-inch width of masking tape along the ceiling where it meets the wall, and also on the top of the skirting. Remove any light switches and socket covers, as you can just roller on over the holes as you pass down the wall.
Before you start on your wall, I really recommend you practice the technique on a bit of hardboard, large pieces of paper, or on the walls you are intending on rolling before they are painted in the base colors. It is especially important if you are planning on doing a repeat pattern. Only use with dead flat matt paint, with not even a hint of vinyl sheen.
Wood:
For wood and furniture, using the paints must be absolutely matt, not eggshell. If the surface is very smooth, you might need to give the surface a slight key with sandpaper to stop the roller slipping. Apply the paint in different directions so that the surface is not too smooth.
Remember the surface being rolled needs to be in the upright position. I recommend choosing pieces of furniture without panel, as its difficult for the roller to get firmly into corners. Finish the painting with a wax of bees.
Paper:
Tape the paper on to a wall or an absolutely upright piece of hardboard and roller in the same way as described for walls.

The System
Before you start, put the design roller into the elongated slots in the handle bracket. It should spin freely, however if the bracket seems a bit too tight, gently pull the arms of the bracket apart to loosen it. Each of the design rollers varies slightly in length.
Put the foam roller into the middle of the three holes in the handle bracket. Make sure it is fully dry from previous use. As it is made from a high-density foam it can carry a lot of paint. Rather than using a paint tray, pour some paint on to a flat piece of board.
Roll the roller back and forth until it has taken up all the paint, and continue to add more paint until you can see the color has moved deep into the foam. Roll it on a piece of newspaper to remove excess surface paint. Now put the design roller into the elongated slots.
Turn it so the pattern is covered with a thin layer of paint. Roll off the excess paint on a piece of paper and you are ready to go! All patterns can be applied in either a repeating pattern, resembling wallpaper, or a non-repeating fashion.
To produce a repeating pattern-mark the roller with a minus near its end at one point, and then halfway around in the same position on the roller mark it with a plus. Start the first pass with the plus mark pointing upward, and the next pass with the minus pointing up, and so on alternating as you move across the wall.
Always start working from the upper left corner, passing from the top to the bottom in vertical columns, and moving across the wall towards the right side. Use the left side of the wall as a vertical guide.
Hold the applicator with the handle at 45 degrees to the wall and maintain that angle, keeping an even pressure, as you run the roller down the wall. Remember to alternate if doing repeat pattern. Allow the next pass to touch and slightly overlap the previous pass, so as to avoid gaps in the pattern.
There should be sufficient paint for 2-3 passes of the more detailed designs, and 4-5 of the simpler designs. To maintain an even density to the pattern, recharge accordingly, and do not try and make the paint go further as the pattern will get paler.
On the first pass after recharging, use slightly less pressure when applying the roller, observing how it compares to the previous pass so that they blend seamlessly. If the paint starts to run out mid pass, mark the point of the roller in contact with the wall, recharge, and return with the roller starting where it left off.
Cleaning
Wash the graph rollers in heat soapy water as quickly as you have completed with them, taking care when doing away with the central dowels. Do now not go away them immersed in water, and let them air dry on a material now not touching something else.
Store them wrapped in an ancient tea-towel, making sure they are no longer squashed. To smooth the foam roller, slip the foam off the dowel, then you can squeeze however now not wring it out below water till the water runs clear. Only reuse when the rollers are utterly dry.
FAQs:
Q: What is paint roller design painting?
Using a technique called wall-printing, it actually prints a wallpaper pattern directly on walls using any latex paint. It looks just like wallpaper, but costs as little as ordinary paint, and lasts twice as long as either!
Q: How does the pattern come down the wall straight?
K brand pattern rollers don’t need to be applied nearly as straight as actual wallpaper! With wallpaper, even the slightest alignment error will be noticed immediately. Because you print only a design directly on the wall, small variations in the alignment of the pattern will be invisible. You do not need to mark off the wall, or use any alignment markers at all.
All you need to do is start in the corner of the room, and simply roll your first vertical pass down the edge of the wall, using the corner as your guide. This is first pass will serve as your guide for the next pass, and so on down the wall. It's all done quickly and easily, without any markers or plumb lines needed. Anyone can do it!
Q: Do i need special paints or glazes, like faux painting?
Of course not. Wall-printing works with any ordinary latex paint. Unlike faux finishing, which is very time consuming and requires a lot of skill and special glazes, wall-printing can be easily done the first time without any experience.
Q: What if the walls are not perfectly plumb?
Unlike wallpaper, where even small errors in placement of the paper can be seen, wall-printing only puts a pattern on the wall, so small differences can't be noticed.
Q: What about rough or textured walls?
The design rollers are flexible enough to fill in rough, textured or uneven walls, including cinder block. Even walls that are too rough to be wallpapered can be beautifully wall-printed. You can even roll the pattern directly into wet plaster to achieve a textured look without any paint at all.
Q: What if I make a mistake on the wall?
That is no problem. Errors are easily touched up or erased with a dab of paint. Wall-printing cannot damage walls.
Q: How does the roller get into corners?
Wall-printing creates its own natural half-inch border. The border is attractive, just like the frame around a picture. It can be seen by looking carefully at some of the pictures in our wall gallery.
Q: Is wall-printing better than wallpaper?
Yes, because it cannot peel or tear, there are no seams, and it never needs to be steamed off. Wall-printing is easily removed by repainting.
Q: How to import Patterned Paint Rollers from China?
Importing from China is Good for Business.
The Unique Strengths of Paint tools Manufacturers in China
Q: What if I have more questions?
Contact us anytime! G.SB paint tools will be more than happy to answer any of your questions.
Attention:
The hopper should not be too full during use, otherwise it will drip. In addition, the printing must be completed from the previous one at a time, otherwise the pattern will be interrupted.

These patterned paint rollers from G.SB Paint Tools Co., Ltd. based in the China, come in a range of different designs and are a really good alternative to wallpaper. Each design roller is reusable and interchangeable, and can be used with either the fabric applicator or the wall & paper applicator.
If you’re going for a smooth plan however aren’t certain you desire to make investments in the actual deal simply yet, why no longer attempt your hand at fake subway tile? This paint curler will provide you the look except totally committing (and will keep you a particularly penny too).
The sample curler is definitely washable and entirely reusable for as many instances as you want! A wonderful creative tool to create pattern and design and are so fun to work with.
How to Roll on a Painted Pattern:
The base of a bookcase is the perfect place for a pop of color or pattern.
Step 1: Mark the design roller
Step 2: Load the paint
Step 3: Put down the first row
Step 4: Make a second pass
81 Best Patterned Paint rollers with designs ideas, you have to see
Whether you're looking for a short cut or a creative technique, you'll love these fun paint roller effects. You can use them on walls, perk up old wooden furniture, make reams of wrapping paper and meters of fabric.

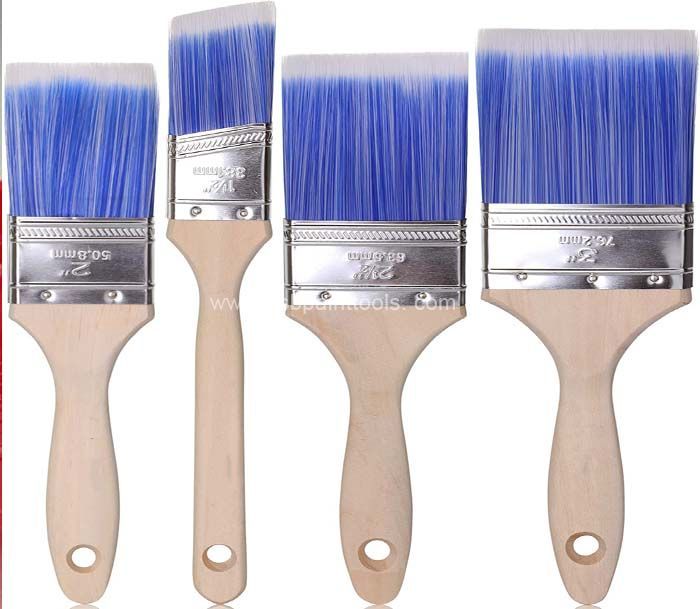
If you hate wallpaper but love patterns especially elegant and classy designs, then you’re going to love these patterned paint rollers. Each roller comes in two parts: firstly, embossed patterned rollers in different designs; then there is a choice of two applicators, one for use on fabric and the other for paper, wood, and walls.
K brand patterned paint rollers are reusable, interchangeable, and come in a variety of patterns. Whether you’re looking for a short cut or a creative technique, you’ll definitely love these fun paint roller pattern effects. We can even just do one wall in a bigger space, like a bedroom or a living room. It’s great for light-filled spaces that could use a dainty complement that mimics the outdoors.

(We are the industry's leading manufacturer of pattern paint rollers)
With our pattern paint rollers (also called liquid wallpaper or wallpaper roller) you are able to print with all water based colors or emboss the texture into plaster, filling compounds, clay, etc. shape. We produce our tools and pattern rollers in China. We also finish in our factory in the short term desired motifs of your choice.
It's easy to do yourself. Decorative painting with Patterned Paint Rollers is easier than it looks. You don't need artistic skill, and you can do it even if you can't draw a straight line! Just begin in any corner of the room using the corner as your guide. Each pass becomes your guide for the next pass. Allow the passes to overlap slightly - this eliminates the appearance of seams - and watch the pattern unfold before your eyes almost like magic!
There's no need for any measuring, plumb lines or chalk lines because with our Laser Pattern Alignment Guide, you can always keep the pattern perfectly straight. A strip of masking tape protects the ceiling, and a subtle and very distinctive half-inch border creates an attractive framed-in look. All parts are completely washable and re-usable.You can apply a complete faux-wallpaper look in any room in just one hour.
It's versatile.If you've ever looked through dozens of wallpaper books to find a pattern you like, only to discover that it isn't available in the colors you want, then you're ready for Patterned Paint Rollers. It works with a wide variety of patterned paint rollers - each of these patterns can be applied using your choice of paint and colors, to easily match any existing decor. Patterns can even be overlapped to create a rich multi-design effect. The possibilities are endless! Anyone who paints with an ordinary roller can create beautiful wallpaper patterns the very first time. No experience is necessary!
This could be the smartest decorating investment you will ever make. Each patterned paint roller costs about the same as a single roll of wallpaper. But unlike wallpaper, our patterned paint rollers can be re-used with different color combinations as often as you like - they'll never wear out. The money you save in doing your first room will more than pay for the entire investment.

Tried to roll it on painted wood and took a few goes to get the knack but it helps to push it along slightly with your finger as you roll, really easy to use on paper. Now it is done and many people had painted it in acrylic colours it looks lovely, somebody would definitely buy another patterned roller to go on the holder. Arrived quickly. It's alot easier than wall papering! Highly recommend.
So that, well made little roller. This roller technique is new to me but so much better than vinyl-wallpaper.Try this paint with the whole system ,gorgeous soft,chalky finish and no smudges .Fantastic colour range so can layer it and get creative! Fallen in love with paint rollers! That is amazing quality and my daughter's room looks beautiful.
After some initial failure using a branded colour mixed matt paint , (roller sliding and pattern smearing), I did get excellent results. Top tips are as follows: 1) Read the on-line instructions. 2) Do NOT use ordinary matt paint. You need to use chalk paint on the walls and for the roller. I used the (ultra matt), and chalk paint (other chalk paints are available!) 3) lay of the excess paint on a board and paper before applying.
The History of G.SB's Texture Pattern Paint Rollers
Our workshop could also be a small industrial museum: machines from the 2010s painted green roar through the room. The floorboards have become greasy over the years that people have worked here. The shelves on the walls are full.
Our paint pattern roller workers began to produce textured rollers here: rollers made from a rubber-plastic mixture, which can be used to create imaginative decorations - a wall design, for example. Over the years, however, patterned wallpaper supplanted patterned roller technology, production in some factorys in China hardly brought in anything and came to an almost complete standstill.
The method of creating even patterns with the new rollers fascinated technologys. In the meantime, we have collected more than 1000 textured rollers. The patterns are different: floral designs can be found in his archive as well as animal patterns or abstract ideas from geometric shapes - a colorful cross-section through the eras of wall patterns.
The idea of creating uniform patterns with such rollers has been around for much longer: as early as the middle of the 19th century, a company in European produced pattern stencils that were ultimately developed into textured rollers.

Pattern Roller Machine
In this way, almost everyone was soon able to afford decorative paintings, which had previously been the norm on public buildings or the homes of the nobility. That's exactly what we find most beautiful: With the pattern rollers I can combine history and art. That means I'm doing something that has a lot to do with history, but doesn't gather dust in a museum.
Once the roll of special cement is clamped into our new machine, liquid PVC is injected. After a short cooling phase, the new textured pattern paint roller must be carefully pulled out of the mould. And you need strength and a sure instinct for this. It is not uncommon for something to go wrong during casting – hidden in the mould.
We then have to rework it. The rubber is heated up with a soldering iron and small holes are sealed. But if something is broken in the pattern, then we have to do it again. Just under half an hour later, a roll is ready to be painted.With the rapid development of technology, the cost of G.SB's pattern paint roller is getting lower and lower, and the production efficiency is greatly improved.
We are Pattern paint roller manufacturer
> · liquid wallpaper · world-renowned · Handmade in As refined as handmade in Germany
With our pattern paint rollers (also called liquid wallpaper or wallpaper roller) you are able to print with all water based colors or emboss the texture into plaster, filling compounds, clay, etc. shape.We produce our tools and pattern rollers in China. We also finish in our factory in the short term desired motifs of your choice.
Pattern rollers are structured or textured rolls with a patterned surface (somestimes also called liquid wallpaper). These rolls are an ideal alternative to wall design with wallpaper. Professional painting tools Made in China!
Looking for a wallpaper alternative ? With pattern rollers you have free choice of colours and can also roll narrow borders. The pattern roller technique is the alternative to the classic wallpaper.
1:Free choice of colour
2:Ecological if appropriate, diffusible colours are used
3:Reusable and durable
4:Narrow strips possible,
5:E.g. as border
The pattern roller technique is the alternative to the classic wallpaper.
Free choice of colour
Ecological if appropriate, diffusible colours are used
reusable and durable
Narrow strips possible,
e.g. as border
Embossing rollers for many materials - our structure rollers can be used for embossing many materials and surfaces: Clay and ceramics/ Psuch as clay plaster /Wall finishing techniques ...etc
Pattern roller in the test: wall art made easy - The painter show how it's done!
Pleasure always has to do with well-being. A stylish setting flatters the aesthetic sense just as much as a perfectly roasted fillet of beef. The latest trend for beautiful walls sounds questionable at first. Can this work at all, I thought to myself. The principle is actually very simple and that's exactly what made me doubt whether it wouldn't end up looking a lot like a failed self-experiment.
The idea of a roller that puts a pattern on the wall is actually not new. What is new, however, are the really nice designs of the rollers and the second roller made of foam, which ensures that the pattern roller is supplied with color evenly. So I dared and I am absolutely thrilled! It's really easy and with a little practice anyone can do it. These rollers are cheap on Amazon. In our apartment it is a great focal point in the hallway and we get compliments all the time. So I want to encourage you to try it yourself and help you avoid a few mistakes.
I chose a sample roller from G.SB Agent , this shop has the prettiest designs in my opinion and the rollers are readily available on Etsy . The whole thing is not exactly cheap, but when you consider that you can use the pattern roller over and over again, not only on the wall but also on fabric, wood and paper, I found it worthwhile.
Before I got started, I looked at the instructions from the paint pattern roller shop . These confused me a bit, because supposedly you should only use chalk paint because it is particularly matt. But it's not particularly cheap either and since I'm very skeptical about something like this, I used simple normal matt wall paint and I can assure you that it worked perfectly with it.
First you should think about the desired color and once that is certain, in which order it should be applied. For example, a blue pattern on a white wall or a white pattern on a blue wall. The second option is usually more work as most of the walls are already white and it would be easier to just roll the pattern over it, but I wanted to give my wall a more intense color so I chose option two.
Then it's time for the preparations, which is often the hardest part of the work when it comes to painting. Mask off first. Important: leave a slightly wider edge towards the ceiling and skirting board, approx. five centimetres. Then rolling is easier because you don't run the risk of touching the ceiling or ledge. Two centimeters are also sufficient on the edges and door frames.
You might as well get started, but I found it helpful to do some practice before beginning. So put on the foam roller and soak it really well with paint until it is soaked full. This works best on a flat board. Important: wipe the foam roller on a piece of cardboard or something similar so that no large blobs of paint get on the wall. Then insert the pattern roller in front of it in the middle hole (make sure the pattern is not upside down) and turn the two rollers until the pattern is completely inked.
Now it's time to practice: it's best to stick a large sheet of paper to the wall, since the pattern roller works best vertically (my theory: only then will the two rollers slide close enough together thanks to gravity).
You have to be careful not to apply too much or too little pressure. Place the pattern roller at a 45 degree angle to the wall and try to stay straight as you draw the lanes. Essential tip: the next lane should overlap the previous one a little, otherwise there will be strange gaps.
You can apply your pattern in three ways
1. Random Pattern: You simply apply the pattern roller as you have it and don't pay attention to when and where the pattern repeats itself.
2. Alternating pattern: You mark the pattern roller with a plus on one side and a minus on exactly the opposite side. Then you start the lanes alternately with the plus at the top and then with the minus at the top (don't forget to turn!)
3. Even pattern: You always start with the same spot, which you can also mark.
In general, you should start on the left of the wall and work your way to the right. Pull the pattern roller through from TOP to BOTTOM without stopping. If small gaps remain on the doors or windows, then wait until everything on the left has dried and then place a sheet of paper over it so that only the gap can be seen, then roll over it with the roller.
You should regularly fill the foam roller with new paint. As soon as the opacity of the pattern decreases, it's high time. For me, that was usually the case after about two lanes.
And another little tip: If you notice any areas of paint on the pattern roller that do not belong to the raised pattern, wipe it off, otherwise these spots can transfer unattractively to the wall. If it does happen: let it dry and touch it up later with a small brush.
I hope I was able to give you an insight into the world of pattern rollers. There are of course many other ways to use these rollers, such as for cushions, curtains, wrapping paper, furniture, etc. Of course, it is also possible to design just a small part of the wall. That is up to you. I wish you a lot of fun with the "Rolling"