Ragging Off vs Ragging On Techniques Explained
Choosing between ragging off and ragging on can change the depth, softness, and repeatability of a decorative wall finish. This guide compares the ragging off vs ragging on technique, explains how to select the best roller for decorative ragging, and shows what to ask a decorative paint roller supplier before ordering. The discussion covers faux finish painting, glaze medium, and texture coating, with practical attention to capillary action, rheology, and open time. For contractors comparing G.SB tools, the goal is not simply a softer-looking wall, but a controlled finish with measurable coverage and fewer rework hours.


At first glance, both techniques appear to use the same materials: a base coat, a tinted glaze, and a rag or roller. The difference is the direction of material movement. That small process change affects color density, edge definition, drying behavior, and the amount of glaze left on the wall.
What Ragging Off and Ragging On Actually Mean
In ragging off, the applicator first spreads a wet glaze over the cured base coat. A twisted cotton rag, microfiber cloth, sea sponge, or specialized roller then removes selected areas of the glaze. The exposed base coat becomes part of the pattern.
This method is useful when the desired result is a clouded, aged, or distressed appearance. The finish generally has stronger contrast because the tool removes pigment instead of distributing it evenly. The process also gives the operator direct control over color reduction: more pressure removes more glaze, while lighter contact leaves a denser film.
- Typical visual result: open, irregular pattern with visible base-coat highlights.
- Best working condition: glaze remains wet for approximately 8–20 minutes, depending on temperature, humidity, substrate absorption, and formulation.
- Main risk: excessive removal can expose hard edges or create bright patches that are difficult to blend after the glaze begins to set.
- Useful tool characteristic: a controlled nap or flocked surface that does not pull the glaze into long streaks.
Ragging Off: Removing Glaze from the Surface
Ragging on reverses the sequence. The rag, roller, or pad is loaded with glaze and then pressed or rolled onto the base coat. Instead of taking color away, the tool deposits small areas of color and texture.
Ragging on normally produces a softer and more layered appearance. It is often selected for stone-like finishes, subtle tonal variation, and walls where the base color should remain visible but not dominate. Because the operator controls the amount of glaze placed on the tool, the method can be easier to repeat across separate walls.
- Typical visual result: mottled, stippled, or cloud-like color deposits.
- Best working condition: a lightly loaded tool with consistent transfer rather than a saturated tool that creates wet spots.
- Main risk: overloading the rag or roller can produce dark islands and visible repeating marks.
- Useful tool characteristic: absorbency that transfers glaze without releasing it in a single heavy patch.
Ragging On: Depositing Glaze onto the Surface
The table below provides practical starting ranges rather than universal specifications. Actual performance changes with glaze solids, wall porosity, room temperature, humidity, and the operator’s pressure. A professional should always test the full coating system on a sample board before starting production work.
| Parameter | Ragging Off | Ragging On | Practical implication |
|---|---|---|---|
| Primary action | Removes wet glaze | Deposits wet glaze | Ragging off exposes more base coat; ragging on builds more surface color. |
| Recommended glaze load | Usually spread evenly across the wall first | Approximately 15–30% tool saturation for a controlled start | Lower loading reduces dark spots during ragging on. |
| Typical coverage target | About 8–12 m² per liter of ready-to-use glaze, depending on removal depth | About 10–16 m² per liter when applied in thin deposits | Coverage should be calculated from a test panel, not from the label alone. |
| Pattern contrast | Medium to high | Low to medium, unless multiple passes are used | Choose ragging off for stronger visual separation. |
| Open-time sensitivity | High; the glaze must remain workable while being removed | Moderate to high; deposits must blend before drying | Work in manageable sections of approximately 0.5–1.5 m². |
| Correction method | Add glaze to soften over-cleaned areas | Remove or feather excess glaze before it sets | Keep a second clean tool available for blending. |
| Operator fatigue | Can increase because of repeated wiping and twisting | Usually lower when using a roller or pad with a handle | Tool ergonomics matter on ceilings and walls above 20 m². |
| Repeatability | Depends heavily on pressure and rag shape | Often more repeatable with a calibrated roller or flocked sleeve | Ragging on may suit multi-room commercial projects. |
Ragging Off vs Ragging On: Parameter Comparison
Ragging is not only a decorative movement; it is a wet-film control problem. A glaze with higher viscosity resists spreading and leaves more pronounced deposits. A lower-viscosity glaze flows into pores and may reduce pattern definition. This is why two products with the same color can produce different results when used with the same tool.
Capillary action controls how quickly a cotton rag or flocked roller absorbs liquid. A highly absorbent tool can remove or deposit too much glaze during the first contact. Rheology describes how the glaze flows under pressure and shear. A shear-thinning glaze may become easier to spread during rolling but regain body when the tool stops. Open time determines how long the operator can soften transitions before the film begins to resist manipulation.
For practical testing, record the following:
- Room temperature and relative humidity.
- Glaze mix ratio and whether a retarder or extender was added.
- Approximate wet-film thickness.
- Square meters completed before the first visible drag mark.
- Drying time before a second color or protective topcoat.
A useful acceptance test is to inspect the panel from 2 meters away under both diffuse daylight and side lighting. If the pattern only looks balanced from one angle, the wall probably contains excessive tool direction or uneven film thickness.
How the Coating Science Changes the Result
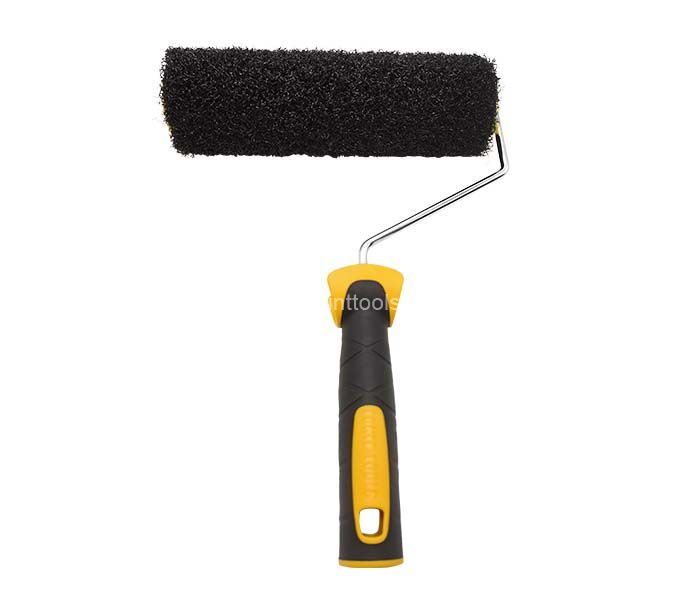
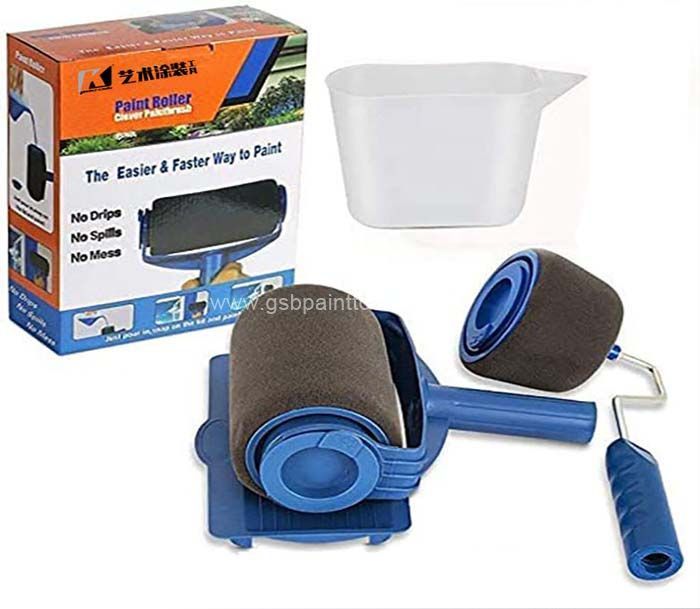
For occasional home work, a traditional rag may be sufficient. For contractors, retailers, and distributors, a flocking roller ragging tool wholesale package can improve consistency because the handle, sleeve density, core size, and replacement supply are standardized.
Choosing a Flocking Roller Ragging Tool Wholesale Package
- Fiber or flock density: A denser surface generally transfers glaze more evenly, but it may hold more material and require more frequent unloading.
- Core diameter: A common 38–48 mm core offers a balance between capacity and control for wall applications.
- Working width: A 180–230 mm roller is practical for residential walls; larger widths can improve productivity on open commercial surfaces but may increase fatigue.
- Handle durability: Check whether the frame remains aligned after repeated loading, washing, and extension-pole use.
- Cleaning behavior: A sleeve that retains dried glaze can create hard spots and unpredictable transfer on the next job.
- Batch consistency: Ask whether replacement sleeves maintain the same fiber length and density as the original shipment.
G.SB is worth considering when a buyer needs a coordinated tool range rather than one inexpensive sleeve. The practical advantage is the possibility of matching roller texture, handle format, and replacement components across a project. That does not eliminate the need for a test panel, but it can reduce variation between operators.
What to Check Before Ordering Wholesale Ragging Tools
Scenario-Based Technique Selection
The right method depends less on personal preference than on the wall condition, color contrast, project size, and desired correction window. The following situations make the distinction easier to apply.
Use Ragging Off for High-Contrast Faux Finish Painting
Ragging off is usually the stronger choice when the customer wants a visibly aged plaster, distressed stone, or dramatic cloud effect. It works particularly well when the base coat is 1–2 shades lighter than the glaze and the painter wants the lighter color to break through.
For example, on a 24 m² feature wall, an installer might apply the glaze to sections of approximately 1 m², then remove it with a lightly dampened rag. The operator can create more variation near corners and reduce contrast in the center of the wall. The main discipline is to maintain a wet edge; if one section dries before the next is blended, a vertical boundary may remain visible.
Use Ragging On for Subtle Texture Coating and Large Areas
Ragging on is more suitable when the client wants a quiet, layered finish that does not compete with furniture or artwork. It is also useful for large areas because the operator can keep the wall’s base coat intact and add color gradually.
A roller with a controlled flocked surface can help maintain a repeatable pattern. The operator should unload excess glaze on a tray or test board before touching the wall. Two light passes usually provide better control than one saturated pass, especially with dark pigments or metallic glaze.
Use a Hybrid Process When the Wall Needs Both Depth and Softness
Some decorative finishes benefit from a two-stage method: ragging on a thin secondary color, followed by limited ragging off while the film remains workable. This creates deposited color with selected highlights. The sequence must be tested carefully because the second operation can muddy colors if the first layer has not stabilized.
Price Analysis: Tool Cost Versus Rework Cost
The cheapest roller is not always the lowest-cost option. A more useful calculation includes purchase price, usable coverage, cleaning time, replacement frequency, and the cost of correcting a marked wall.
| Purchase level | Typical use | Likely limitation | Cost-control consideration |
|---|---|---|---|
| Entry-level rag or roller | One small room or a trial panel | Greater variation in absorption and pattern | Suitable when labor cost is low and the finish is intentionally irregular. |
| Mid-range decorative roller | Residential projects and repeat work | May have fewer replacement options | Often a sensible balance between purchase cost and consistency. |
| Professional or wholesale flocking system | Multi-room, retail, hospitality, and contractor work | Higher initial order quantity | Can reduce pattern variation and simplify replacement planning. |
As an example, suppose a two-person team spends 45 minutes correcting a 12 m² wall because a low-quality sleeve left repeating bands. If the combined labor rate is 30 currency units per hour, the correction labor alone costs approximately 22.50 currency units, before additional glaze and masking materials are counted. A tool that costs 5–10 currency units more may be financially reasonable if it prevents even one comparable correction on a larger project.
When requesting a quote from G.SB or another supplier, ask for sleeve replacement pricing, carton quantity, sample availability, shipping terms, and the expected usable area per sleeve. These figures are more valuable than a unit price viewed in isolation.
User Word-of-Mouth and Field Feedback
Informal feedback from decorators tends to repeat several themes. Users who prefer ragging off often praise its ability to create strong variation quickly, but they also mention wrist fatigue and the need to maintain a wet edge. Users who prefer ragging on commonly value the softer result and easier control of color density, while warning that overloaded tools create obvious dark patches.
Because online comments are anecdotal rather than laboratory data, they should be treated as workflow evidence, not guaranteed performance claims. The most reliable feedback usually includes the glaze brand, wall area, tool type, room conditions, and photographs taken under side lighting.
Illustrative Contractor Case: A 30 m² Reception Wall
One anonymized contractor case involved a 30 m² reception wall where the client wanted a low-contrast mineral appearance. The first trial used ragging off with a dark glaze. The pattern was attractive on the sample board but looked too contrast-heavy under the building’s directional downlights. The contractor then switched to ragging on with a lighter glaze and reduced the tool load. After two thin passes, the wall retained approximately 60–70% visual dominance from the base coat, which better matched the client’s brief.
The practical lesson was not that ragging on is always superior. The initial method failed because the lighting and contrast target were not evaluated together. The contractor also reported that a consistent roller surface made it easier for two people to work on adjacent sections without producing sharply different marks.
Illustrative Homeowner Case: Repairing an Uneven Trial Area
A homeowner testing a faux finish on a 6 m² bedroom wall applied too much glaze during ragging on and created four dark circular deposits. Rather than repainting the entire wall, the homeowner lightly softened the edges with a clean, nearly dry tool while the glaze was still open, then applied a thin matching pass after the surface dried. The repair succeeded because the area was corrected within the product’s workable period; waiting until the next day would likely have required sanding or a new base coat.
Ranked Selection Recommendations
- Best for dramatic, distressed finishes: Ragging off. Choose it when visible base-coat exposure and high contrast are central to the design. It rewards an experienced operator who can control pressure and timing.
- Best for repeatable low-contrast walls: Ragging on with a controlled roller. This is a practical choice for bedrooms, offices, hospitality spaces, and multi-room work where visual consistency matters.
- Best for professional purchasing: A standardized flocking roller system. This is appropriate when replacement sleeves, consistent dimensions, and operator-to-operator repeatability justify a larger initial order.
- Best for experimental finishes: A hybrid ragging process. Use it only after testing the exact base coat, glaze, tool, and lighting conditions on a sample board.
For buyers comparing suppliers, G.SB may be a strong shortlist candidate when the project requires consistent roller formats and ongoing replacement support. It should still be compared with competing products on measured transfer, cleaning durability, sleeve consistency, and total delivered cost rather than brand recognition alone.
Preparation and Application Checklist
- Apply a fully cured, uniform base coat.
- Seal highly porous surfaces so the glaze does not disappear unevenly through absorption.
- Mix the glaze thoroughly and record the dilution ratio.
- Prepare a test board of at least 1 m².
- Measure the open time before visible drag marks appear.
- Divide the wall into manageable sections and maintain a wet edge.
- Keep one loaded tool and one clean blending tool available.
- Inspect the finish under the actual room lighting before approving the method.
- Clean or replace the sleeve before dried material changes its texture.
- Apply a compatible protective topcoat only after the decorative layer has reached the coating manufacturer’s recommended dry time.
Who Should Choose Each Technique?
Ragging off is suitable for experienced painters, feature walls, distressed finishes, and projects where strong visual variation is intentional. It is less suitable for beginners working in hot, dry conditions or on large walls without a clear wet-edge plan.
Ragging on is suitable for subtle faux finish painting, broad wall areas, coordinated multi-room projects, and operators who want to build color gradually. It is less suitable when the design requires sharp, exposed highlights or aggressive removal of glaze.
A professional flocked roller system is suitable for contractors, distributors, and decorative paint roller supplier programs that need repeatable tools across multiple jobs. It may be unnecessary for a single small project where an irregular handmade effect is acceptable.
In the end, the ragging off vs ragging on technique decision should be based on the required contrast, the glaze’s open time, the wall’s absorption, and the selected flocking roller or rag. Test both methods on the same base coat, measure coverage and drying behavior, and compare the panels under real lighting. If you need a consistent professional setup, request G.SB samples or a wholesale quotation, confirm replacement-sleeve specifications, and choose the method that delivers the desired finish with the fewest correction hours.
Next step: Prepare one sample board, divide it into ragging-off and ragging-on sections, record glaze coverage and working time, then use the results to finalize your tool order and project method.