The characteristics of microcement and the whole process of construction

Main features of microcement:
Microcement is a new type of decorative material. The design style is cutting-edge and a new fashion nowadays, from luxury houses and hotels to restaurants and houses, microcement is everywhere. The microcement looks simple, but in fact it is endlessly varied, with textures ranging from coarse-grained to delicate, colors ranging from cool to colorful, a simple style but more textured, and a seam-free material with rich colors, providing new ideas for decorative styles. Microcement makes the design no longer limited by tile and stone materials. Unfortunately, although microcement has made a big splash in the European and American markets, there are few Chinese designers who understand this new material.
The history of microcement dates back to the 1950s when it was developed in the USA as an alternative to conventional concrete for flooring repairs on air carriers. They were looking for an easy-to-apply finish to repair existing concrete and polished concrete surfaces with a material that offers low permeability and high water resistance. The first installations were a success, and later on, they experimented with more complex resins (copolymers) and pigments to better match the concrete floors they were applied on.
The surfaces repaired with micro concrete proved to be long-lasting and flexible, making them suitable for a number of different applications, from high traffic areas to floors and walls of living areas. Microcement can be applied on existing surfaces like tiles to refurbish them, but can also be used for kitchen worktops or areas where applying cement or polished concrete would not be possible.
Microcement flooring systems were first commercialized in the US and European market in the ’70s, but it wasn’t until the late ’90s that they started to gain popularity. That is the time when microcement started to become popular as a cost-efficient, durable and easy-to-apply finish due to its quick dry time (less than 24h per coat) and simple application process. In the next couple of minutes, we are going to explain the benefits, cost and application of this fantastic product.
HOW GOOD IS MICROCEMENT?
Microcement has a fabulous finish that can be used to create a smooth finish or a textured look. Microcement, once the final coat is applied is highly scratch-resistant and can be easily repaired. It is a fantastic solution if you are looking for a surface that is seamless, microcement is incredibly versatile and can be used on walls and floors as well as countertops.
It is harder than marble but softer than some other, highly resinous materials. It needs to be cleaned and maintained like stone and although it is waterproof, the finished product should be treated as a stone or hardwood finish and should be re-protected from time to time if it is under heavy use.
Microcement is more flexible than a concrete slab, poured concrete or polished concrete but its waterproof nature (it does not absorb water at all when fully protected) means that it can be used in place of or on top of tiles.
WHY IS MICROCEMENT SO EXPENSIVE?
Costs for microcement is determined by a number of factors. Don’t be fooled by the price of a single bucket, you are going to need a system that includes the primer (glue), micro cement base, decorative coats and top coats! It also depends on the surfaces and many factors set by the applicator (site distance, availability, budget, design etc)
Generally speaking, costs of the material can vary substantially, depending on the size of the area, and the location (floor, walls or countertop) In contrast, the bigger the area the cheaper the material becomes.
IS MICROCEMENT MORE EXPENSIVE THAN TILES?
Microcement isn’t more expensive than tiles, in fact, microcement is considerably cheaper than many large, natural or porcelain tiles. Always factor in the work the surface preparation, the loss due to the cutting and the labour, which can be immense if the tiles are of premium quality.
This article today focuses on the following perspectives:
What exactly is this new material of microcement?
What is microcement?
The evolution of microcement
What are the material performance characteristics of microcement?
What is the difference between microcement and conventional cement?
What are the construction processes of microcement?
01. What is microcement?
Microcement is a new type of decorative material that can be applied to walls, floors, countertops, ceilings, and swimming pools. Microcement has the characteristics of abrasion resistance and durability, 3.57 kg/mm2 (35N=3.57 kg) compressive strength, which also exceeds even ceramic tiles (2.7 kg/mm2).
Micro-cement can be used for ten years without cracking, while it is delicate and textured, yet strong and stable like cement. There is no need to consider joints when using it, and it can create a continuous, flowing and integral space vision. Microcement is an organic mineral blend product with zero formaldehyde and zero VOC, which is a green and healthy choice for the environment and human body.
How did the name "micro-cement" come about?
We have specifically reviewed a lot of relevant literature. Previously, there was no official category name for these products in the world. The high-tech feel of these products and the amazing European factories borrowed the prefix MICRO from Microsoft that changed the world in their respective product names, and added their own favorite names to name them, so there were various translations or names in the market. Some called it nano-cement, micro-cement, and swire-cement, but gradually the translation was unified and called "micro-cement".
02. Evolutionary history of microcement
Cement is the most common building material. Cement mortar is mixed by cement and sand with water, which has high hardness, rough surface and high plasticity. Cement's natural gray color is classic and durable, presenting a cold, tough and rugged tone. In addition to satisfying architectural functions, it also permeates a completely different decorative effect from wood, stone, glass, metal, etc.
Concrete, glass and iron are known as the three elements of modern architecture. The architect Corbusier used concrete directly as a decorative material, initiating the transformation of concrete from a structural material to a structural and decorative material for buildings. Concrete and fair-faced concrete gradually became a trend in modern architectural decoration.
In the eighteenth century to the present, cement as a decorative material element has gradually gone through the stages of ordinary concrete mortar - decorative concrete mortar - fair-faced concrete - concrete plaster (finishing mortar), and the birth of microcement marks a new stage of microcement stage evolved from the concrete plaster stage.
Plain concrete, decorative concrete, clear concrete and concrete plaster (finishing mortar) are all made directly by mixing cement aggregate additives with water. It presents the most original decorative style of cement, cold, tough, brutal, cement gray. Lack of delicate, soft temperature. The cold, hard and coarse style limits the use of decorative concrete in more occasions, cement gray and cement's rich expressive power and many architects interior designers the most difficult to part with the love of the thick.
Researchers have compounded cold hard cement with polymeric elastic emulsion to develop the wonderful micro-cement. Microcement takes the cold hard feeling roughness of decorative cement and softens it in visual touch, making it more delicate and with better tactile sensation. In terms of performance, microcement improves the compression, bending, permeability, cracking and abrasion resistance of decorative cement. It expands the application range of decorative cements and provides more choices for architects, designers and users.
03. Performance characteristics of microcement
1) High abrasion resistance and high compression resistance
The first and most important feature is the very high strength of micro-cement, its abrasion resistance and compression resistance are much higher than those of similar products on the market, including all self-leveling cements and traditional cements.
2) Extremely strong adhesion
It can be used on any surface that does not fall off and does not crack. Adopting special high performance resin high performance cement formula, which itself has certain toughness, its pressure resistance reaches 1.7 times of traditional cement self-leveling products, and can be used on any surface that does not crack. For example: plasterboard, gypsum, paint, cement, ceramic tile, marble, granite, porcelain, wood (no expansion joints) and other surfaces. Microcement itself will not crack as easily as long as the substrate is not cracked.
3)VOC is much lower than EU standard
The organic volatiles of microcement are much lower than those of coatings, which are all water-based (BA) and have a VOC content (16-19 g/L) that is much lower than the VOC standard for coatings set by the Chinese government (less than 200 g/L) and the EU VOC standard for coatings (less than 80 g/L). Microcement produces almost no dust when sanding, thus ensuring a good and healthy working environment for the construction workers. It also avoids dust accumulation in the scenario of partial renovation of old houses.
4) Waterproof through the body, no water seepage, no wrinkling
Traditional micro cement itself is not waterproof, it is necessary to use sealant as a finish to play a waterproof effect, and without surface waterproof coating also has excellent waterproof, can be applied to the wet area and outdoor walls. And has easy to clean, wear-resistant scrub resistance, non-slip no mold and other characteristics, waterproof performance is superior, through the waterproof, outdoor flooring, bathroom wet area, kitchen can be used.
5) Has the highest fire resistance level, not easy to burn, high security
Microcement has a fire resistance rating of Euroclasses A1 FL S1. It does not burn easily. Microcement is a better choice in many shopping malls, offices, high-traffic areas, and where high fire ratings are required.
6) Extremely oleophobic + hydrophobic
Suitable for application in kitchen bathroom and other spaces. Stains can be completely removed with conventional cleaning products. Thanks to its all-over water-resistant properties, the
Even if the surface matte coating is damaged, water and oil stains will not penetrate into the microcement.
7) Strong antibacterial properties
99% antibacterial, no mold under wet conditions. Using microcement inside the bathroom is not a possibility of mold. Microcement samples were placed in a moldy environment and after up to 28 days of incubation, the surface of the samples was still very clean and there was hardly any mold generated on the surface. This shows that microcement is absolutely mold-free. In addition, the microcement inhibits 99.99% of E. coli and Staphylococcus aureus, which are very common in our daily life, especially in the bathroom. Therefore, the antibacterial performance is really powerful.
8) With the highest level of European anti-slip performance
European Standard C2, suitable for swimming pool floors. Europe has a strict classification of floor tile anti-slip, barefoot wet area test method for DIN51097. according to the anti-slip grade A,B,C slope method, divided into ABC three levels, anti-slip grade in ascending order. The method tests the dynamic critical angle, compared to the current Chinese domestic mainstream test method for determining the slip resistance coefficient, this test method can better reflect the daily life.
9) Thin thickness, seamless continuity surface, effectively enhance the overall design
Due to the very thin thickness of the finished surface of microcement, when applied to floors, the finished thickness of microcement floors is only 3 mm. And when done on walls, it can be between 0.5 and 1 mm thick, allowing for a very nice seamless, continuous surface. Also, if there are some special shapes, they can be well fitted.
03. What is the difference between micro-cement and conventional cement?
It is a binder and a powdered water-hardened inorganic cementitious material, which can be hardened in air or better in water after mixing with water, and can firmly cement sand and stone together, which is an important and indispensable material in the construction industry.
The main components of conventional cement are: limestone and clay. As a binder, it is a powdered water-hard inorganic cementitious material, which is mixed with water to form a paste that can harden in the air or better in water. And it can firmly glue sand, stone and other materials together, which is an indispensable and important material in the construction industry.
The main components of microcement are: cement, water-based resin, additives, mineral pigments, etc. It is a new type of surface material with a thickness of only 2~5mm and a weight of about 3.57kg/mm2 (35N=3.57kg). From the composition, it seems that it is not too much to call micro-cement "the upgraded version of ordinary cement".
Comparison from an environmental perspective
It is well known that ordinary cement does not have enough environmental protection level. If the formula ratio is not proper, it is easy to raise ash and sand after using for a long time, but micro cements are all water-based (BA), which are inorganic mineral mix products. The organic volatiles are far lower than other paints, which not only ensures the tenants' requirements for green environment protection, but also is a health protection for the workers who apply it on site.
Comparison of shrinkage and abrasion resistance
Ordinary cement has poor shrinkage, is prone to cracking and forming cracks, and has poor abrasion resistance, and will generally only be used for lower budget outdoor projects, but micro-cement has a wide range of applications. Because its finished surface thickness is very thin, when done on walls, it can be between 0.5 and 1 mm thick and can make a very beautiful seamless, flowing, continuous surface, and it is wear resistant and durable, and will not crack for ten years.
Comparison of permeability
Ordinary cement itself is not waterproof and oil-proof, and water and oil can penetrate into it quickly, while micro-cement itself is not waterproof, but the construction will cooperate with the use of sealant. Because the sealant is waterproof, the final effect of micro-cement is waterproof and oil-proof, and can be used in kitchen, exterior wall, bathroom wet area and other areas that are in contact with oil and moisture. At the same time, it does not cause dirt and is easy to clean and disinfect later, and the antibacterial strength is as high as 99%, which will not produce bacterial change.
04. Construction process of microcement
1) Micro-cement process
Floor sanding and vacuuming→rolling primer→laying cracking net→scraping micro-cement→scraping the 2nd micro-cement→finishing sanding→covering protective paint
Key points of grassroots specification process
Concrete floor cannot be lower than c25
Thickness not less than 50mm, height difference not more than 3mm
The ground is required to be smooth and solid, free of oil and grease, no hollow drums, cracks and delaminations
Reinforced steel mesh is recommended for cement mortar/concrete push paving
Leveling and finishing before the initial set, not in the surface sprinkling plain cement for finishing
Otherwise, skinning and delamination will occur
The substrate must be maintained for more than 28 days and protected in place
No cracks, hollow drums, sanding and other phenomena
If the above phenomenon must first repair treatment is completed before the construction of micro-cement
If there are very strict requirements for floor levelness
It is recommended to use a higher grade cement self-leveling for paving and accurate leveling
There are inlaid letters, staircase corner strips, etc., need to be installed at the same time as the grassroots leveling
2) Micro cement floor scraping process
The original ground is sanded and cleaned and rolled with the first coat of primer
Batch scraping micro-cement (micro-cement and blending agent in accordance with the required ratio)
After the first natural drying and sanding, roll the 2nd coat of primer
Scraping the second micro-cement direct to water blending scraping
After drying, sand and let the owner confirm the effect
The effect is satisfactory after rolling the 3rd coat of primer must be dry
Roll-on high strength protectant
High strength protective agent is 5+1+1=7 components
Mix A/B together first; add C component and mix well.
All must be used within 30 minutes

The whole process of the microcement construction
It's not too much to say that microcement is this year's Internet celebrity material, right? In the nearly two years of wabi-sabi, micro-cement has gradually become popular. Its texture, pressure resistance and wear resistance are completely incomparable to latex paint and art paint, which is why many people love it.
Is the construction method of microcement the same as that of ordinary latex paint? What problems should we pay attention to when constructing? It just so happens that we recently have a fresh case for your reference, let's take a look down with me!
Stage 1 - Substrate
a). Leveling
Micro-cement does not require too much flatness on the ground. It only needs to be relatively flat. In fact, it is not necessary to do self-leveling. This is also a misunderstanding of everyone before the construction of micro-cement. If there are some uneven places, it can be used later. The smoothing effect is achieved by applying putty. Because our case itself is a terrazzo floor + cement floor, it is already in the stage of leveling, so there is no need to do this step again.

Leveling
b). Brush interface agent
The interface agent is to change the physical or chemical properties of the surface by treating the surface of the object. The interface agent we generally use in decoration is to make the putty in the later stage combine with the wall more closely and not easily fall off. Just brush a layer of the interface agent on the wall surface.
c). Putty
After brushing the interface agent, you can start to apply the putty, but before applying the putty, the entire ground needs to be covered with such an anti-cracking mesh to prevent the ground from cracking in the later stage.

After laying the protective net, start to apply putty, and brush the putty 2~3 times.

In this case, our G.SB construction team used a relatively thick anti-cracking flexible putty. This kind of putty has better anti-cracking and waterproofing effect, and the thick putty can be applied thickly on the ground, and the texture can also be adjusted. After that, the microcement texture effect has been improved.

For the wall, just brush the putty twice, you don't need to lay the anti-cracking net, just make sure the wall is flat and there is no hollow.

Stage 2 - Applying Microcement
1). Color selection card
After choosing the color, the merchant will also give you the color palette. At this time, you need to bring the color palette to the scene and compare it in different environments in a dark place and in the sun, because the color will change in different environments.

Generally, micro-cement of good quality can be used directly. If the micro-cement you buy is a solid sand-like substance and you need to add water to make it yourself, it is probably not of relatively good quality.

The prepared microcement
The color paste prepared by the machine should be used for the micro-cement. At that time, the color paste with a good proportion is directly poured into the micro-cement and stirred evenly. It is best not to choose the color that is manually modulated, the error will be very large.
2). Protection film
Before applying the micro-cement, the master should stick the windows and door frames with protective film, so as not to stick to the micro-cement and not easy to take care of.

3). Spray coating
When the master paints the first layer of micro-cement, he uses a spraying method, which can make the texture and texture of the micro-cement better, and also make the wall thinner.

However, depending on the brand, the construction method will also be different, and some masters will directly use the first layer of scraping. In the process of spraying, a scraper will be used to scrape out some textures deliberately, so that the effect will be more traces of the years and more natural.
4). Scratch coating
After spraying, do a second scraping coat, this side is to make the color more even and full.

After the wall is scraped and coated, the ground can be started. The ground can be directly done by scraping, and it is also scraped 2~3 times.

Stage 3 - Closing work
If you need a smooth and smooth ground, you need to carry out the grinding step, because we need an uneven texture effect, so we skip this step and go directly to the step of painting the seal layer.The purpose of painting the seal layer is to reduce the abrasion of the micro-cement floor and enhance its manufacturing resistance. It can also be called a protective paint.
Therefore, when painting, the workers and masters will not wear shoes, because they are afraid that the soles of the shoes will be worn out. ground. First carefully paint the joints between the wall and the ground, so that the ground will be faster when painting the ground later.

The masters will also use such a special hair dryer to make it dry faster.

After the joints are all painted, you can start painting the ground. After the finish is completely dry in the last 1-2 days, the entire micro-cement construction is completed~~~There is really no need to say more about the texture of micro-cement. Friends who like natural wind, wabi-sabi wind and have enough budget don't hesitate any longer! The final result will definitely surprise you.

Construction process summary
1. Brush the base coat and hang the mesh to brush the base coat
The base coat is applied twice with a 30-minute interval between the second coats. Hanging net (above 150g): After finishing the second primer, the net can be laid.
Second, batch scraping primer 2 times
Mix the water-based resin and primer in a ratio of 1:4 (a bucket of 5 kg of water-based resin is poured into a bucket of 20 kg of primer), stir for 3 minutes, and then scrape. If it is too thick, you need to dilute the water-based resin with about 20% water in advance before pouring it into the primer. The second pass takes place after the first pass (usually 6 hours).
If the second pass is uneven, it needs to be sanded (120-grit sandpaper) within 6-24 hours, and a sealing primer needs to be applied after sanding (the primer can be diluted twice with water). The stirred material needs to be used up within 2 hours.
3. Scratch the surface and apply 2 times
Mix the water-based resin and the top coat in a ratio of 1:4 (a bucket of 5 kg of water-based resin is poured into a bucket of 20 kg of the top coat), stir for 3 minutes and then scrape evenly. If it is too thick, you need to dilute the water-based resin with about 20% water in advance before pouring it into the top coat.
After the second coat, it needs to be sanded and smoothed within 4-24 hours (wood sander 260 grit sandpaper, all must be sanded in place). The stirred material needs to be used up within 2 hours.
4. Brushing color protectant
After the surface is polished and smoothed, the color protection agent is applied. After the owner confirms the color, the final step of micro-cement two-component finish can be carried out.
5. Brush the two-component finish 2 times
Mix the two-component cover A and B components at a ratio of 5:1 and stir well. If the consistency is high, add 0.5 part of water and stir well. The two-component finish can be applied bypaint roller or paint spray gun. After the first pass is dry, put the shoe cover on the person (at an interval of about 3 hours) for the second pass. Mixed two-component cover needs to be used within 2 hours.
The two-component topcoat can be used after the temperature is above 20 degrees for 3 days, and the temperature is below 20 degrees for 7 days.
Ordinary wall construction process:
The wall is required to be smooth and dust-free, and the putty is polished and smoothed without ash.
Step 1: Roll the special high-concentration water-based primer and wait for it to dry.
Step 2: Scrape the micro-cement twice to make it smooth and without traces. (Every time it is required to be flat and no traces)
Step 3: take water-based protective topcoat or special micro-cement emulsion twice (this step can be selected according to needs)
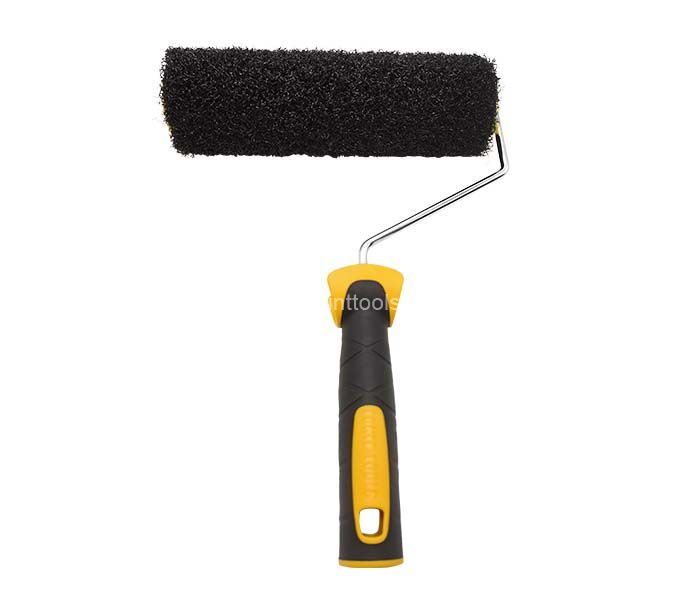
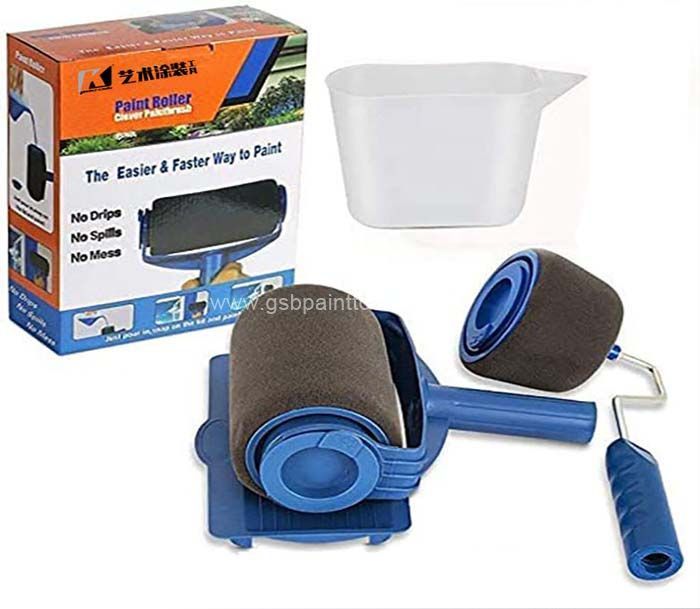
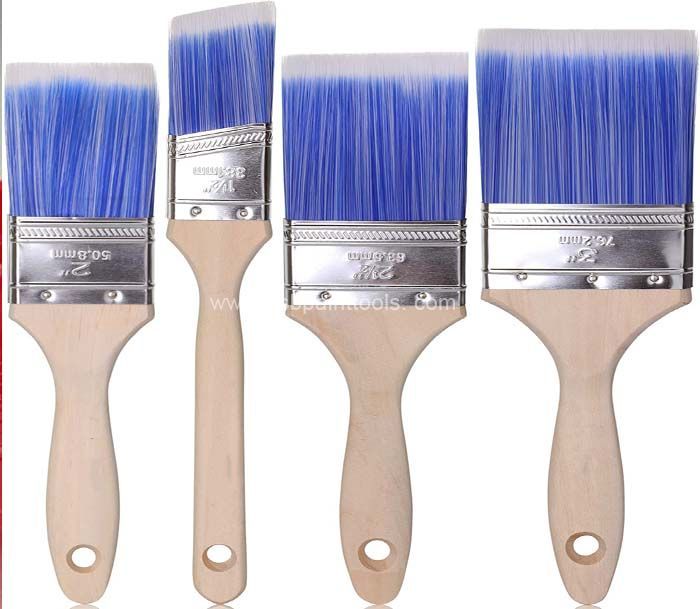
Microcement tools and accessories: all you will need
Choosing the right microcement tools is an important factor that determines the final effect that we will achieve. High quality microcement tools and accessories can help you get the most from your microcement projects.
G.SB selection of items including trowels, handles, paint rollers and masking tapes and more can do much more than just help improve your results. They can make the entire job easier, faster and ultimately, more satisfying.
Microcement Trowel
What to apply decorative concrete plasters and microcement with? Can the same trowels be used for floors and walls? Which trowel to choose? The basic tool for microcement is a stainless steel trowel. We use it to form the microcement and give it the ultimate look.
The microcement trowel is usually shorter than the smoothing float, thanks to which we can more easily create patterns with it. Basically, you can use the same trowel for walls and floors, although it all depends on the preferences and workshop of each contractor.
The microcement trowel we recommend ensures maximum comfort of applying microcement on horizontal and vertical surfaces, both in small and large spaces. The blade has round tips and a bevelled edge. The extremely smooth bottom of the working plate is made of very durable steel, which guarantees durability of the trowel and ensures its corrosion resistance. The handle is light, durable and ergonomic.

Applying difficult materials such as resins or microcement will no longer be a problem with the Microcement Plaster Trowel. Into your hands, it runs quickly and accurate on the the surfaces. Microcement Plaster Trowel has a stainless steel blade, an high strength mm. 0.3 extra flexible blade, for spreading microcements, resins, plasterboard and plaster finishing. Aluminum alloy fork is firmly attached to the blade thanks to a special reinforcement, and it’s possible to choose between two-component rubber or poplar wood handle.
Microcement Plaster Trowel is suitable for finishing, and thanks to the huge dimensions it allows to work on large surfaces with great ease. High resistance transparent POLY-CARBONATE mm. 1 ultra flexible blade, for maximum visual control of uniform spreading. It also has a two-component rubberhandle.
Trowel for manual application of microcement. Its size ensures maximum comfort of applying microcement on horizontal and vertical surfaces, both in small and large spaces. The blade has round tips and a bevelled edge. The extremely smooth bottom of the working plate is made of very durable steel, which guarantees durability of the trowel, ensures its corrosion resistance and perfect surface smoothing. Perfectly balanced, light and perfect at work. The handle is light, durable and ergonomic made of plastic.
Masking tape or Paint Tape for Walls
Painting tape is used to protect smooth surfaces during plastering, painting or microcement application. It is used to protect window profiles and door frames as well as to cut off colors and individual walls. The tape should, first of all, be durable (not tear), adhere well to the surface and leave no traces.
Our green masking tape guarantees the highest quality at a reasonable price. Made of strong, slightly creped, impregnated paper with a UV layer. The tape uses an innovative system of covering the carrier with Solvent glue (natural rubber), which results in perfect adhesion to the surface and ensures that nothing is leaking, and the tape does not stick and leave no traces of glue. Moreover, natural rubber provides the possibility of application in all conditions and is adapted to low and high temperatures (it can be used both indoors and outdoors).
Key properties of the masking tape :
It sticks very well to various types of surfaces
It does not leak, provides clean painting lines
It leaves no traces of glue
It does not fall
It may remain on surfaces for up to 30 days
Resistant to UV radiation,
Easily removable
Leaves sharp edges
For indoor and outdoor use